Custom Related Lists
Create and manage several tabular forms to display data in the CT Mobile app.
Create a Custom Related List
The objects and their record types should be previously configured. The mobile user should have permission to read the related list object.
To create a custom related list:
-
In CT Mobile Control Panel
-
In CT Mobile Control Panel 2.0
-
Click Create.
-
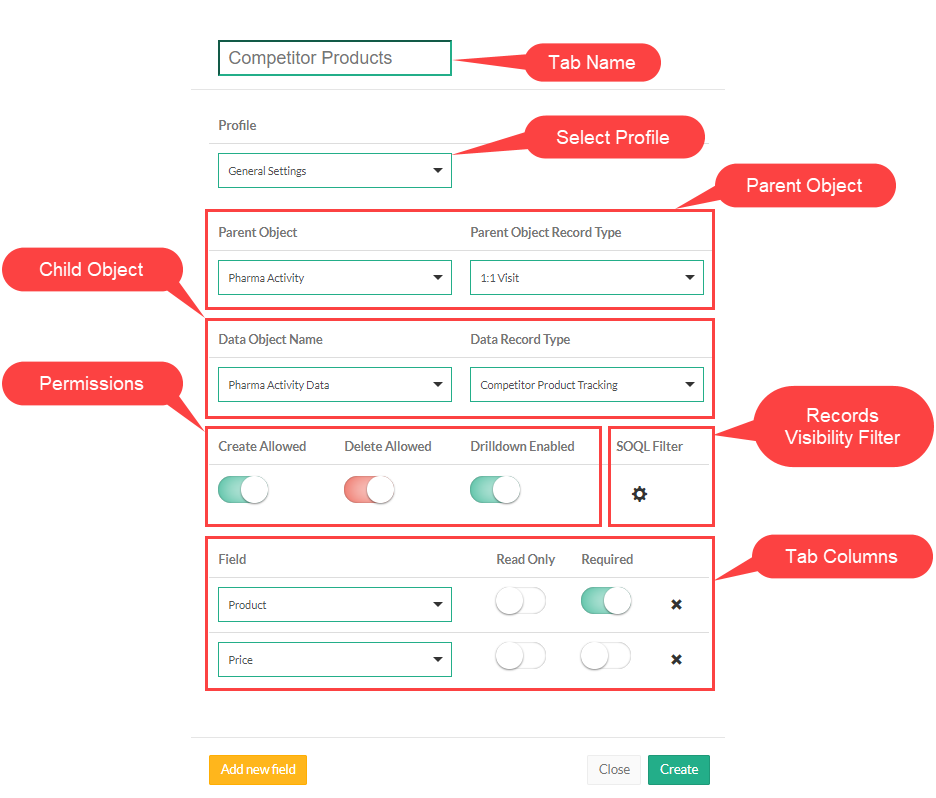
Type in the tab name in the header of the form. This name will be used as a tab name. Also, you can set a custom label for the related list tab.
-
Select the required profile in the Location picklist. To apply settings to all the profiles, select General Settings.
-
Select an object in the Parent Object field.
-
Select a record type of the object of step 5 in the Parent Object Record Type field.
-
Select a related object of the object of step 5 in the Data Object Name field. Some Data Objects can have several lookup fields. In this case, the Lookup drop-down list will appear, allowing you to select one of the fields.
-
(Optional) select the record type of the linked object of step 7 in the Data Record Type field. If you leave this field blank, you will be offered to select a record type, when creating a new record in the custom related list.
-
Define the following:
-
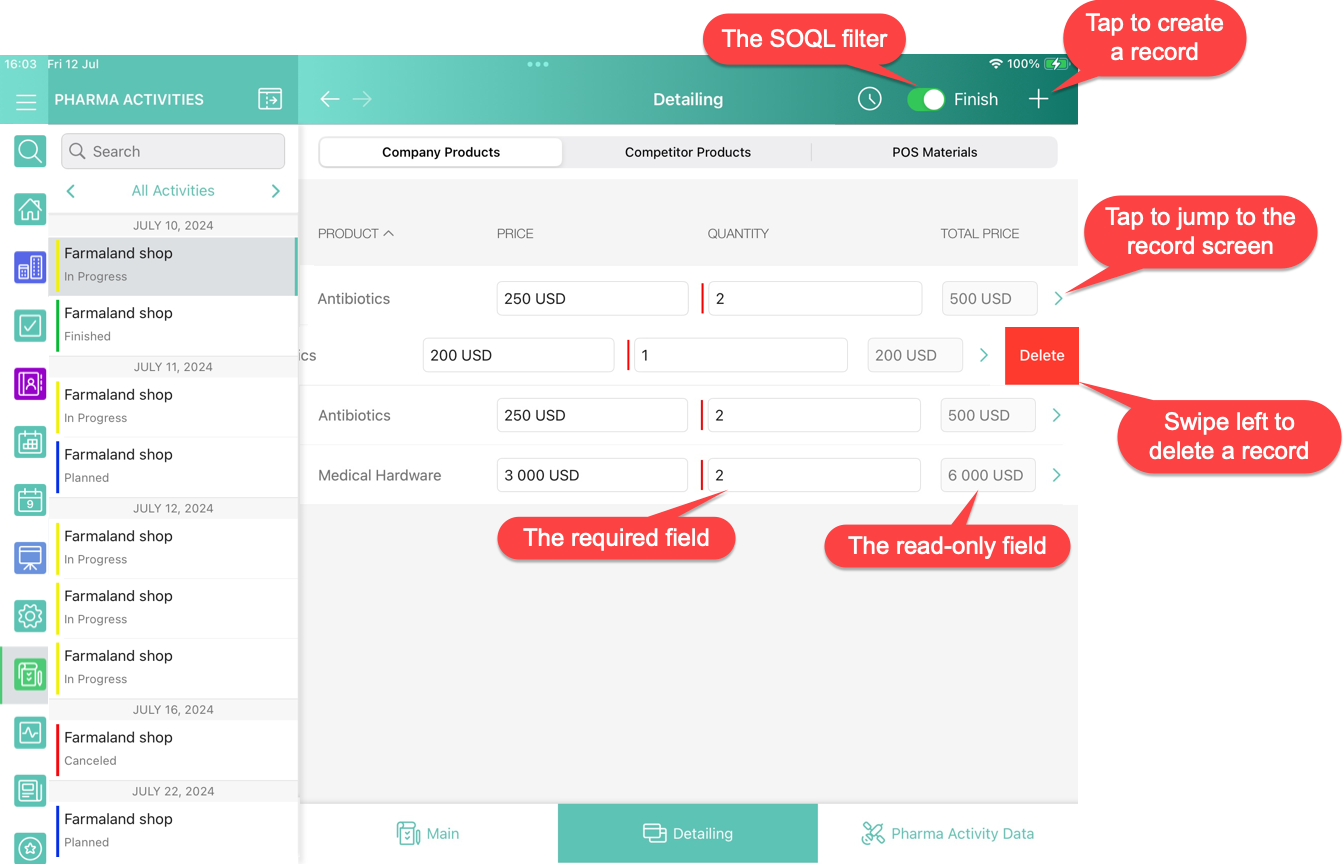
Create/Delete permissions. Influence the ability to create and/or delete records on the custom related list tab.
-
Drilldown. Enable the setting to add the option of opening the record details screen.
-
Adjust Width. Enable the option and specify the column width in the percentages for each field.
-
SOQL Filter. An additional switch will be added to the tab if the filter is used. Toggle the switch to display only the filtered records or the full list of records on the tab.
-
-
Click Add a new field to form a column.
-
Select a field from the drop-down list.
-
Define the Read Only and the Required options for the fields.
-
If the updateable attribute has a false value, this field will be read-only even if the Read Only attribute has not been selected.
-
If the nillable attribute has a false value, this field will be required to fill in even if the Required attribute has not been selected.
-
-
-
Click Create.
-
Click Save.
The custom related list is configured. Perform a synchronization to apply the changes.
-
Click
 next to the required custom related list to edit it.
 -
Click
 next to the required custom related list to remove it.
 -
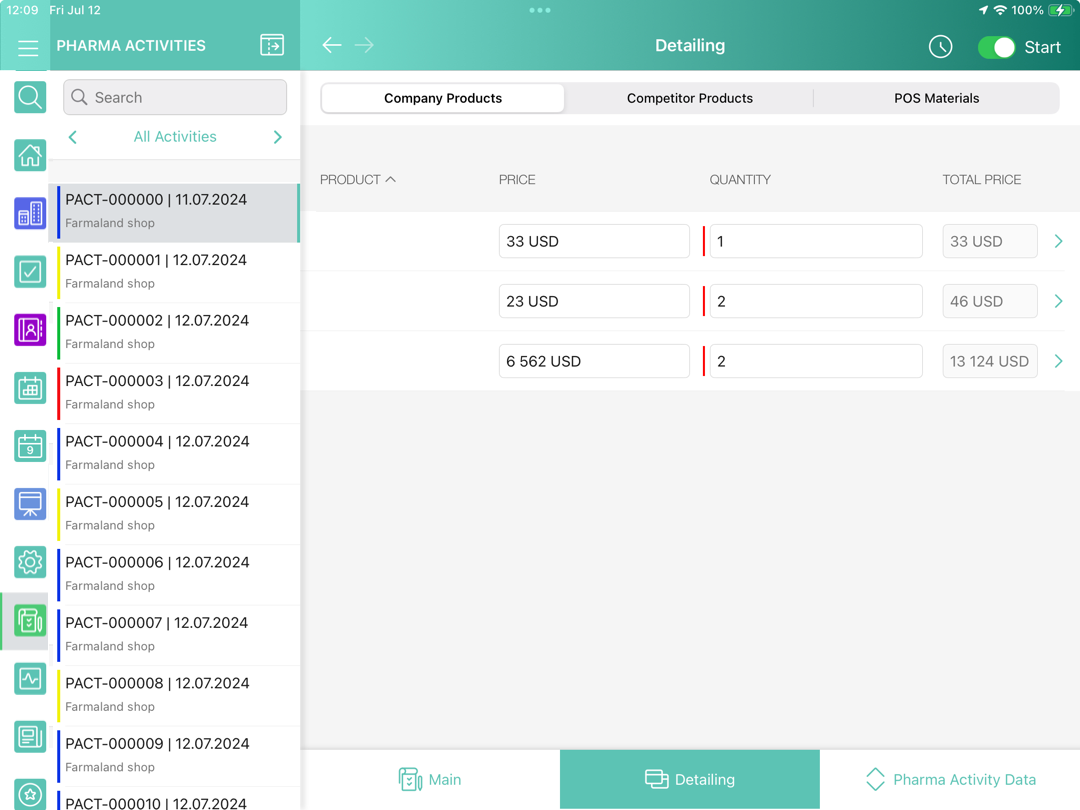
If there is only one custom related list, the tab and the subtab on it will be named the same as the list. If there are two and more custom related lists, the tab will have the Detailing name with subtabs named the same as custom related lists.
-
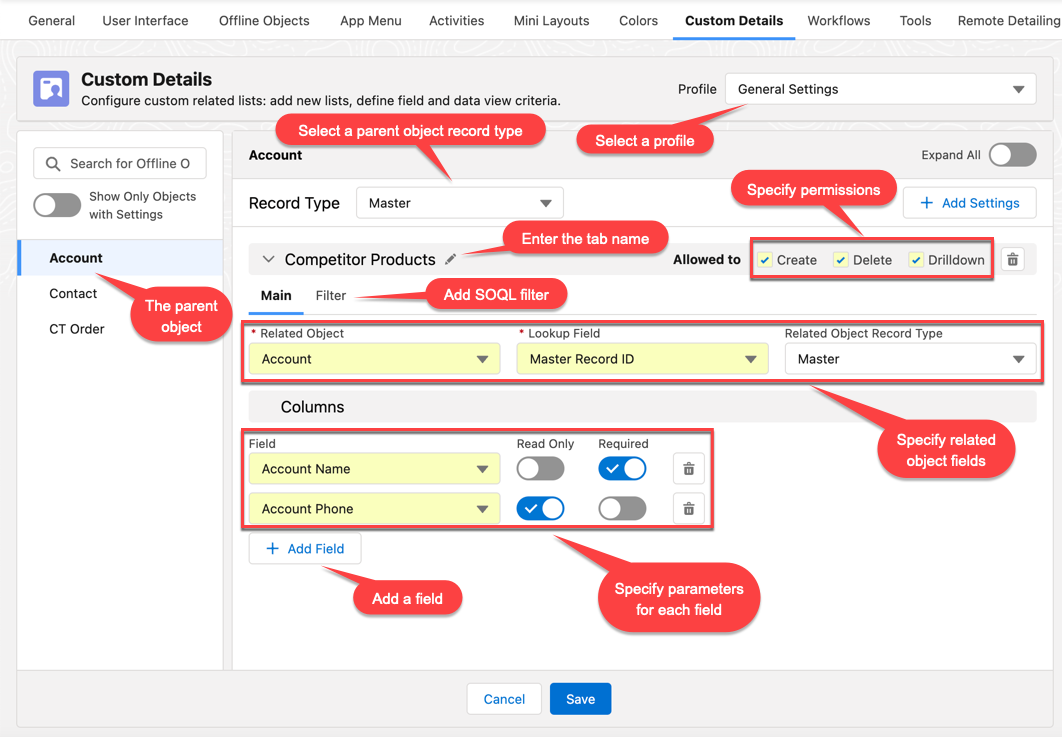
Select the required profile in the Profile picklist. To apply settings to all the profiles, select General Settings.
-
On the left list, select an object. Toggle Show Objects with Settings if needed.
-
Click Add Settings.
-
Enter a name for related list and click
 .
. -
Select a record type.
-
On the Main tab, select values from the picklists:
-
Related Object
-
Lookup Field
-
Related Object Record Type
-
-
Define the following:
-
Create/Delete permissions. Influence the ability to create and/or delete records on the custom related list tab.
-
Drilldown. Enable the setting to add the option of opening the record details screen.
-
-
In the Columns section, define fields for the related list:
-
Select a field from the drop-down list.
-
Click Add Field to add a new field.
-
Define the Read Only and the Required options for the fields.
-
If the updateable attribute has a false value, this field will be read-only even if the Read Only attribute has not been selected.
-
If the nillable attribute has a false value, this field will be required to fill in even if the Required attribute has not been selected.
-
-
-
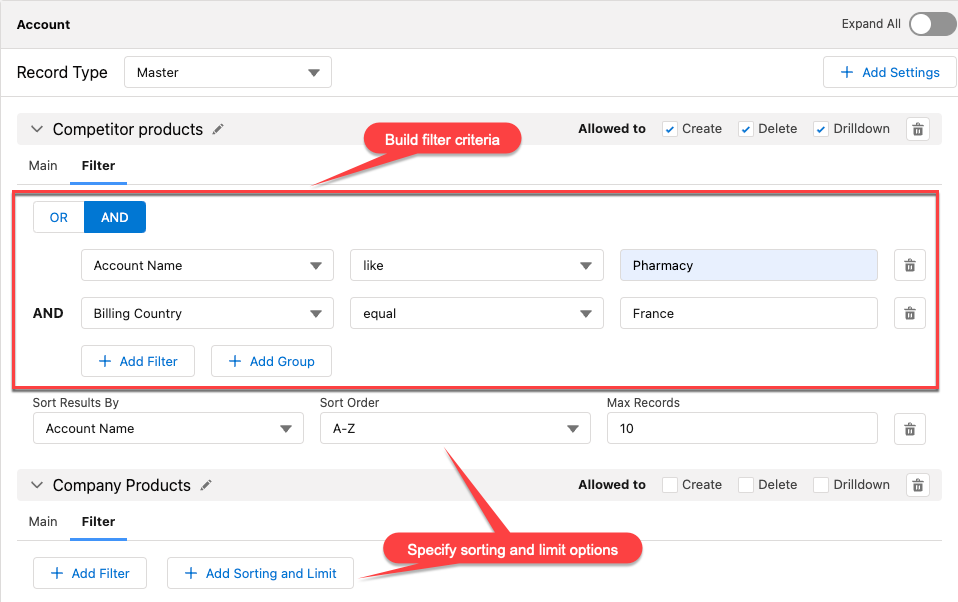
On the Filter tab, set up SOQL filters for using a toggle in the CT Mobile app to display all records or only records that match the criteria:
-
Use Add Filter and Add Group buttons to build the filter criteria.
-
Click Add Sorting and Limit button to specify sorting options for the filter results, configuring the fields:
-
Sort Results By
-
Sort Order
-
Max Records
-
-
-
Click Save.
The custom related list is configured. Perform a synchronization to apply the changes.
-
Click
 next to the required custom related list to edit it.
 -
Click
 next to the required custom related list to remove it.
 -
If there is only one custom related list, the tab and the subtab on it will be named the same as the list. If there are two and more custom related lists, the tab will have the Detailing name with subtabs named the same as custom related lists.
Edit a Custom Related List
To set up the columns' widths of a custom related list, go to Columns' Widths for Standard and Custom Related Lists.
Change Tab Name
To change tab name:
-
Create a custom label for the related list tab and translate it if required.
-
Click Setup → Custom Code → Custom Settings.
-
Click Manage next to Mobile Custom Details Settings.
-
In the Tab Label field, specify $Label.label_name, where label_name is the name of the required Custom Label.
-
Click Save.
The setup is complete.
Edit Fields of the Custom Related List in the CT Mobile app
To edit fields in the CT Mobile app:
-
For the current user profile, specify permission to edit an object, which records are displayed in the custom related list.
-
Specify permission to edit the custom related list.
-
Specify permission to edit for the required field.
The setup is complete.