Applications
The Application module is intended to store and display CLM presentations and custom scenarios.
You can add CLM presentations to the mobile layout and manage CLM presentations by the control buttons, gestures, or JS methods and links on the slides. For each CLM presentation, it is possible to set up statistical data to collect.
| The profile must have access to Application, Slide, Custom Scenario, and Application Stats objects for the correct functioning. |
Add Applications to the Menu
To add the Applications module to the app menu:
-
In CT Mobile Control Panel
-
In CT Mobile Control Panel 2.0
-
Go to CT Mobile Control Panel: App Menu tab.
-
Select the required profile in the Location picklist. To apply settings to all the profiles, select General Settings.
-
Click the
 button to open the Add menu item tool.
 -
Select the Applications item.
-
Click Add to close the Add menu item tool.
-
Click Save.
-
Go to CT Mobile Control Panel 2.0: App Menu tab.
-
Select the required profile in the Profile picklist. To apply settings to all the profiles, select General Settings.
-
Click Show Module Menu.
-
On the Application Modules or Integration tab, select the Applications item.
-
Click Save.
The red dot on the Applications item in the left menu means that new application records have been downloaded since the last synchronization:

Working with Applications
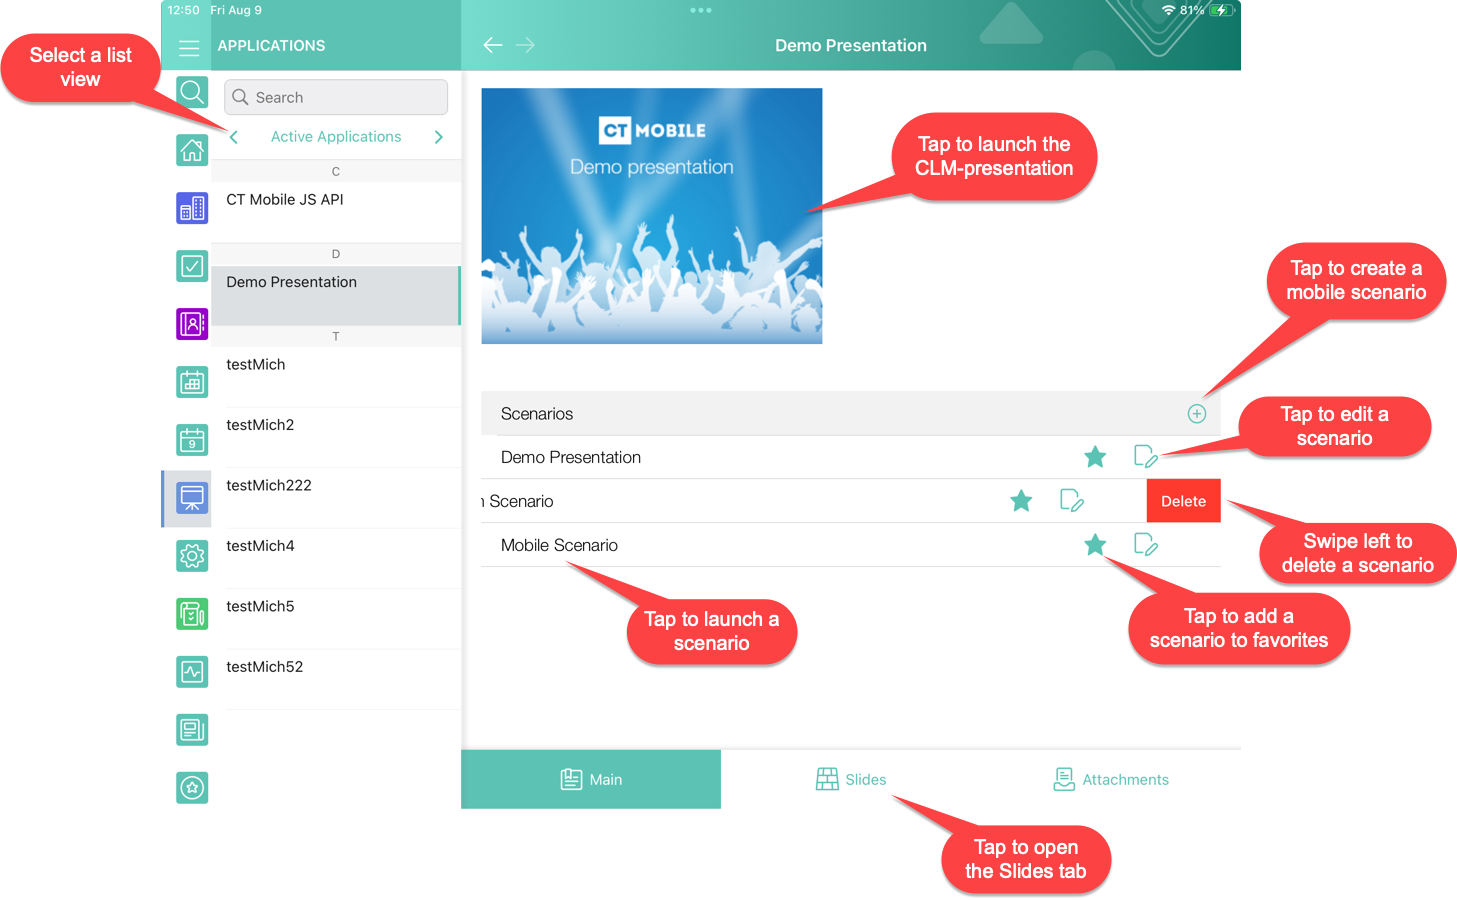
The Main tab
On the Main tab:
-
select the appropriate Application list view and CLM presentation
-
tap the preview image to start the standard CLM presentation with all slides
-
tap the Plus button to add a mobile scenario and tap its name to launch it
-
add scenarios to favorites
By default, a standard scenario is created for each presentation, it includes all the slides of the presentation and it is selected as a favorite. It can be unselected as favorite, but this setting will be reset during the next full synchronization, as it is stored locally in the mobile app. For custom scenarios, which can include all or only selected slides of the presentation, the favorite setting is stored in Salesforce, so it is kept even after full synchronization. -
switch to the Slides or Attachments tab.
The Mobile Scenario Editor
Mobile Scenario Editor is the functionality for creating and/or editing custom CLM presentation scenarios in the CT Mobile app.
| The Slide reordering enabled checkbox must be selected in the Application record type. |
Depending on CLM presentation settings on the Slide object, it provides the possibility to change the order of slides, and remove or add slides to the presentation.
-
Upon editing completion, the set of slides is saved as Custom Scenario.
-
If a slide added to a custom scenario is excluded from the presentation (deactivated or deleted), such change will also apply to the respective custom scenarios.
-
If a slide is required, it cannot be excluded from the custom scenario.
-
The user can mark a scenario created in the editor as a favorite to display it on the home screen of the application and on the record details screen.
To create a scenario:
-
Tap the Plus button to open the Mobile Scenario Editor.
-
Sort slides by likes, popularity, or preview time.
-
Tap a slide to select it.
-
Click Save and enter the custom scenario name.

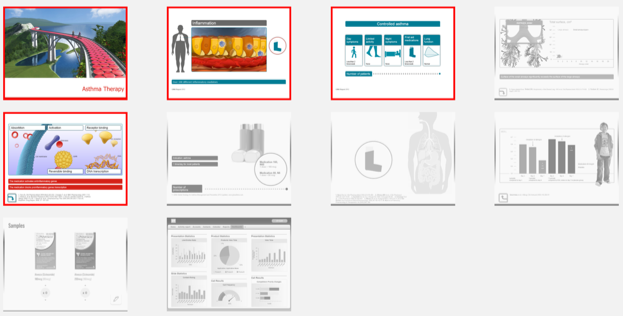
If a slide has the red frame and cannot be untapped, it means that it configured as Required and cannot be excluded from the custom scenario:
The scenario is created. Launch fast synchronization to upload it to Salesforce.
Automatic Scenario Building
|
The user has the possibility of an automatic scenario building based on personal statistics collected in the course of previous CLM presentations.
Scenario building criteria:
-
Slide view duration
-
Number of slide views
-
Number of likes
The Slides/Attachments tab
It is possible to send slides and attachments by e-mail. To send a slide or attachment:
-
Tap the Slides/Attachments tab.
-
Tap the
 button.
 -
Tap a slide/attachment to select it.
-
Tap Send Selected.
-
Select an email template if available.
-
Select a user to send.
-
Click Send.
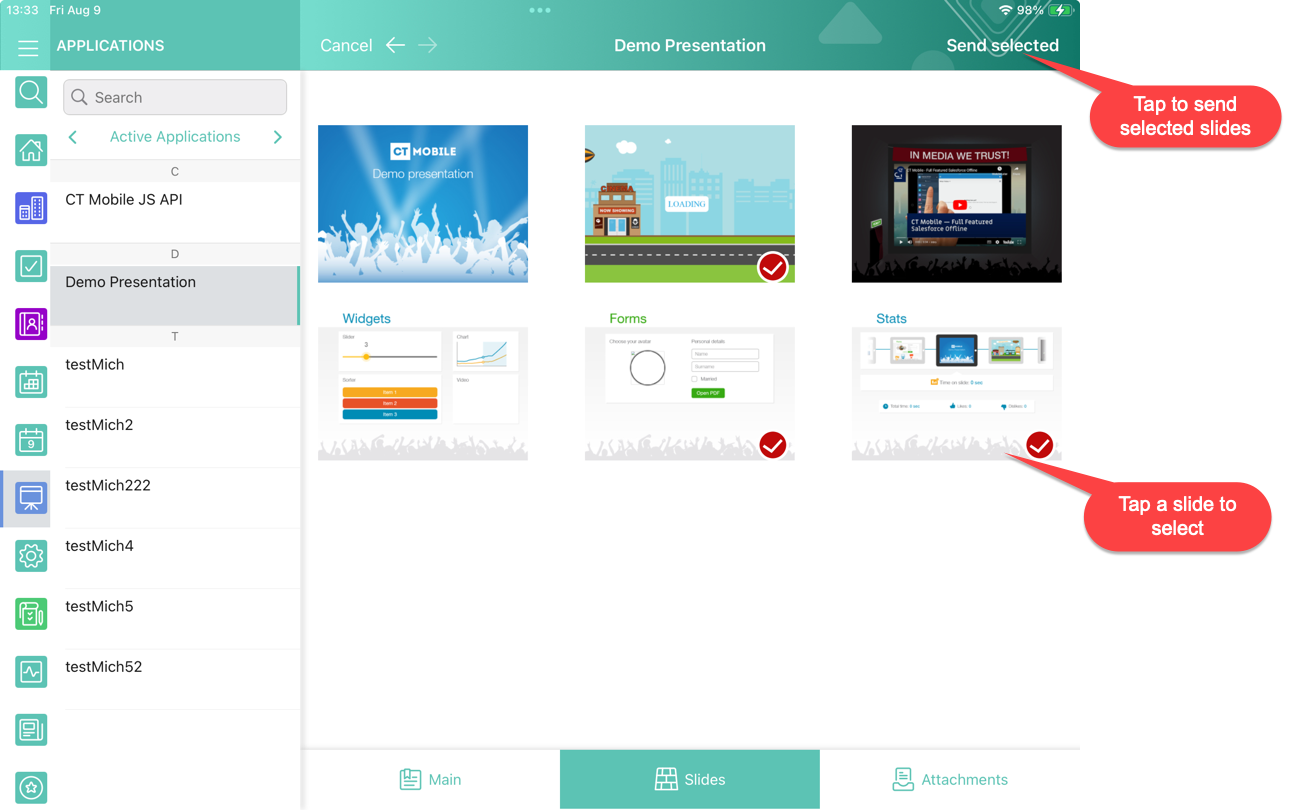
The slides/attachments are sent.