Configuring Mini Layouts
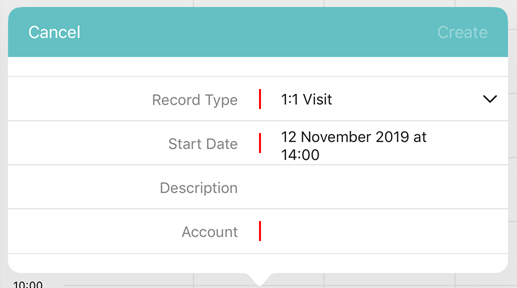
Mini Layouts are special forms with a preconfigured set of fields that are used to create a record in a more convenient way. A mini layout will appear, for example, when tapping the plus button to create a new Account record or creating a new Activity record on the calendar grid. A mini layout can be assigned per each active record type of the offline object.
| If a mini layout for an offline object or its record type is not configured, the default page layout will be open when creating a record. |
Create a Mini Layout
To create a mini layout:
-
In CT Mobile Control Panel
-
In CT Mobile Control Panel 2.0
-
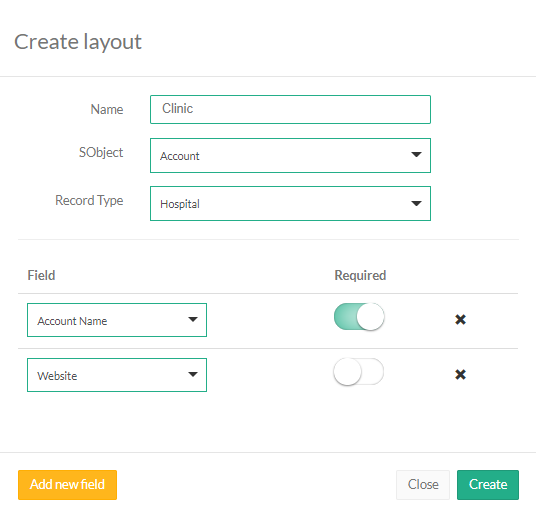
Click Create layout.
-
Enter the unique name of the mini layout.
-
Select the Object from the drop-down list.
-
Select the Record Type from the drop-down list.
Make sure that the target profile has the proper permissions for the selected record type. You can review the profile permissions in Setup → Users → Profiles. -
Click Add new field and select a field from the drop-down list, which will be displayed on the mini layout.
-
Enable the Required setting to add a required field.
-
Click Create.
-
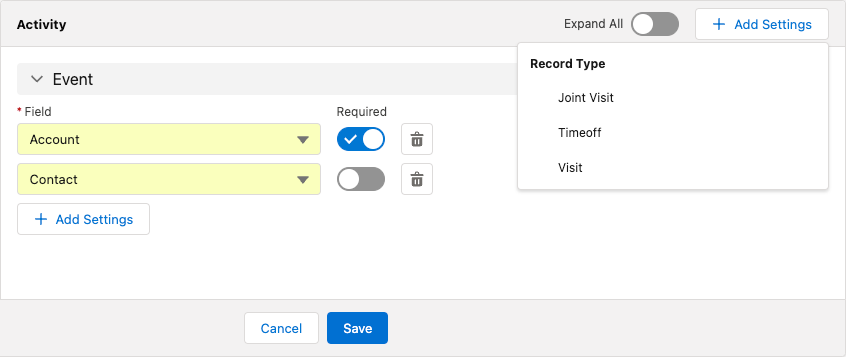
Select an offline object from the left list.
-
Click Add Settings.
-
Select a record type for creating a mini layout. You can create one mini layout for each record type.
-
Make sure that the target profile has the proper permissions for the selected record type. You can review the profile permissions in Setup → Users → Profiles.
-
If a record has no custom record type associated with it, then the Master record type will be used.
-
-
Select fields for the mini layout.
-
To add a new field, click Add Field.
-
Toggle Required option if needed.
-
Click
 to remove the field.
-
-
Click Save.
The mini layout is configured. Perform a synchronization to apply the changes.