Managing Offline Objects
Specify objects that should be available offline, customize user permissions, and add and configure standard related lists. To configure a custom related list, refer to Custom Related Lists.
Before specifying objects, configure remote site settings.
Add Offline Objects
To add an object to work with it in the CT Mobile app:
-
In CT Mobile Control Panel
-
In CT Mobile Control Panel 2.0
-
Select the required profile in the Location picklist. To apply settings to all the profiles, select General Settings.
-
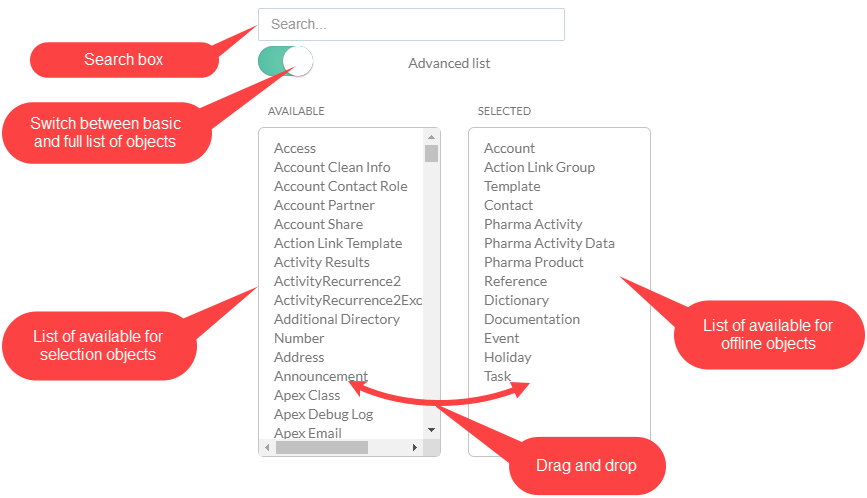
Drag and drop desired objects from the Available list to the Selected list.
-
The Available list contains all objects, but only objects in the Selected list will be available offline.
-
Make sure that the current profile has at least View permission for the selected objects. You can review the profile’s permissions in Setup → Users → Profiles.
-
By default, the Available list contains only the objects with the page layouts. Enable the Advanced List option to also display objects without page layouts.
-
Enter the label or API name of the desired object in the Search box to find it in the Available list.
-
To display objects in the desired order in the CT Mobile app menu, re-order them in the Selected list.
-
-
Click Save.
-
Select the required profile in the Profile picklist. To apply settings to all the profiles, select General Settings.
-
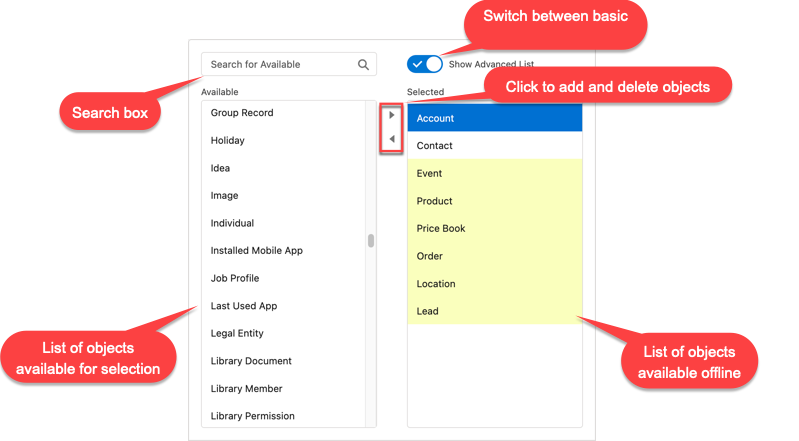
Click
 to move desired objects from the Available list to the Selected list.
-
The Available list contains all objects, but only objects in the Selected list will be available offline.
-
Make sure that the current profile has at least View permission for the selected objects. You can review the profile’s permissions in Setup → Users → Profiles.
-
By default, the Available list contains only the objects with the page layouts. Enable the Show Advanced List option to also display objects without page layouts.
-
Enter the label or API name of the desired object in the search box to find it in the Available list.
-
-
Click Save.
The setup is complete.
Set up Permissions to Offline Objects and Standard Related Lists
| These settings cannot overcome the user’s profile permissions. |
To set up permissions for the offline object:
-
In CT Mobile Control Panel
-
In CT Mobile Control Panel 2.0
-
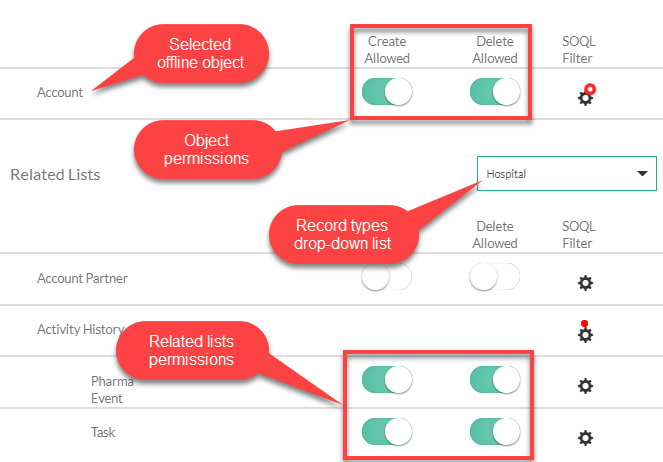
Click the offline object in the Selected list. The Object Permissions options appear on the right side of the screen.
-
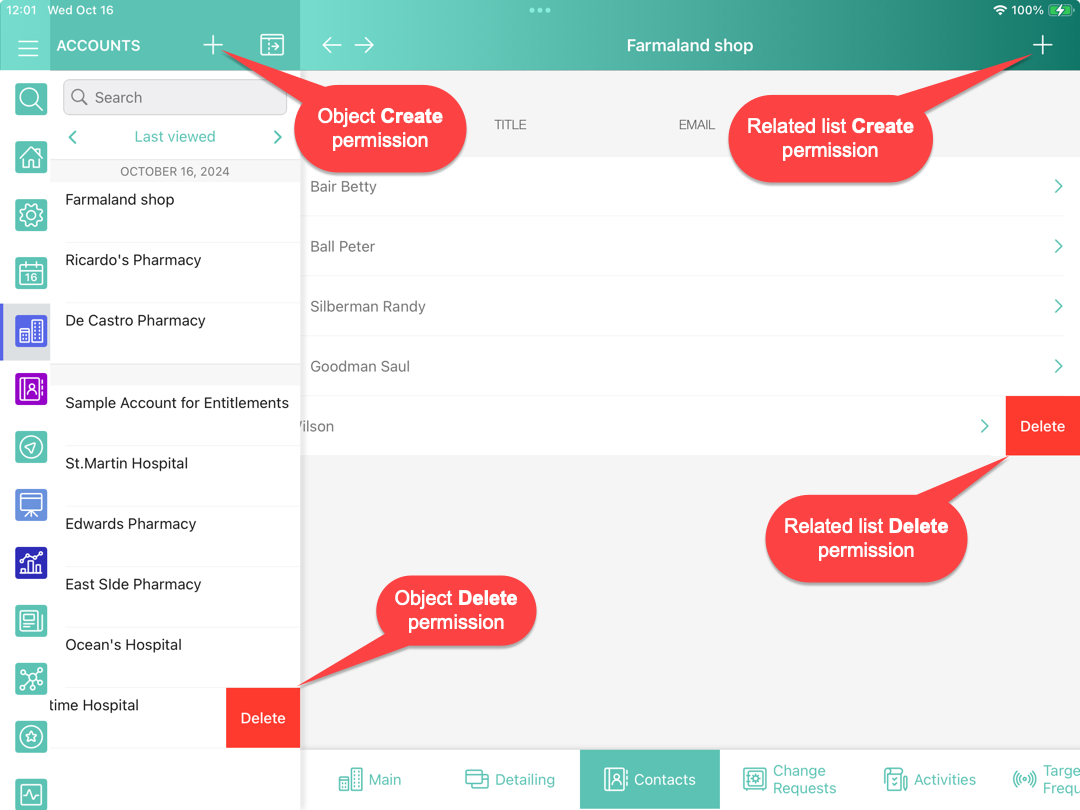
In the Object Permissions section, use toggles to grant permission to create and delete records of the offline object.
-
This permission will not affect the ability to create or delete a record of the current object in the Related Lists section of another offline object. For example, if you restricted the creation of a Contact record in the Object Permission section, you may allow creating the Contact records in the Related Lists section of the Account object.
-
Since CT Mobile 2.5, users can delete unsynchronized records if they have permission to create records but not delete them.
-
-
In the Related Lists section:
-
Select the record type of the offline object from the drop-down list of record types available for the user profile.
-
Use toggles to grant permission to create and delete records of the standard related lists.
-
-
Click Save. For more information, refer to Standard Related Lists.
-
Click the offline object in the Selected list.
-
In the Allowed to section, use checkboxes to grant permission to create and delete records of the offline object.
-
This permission will not affect the ability to create or delete a record of the current object in the Related Lists section of another offline object. For example, if you restricted the creation of a Contact record in the Allowed to section, you may allow creating the Contact records in the Related Lists section of the Account object.
-
Since CT Mobile 2.5, users can delete unsynchronized records if they have permission to create records but not delete them.
-
-
In the Related Lists tab:
-
Select the record type of the offline object from the drop-down list of record types available for the user profile.
If a record has no custom record type associated with it, then the Master record type will be used. -
Use checkboxes to grant permission to create and delete records of the standard related lists.
-
-
Click Save.
For more information, refer to Standard Related Lists.

The permissions are set.
You can also specify the icon for an offline object to display on the Main tab via the standard Salesforce procedure.
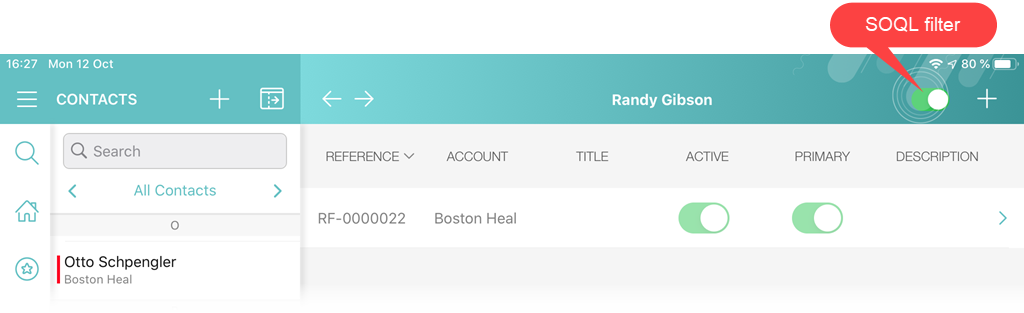
Set up SOQL Filters
SOQL filters are available both for offline objects and standard related lists.
-
In CT Mobile Control Panel
-
In CT Mobile Control Panel 2.0
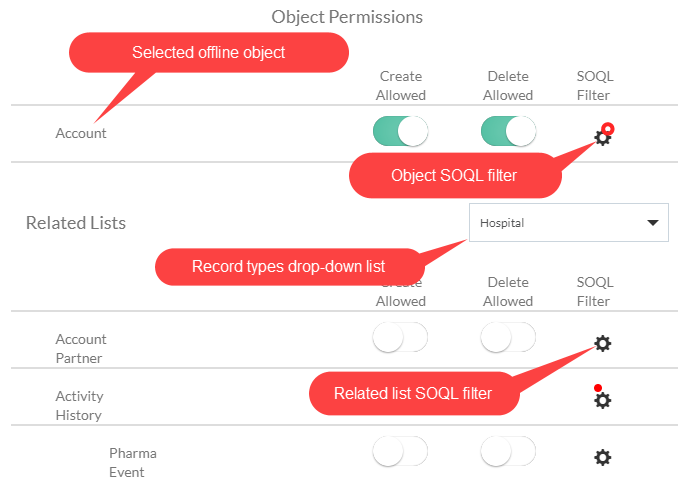
Click the SOQL filter icon to specify the required criteria.

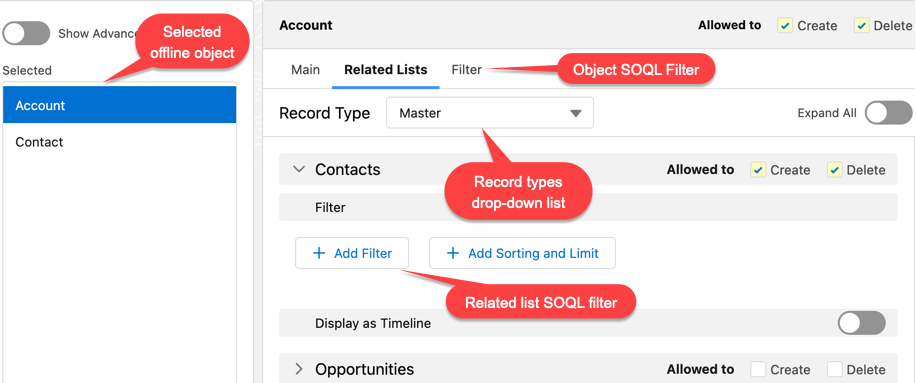
Click the Filter tab to specify the required criteria for the offline object, or Add Filter button for the related list.
Offline Objects
Use SOQL filters to sort the records of selected offline objects, and download only those records that meet the criteria to your mobile device.
Add the Load more records button to allow users to load one or more records that do not meet the filter conditions.
To set up a SOQL filter:
-
In CT Mobile Control Panel
-
In CT Mobile Control Panel 2.0
-
In the Object Permission section, click the setup icon
 next to the offline object.
 -
In the Query Editor window, add criteria by specifying a field, operator, and required value. All SOQL syntax is supported.
-
Click Add new filter criteria to add a new line if required.
-
Enable the Filter logic and define the criteria logic, e.g., 1 and 2 or 3.
-
Click Save.
-
Click the Filter tab of the selected offline object.
-
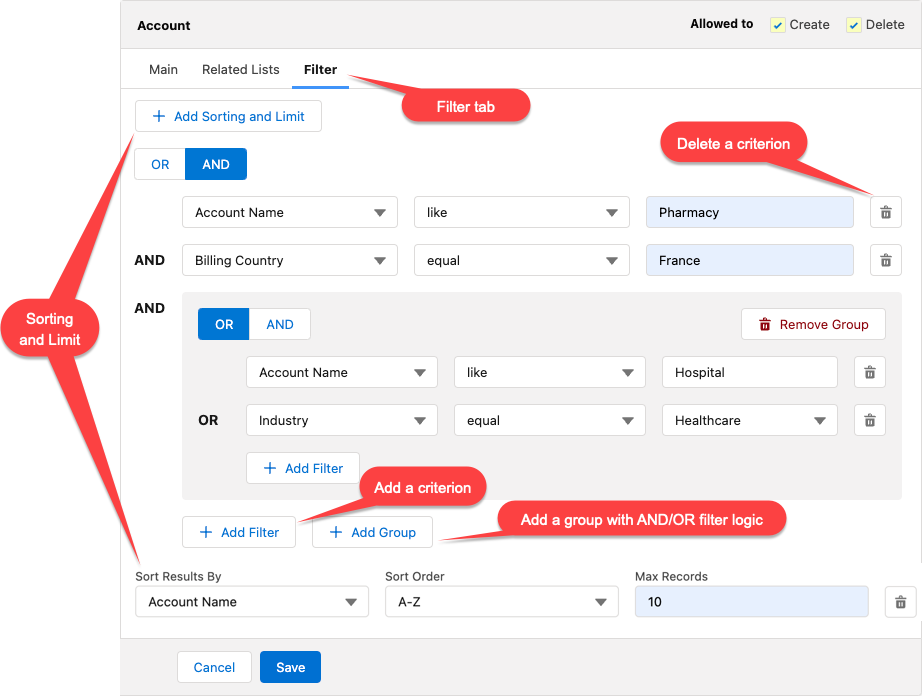
Click Add Filter button and add criteria by specifying a field, operator, and required value. All SOQL syntax is supported.
-
Click Add Filter to add a new line if required.
-
Click Add Group to define the AND/OR criteria logic.
-
Click Add Sorting and Limit to specify sorting criteria, order, and records display limit.
-
Click Save.
The SOQL filter is configured. Here is an example with the SOQL subquery.
WHERE AccountId__c IN (SELECT Id FROM Account WHERE isActive__c = true)Standard Related Lists
Set up SOQL filters and use the toggle in the CT Mobile app to switch the display between all downloaded records of a standard related list and only those that meet the criteria.
To set up a SOQL filter:
-
In CT Mobile Control Panel
-
In CT Mobile Control Panel 2.0
-
Click the setup icon
next to the desired standard related list. -
In the Query Editor tab, add criteria by specifying a field, operator, and required value.
Filter criteria for related lists are carried out in the CT Mobile app and do not support full SOQL syntax from Salesforce. Specify the simple criteria.
-
Click Add new filter criteria to add a new line if required.
-
Enable the Filter logic and define the criteria logic, e.g., 1 and 2 or 3.
-
In the Display Settings tab, enable the timeline view if needed.
-
Click Save.
-
Click Add Filter button for the selected standard related list.
-
Add criteria by specifying a field, operator, and required value. All SOQL syntax is supported.
-
Click Add Filter to add a new line if required.
-
Click Add Group to define the AND/OR criteria logic.
-
Click Add Sorting and Limit to specify sorting criteria, order, and records display limit.
-
Click Save.
The SOQL filter is configured. Here are some examples:
WHERE Boolean__c = true limit 10order by StarDate__c desc limit 10Since CT Mobile 2.5, users can delete unsynchronized records if they have permission to create records but not delete them.