Authorization (7.0)
To connect to the Web Service:
-
Go to the CT Orders Control Panel page and open the Connect tab.
-
Click Connect under the field with the selected server.
A warning will be displayed If you do not have enough permissions. The required permissions are listed here. 
-
On the Salesforce login page, enter your Salesforce credentials.
-
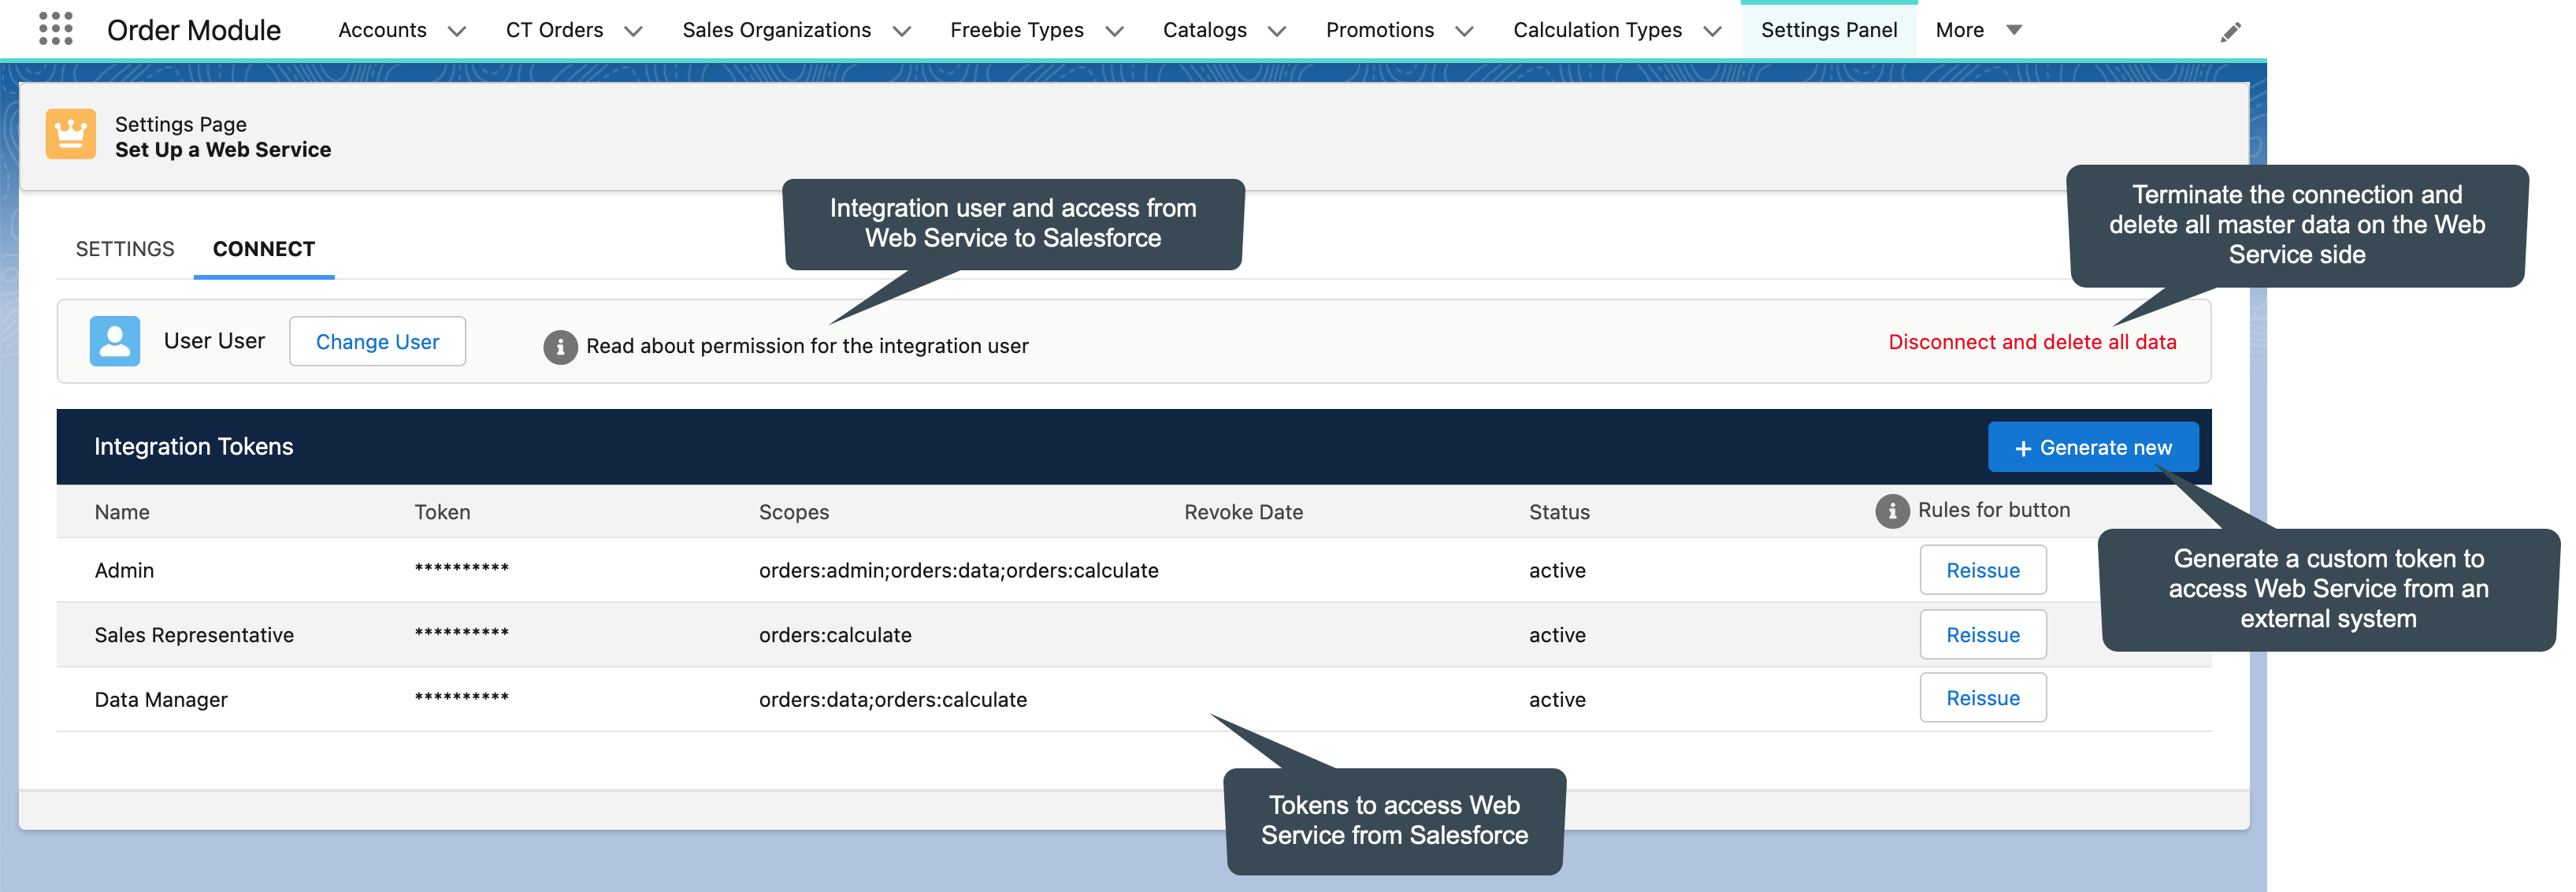
You are authorized, and the Connect tab is displayed. Tokens are created:
-
Active token for Web Service access to Salesforce.
-
Click Disconnect and Delete All Data to terminate the connection to the web service and delete all master data on the web service side. You should confirm this action.
-
Click Change User and enter credentials of another integration user on the Salesforce login page. Use this option to change the integration user, if necessary.
-
-
Active standard tokens to access Web Service from Salesforce:
-
A token for Salesforce administrator access to the web service to send master data.
-
A token for user access to the web service to calculate discounts.
Click Reissue next to the token if you want to deactivate it. The old token will be marked as Expired and removed from the list in three days.
-
-
-
Optionally, create a custom token to access Web Service from the external system (b2b, e-commerce).
-
To get a token, click the Generate New button, specify a token name, and select the scope, for example, discounts.
-
Click the Revoke button if the token is no longer needed. The token will be deactivated.
-
Next, set up the sync process to send master data.