Workshop 5.6: SDK Displaying Info Icon
SDK allows you to add additional icons to the order cart displaying the embedded HTML, or opening a new window with its own URL.
To set up the display of the info icon:
-
Create an HTML template that will be shown in the pop-up window when the icon is clicked on.
-
Create and add an Apex class to your Salesforce org to bring the created HTML to the displayed layout.
-
Go to Settings and click New.
-
Select SDK Setting record type and click Next.
-
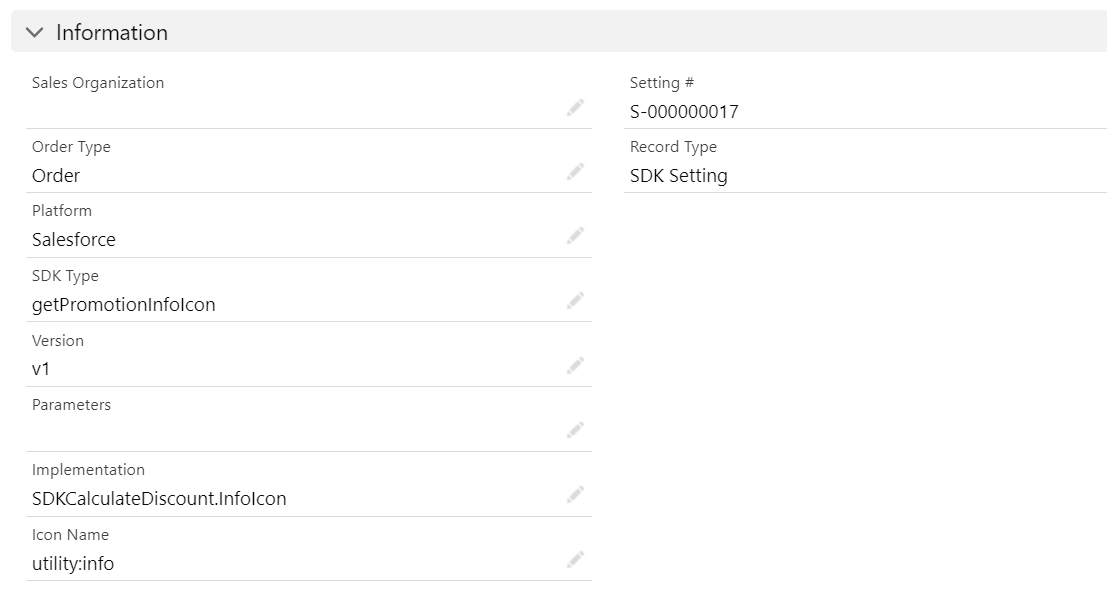
Fill in the fields:
The full description of the fields is available here. -
Fill in Order type and Sales Organization fields.
The setting is searched by the information set in the fields and applied accordingly:
-
First searched the setting with Order Type and Sales Organization filled in so that the setting will be applied to the records of mentioned order types and sales organizations.
-
If not found with both fields, the next suitable setting is searched with only the Sales Organization filled so that the setting will be applied to all records going by the mentioned sales organization.
-
Last searched the suitable setting with no specified fields.
-
If nothing is found, the setting won’t be applied.
-
-
SDK Type: choose where the icon will be displayed on the Order layout.
-
Platform: select where to apply the setting.
Currently, the setting will be not applied on mobile devices. -
Version: v1. Currently, only v1 is available, otherwise, the setting won’t be applied.
-
Parameters: leave empty.
-
Implementation: type in the name of the created Apex class in step 2.
-
Icon Name: select a name from the Utility list to define the looks of the icon.
-
-
Click Save.
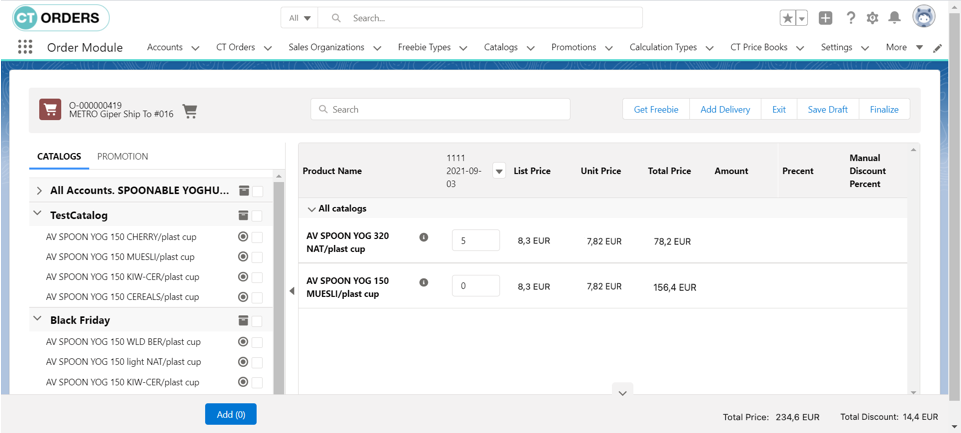
The setup is complete. The corresponding icons are added to the order layout.