How to Set Up Delivery Summary
The Delivery Summary window may be used to review the delivery information and also to edit deliveries if permitted.
-
To use custom fields in Delivery Summary, create them on the Delivery object, for example, Brand__c, Warehouse__c.
-
For lookup fields, you can set up lookup filters to control data that should be displayed in Delivery Summary.
-
Delivery Summary is available for both offline and online orders.
-
Go to Setup → Object Manager → Delivery → Fields & Relationships and click New.
-
Create custom fields, for example:
-
The Family__c field with the Picklist type that is similar to the CTCPG__Family__c field and has the same values.
-
The Brand__c field with the Picklist type that is similar to the CTCPG__Brand__c field and has the same values.
-
-
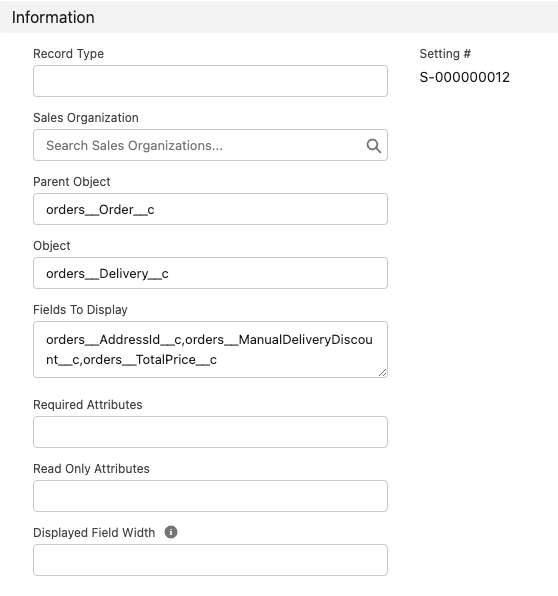
Go to the Settings tab and click New.
-
Select the Layout Setting record type and click Next.
-
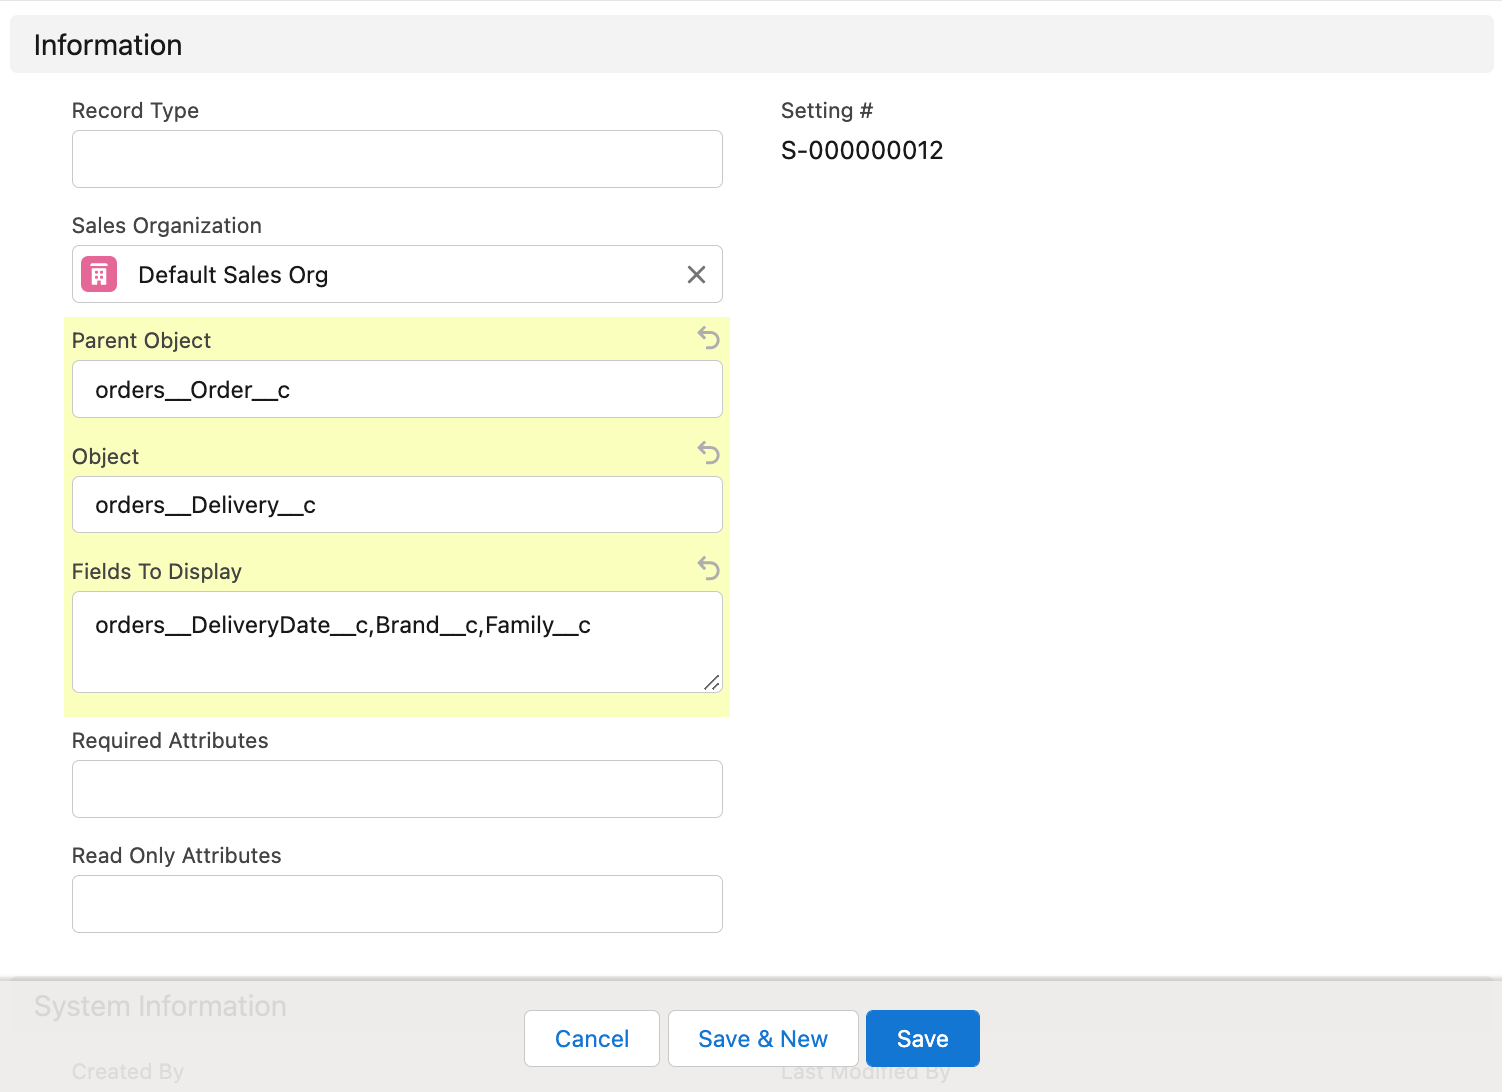
Enter the following:
-
Sales Organization: Default Sales Org
-
Parent Object: orders__Order__c
-
Object: orders__Delivery__c
-
Fields to Display: enter API names of those fields that you want to view in the Delivery Summary window: orders__DeliveryDate__c,Brand__c,Family__c
-
-
Click Save.
The setup is complete.
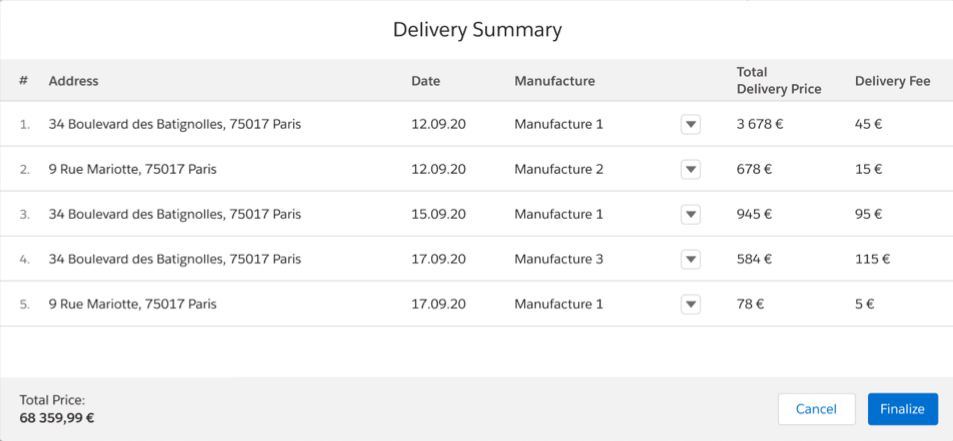
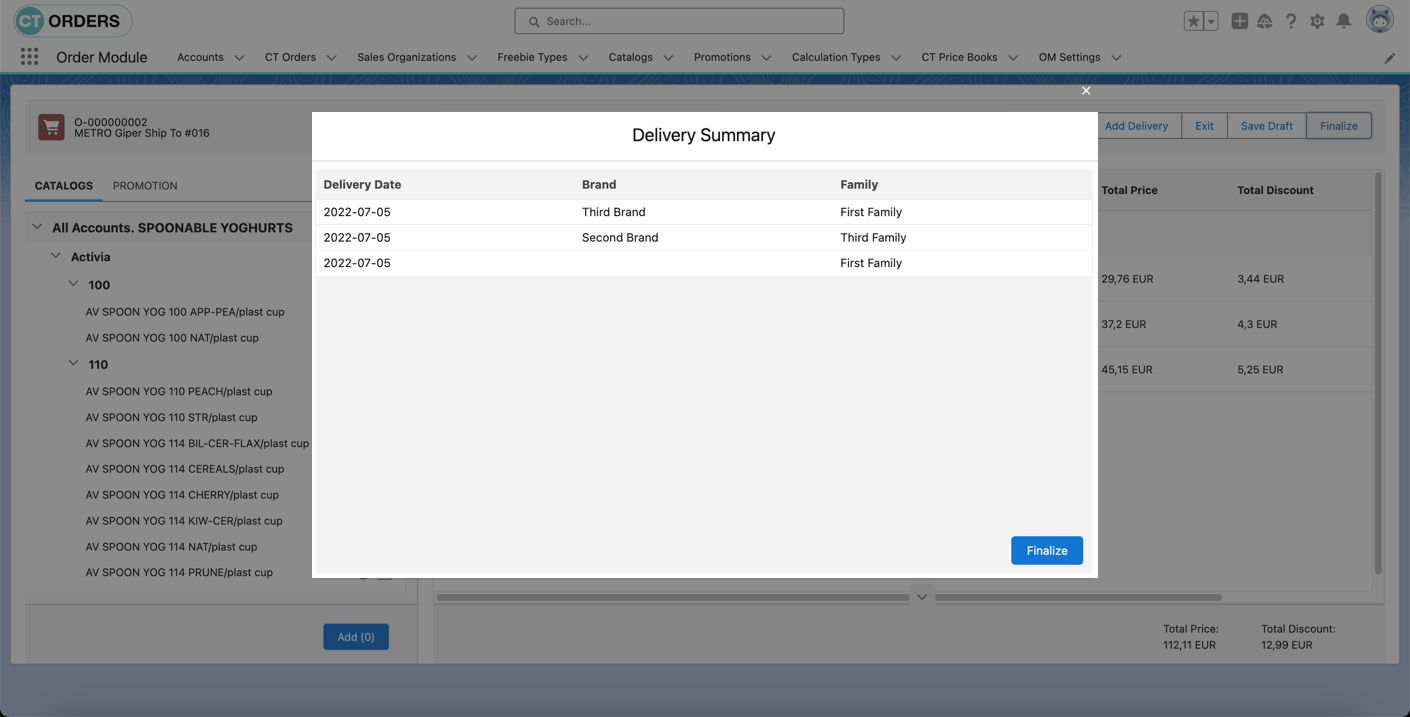
Now, when you create an order, add products, and click Finalize in the order cart, the Delivery Summary window will be displayed. Review information and click Finalize.
| In the Delivery Summary window, you can edit some fields if in the Layout Settings you enter false in the Read-Only Attributes for these fields. For more information, refer to Delivery Management. |
If you want to display delivery address in the Delivery Summary window:
-
On the custom Address object, create a text field containing the delivery address:
-
Go to Object Manager and select the custom Address object.
-
Select Fields & Relationships and click New.
-
In Data Type, select Text and click Next.
-
Fill out Field Label, Length and Field Name fields and click Next.
-
Select profile visibility and click Next.
-
Click Save.
-
-
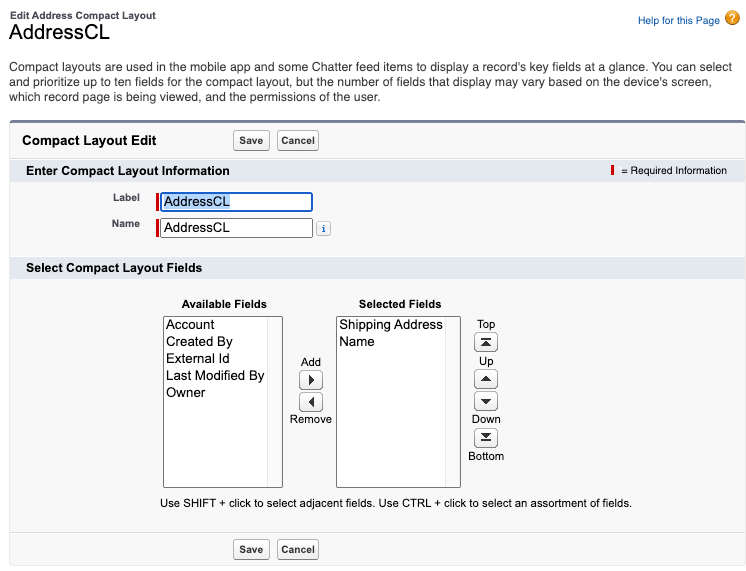
On the custom Address object, create a compact layout with the created text field:
-
Go to Object Manager and select the custom Address object.
-
Select Compact Layouts and click New.
-
Fill out Label and Name fields.
-
Drag and drop fields Name and created text field from Available Fields to Selected Fields. The created text fields must be on the top (Shipping Address in the example below):
-
Click Save.
-
In the Object Manager → Compact Layouts, click Compact Layout Assignment.
-
Click Edit Assignment.
-
In Primary Compact Layout, select your created compact layout and click Save.
-
-
Add the API name of the custom Address object to the Delivery object layout. For example, if the API name of the custom Address object is orders__AddressId__c, add it to the Fields to Display:
Now, delivery address will be displayed in the Delivery Summary window: