Translation of CT CPG Components
To translate the CT CPG package, use one of the following.
Translation Workbench
Enable Translation Workbench, select users who can translate and set up languages in Translation Language Settings.
-
To translate field sets, picklist values, or buttons, use the Translate option.
-
To translate record types or validation errors, select Override.
To translate any component:
-
From Setup, enter Translation Workbench in the Quick Find box, then select Translate or Override.
-
Select a Language.
-
Select a Setup Component.
-
Select an Object.
-
Add new translations.

-
Click Save.
The component is renamed.
Rename Tabs and Labels
To translate custom tabs, for example, CT Product:
-
From Setup, enter Rename Tabs and Labels in the Quick Find box, then select Rename Tabs and Labels.
-
Go to the Custom Tabs section.
-
Click Edit next to the appropriate tab.
-
Specify the new Singular and Plural name.
-
Click Save.
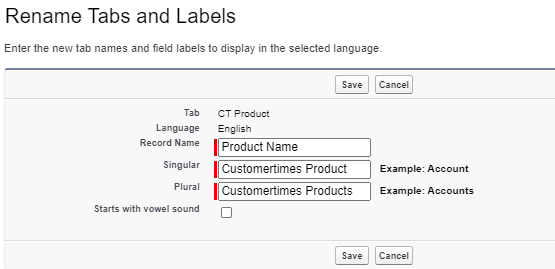
The tab is renamed.

Custom Labels
To translate buttons, labels, popups for Activity Report, Joint Visit Report, or Calendar:
-
From Setup, enter Custom Labels in the Quick Find box, then select Custom Labels.
-
Click the Name of the label to translate.
-
Create or override translation:
-
In the Local Translations / Overrides section, click the New Local Translations / Overrides button to create a new translation.
-
In the Package Translations section, click Override next to the required language to override translation.
-
-
Click Save.
The selected label is renamed.