Configure List Views for the Calendar
On the List View tab, manage available list views. Create, edit, or delete list views, specify columns to display, and more.
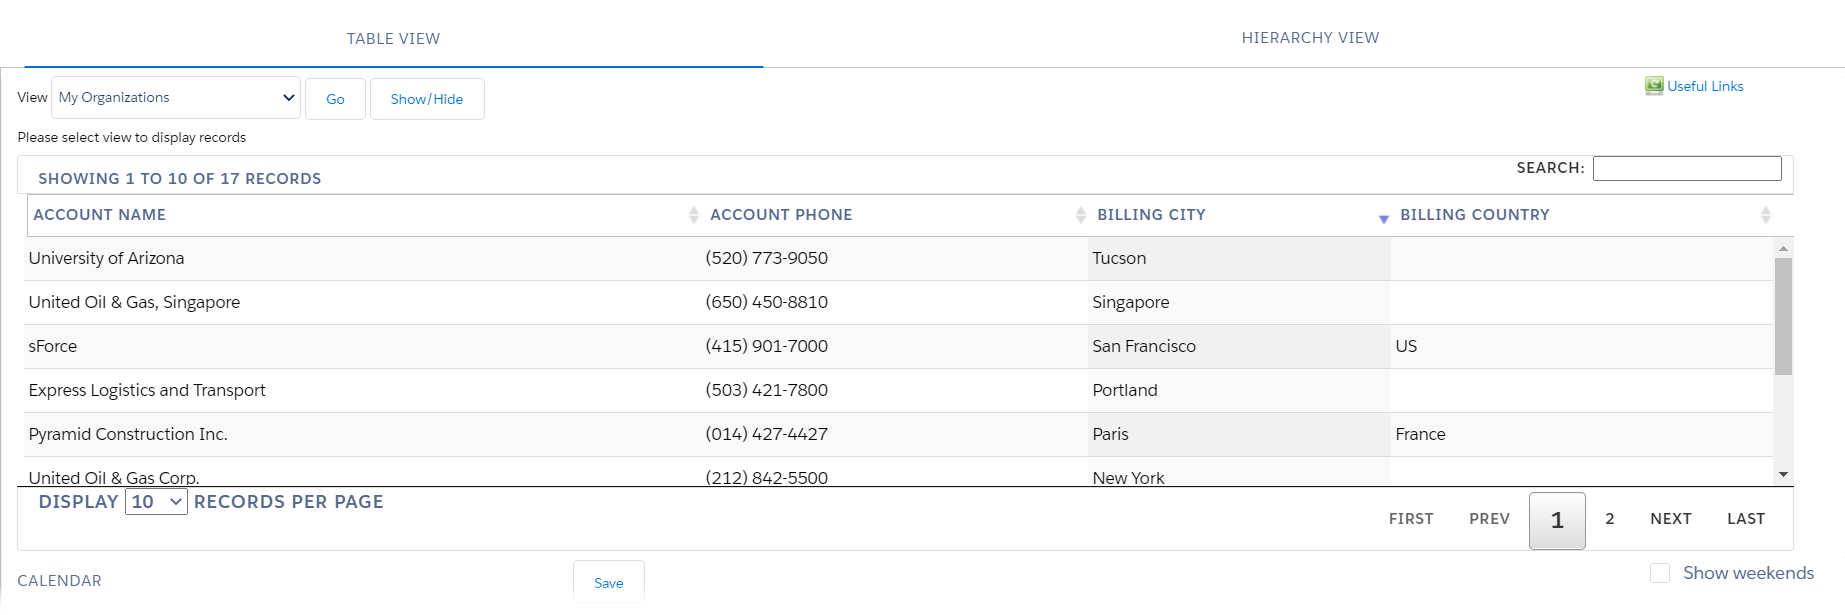
The specified list views will be available on the Table View and Hierarchy View tabs.
To create a new list view:
-
Go to the List View tab.
-
Specify in the following order:
The setup is complete.
Available List Views
In this section, select a list view to customize or create a new list view based on the selected list view.
-
Click Delete this view to remove a list view if needed;
-
Click Reset / Create new view to reset the parameters of the selected list view and create a new one.

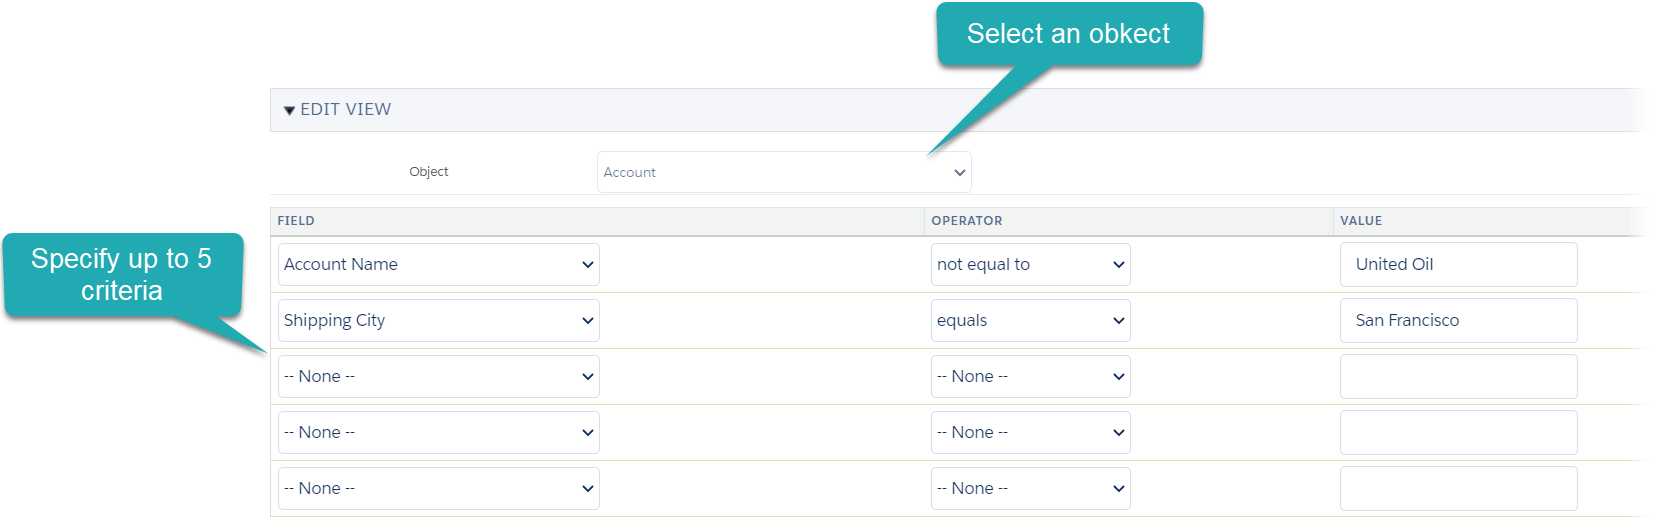
Edit View
In this section, specify the object and list view criteria.
-
Select the Account, Contact, or AccountContactRelationship object.
-
Specify up to 5 criteria.
Select not equal to and leave the Value field blank to display only records with values in the selected fields.
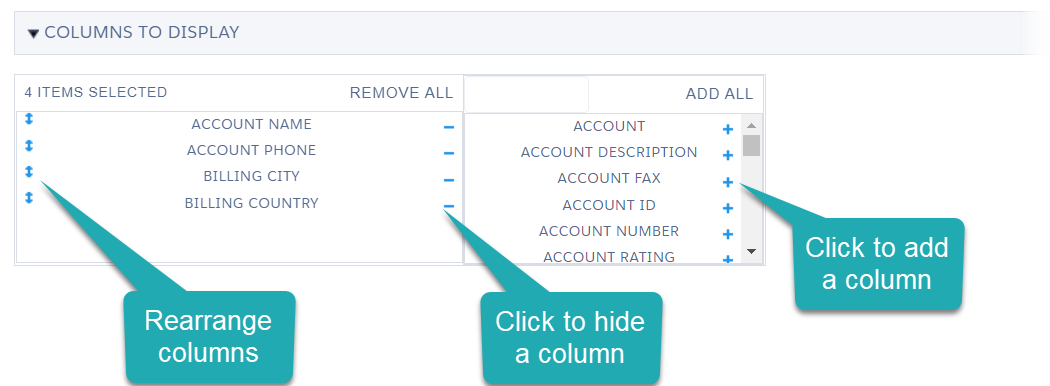
Columns to Display
|
Used on the Table View tab. |
In this section, specify the columns to display in the list view table.
-
Add and remove columns by the Plus button or a drag-and-drop.
-
Rearrange columns if needed.
When a representative selects a list view on the Table View tab, they will see the specified columns in the list view table.