Add and set up divisions
By default, the Alpha and Beta divisions are available, the Account and Contact objects have the corresponding division fields that are present in the Global record of the Application Settings.
To specify a new division:
-
Specify the new division in the User Division picklist of the User and Marketing Cycle objects, for example, Pediatrician;
-
Add the custom User Division field on the User page layout and specify the new Pediatrician division for the required User record;
-
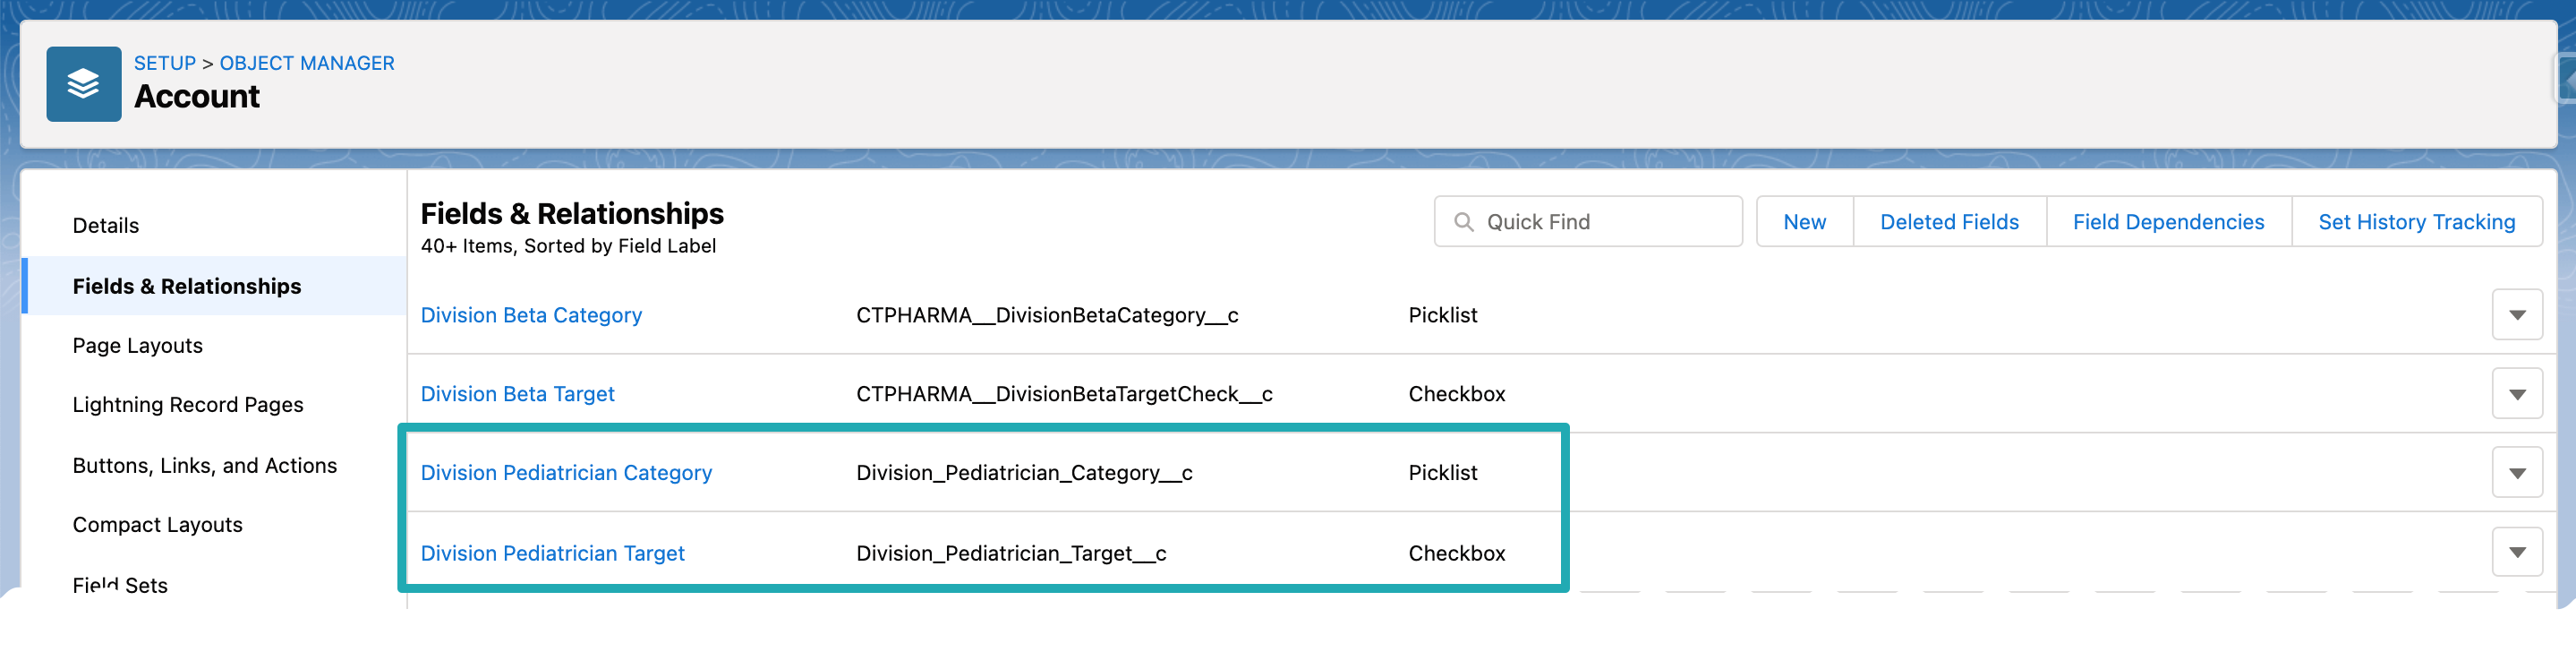
Create the new division fields on the Account and Contact objects using the same division category name, for example, Division_Pediatrician_Category__c and Division_Pediatrician_Target_Check__c;
-
Add new division fields, Division_Pediatrician_Category__c and Division_Pediatrichian_Target_Check__c, in the corresponding record of the Application Settings.
Add Division to the User and Marketing Cycle objects
To add a new division:
-
Go to Setup → Object Manager → User → Fields & Relationships → click User Division.
-
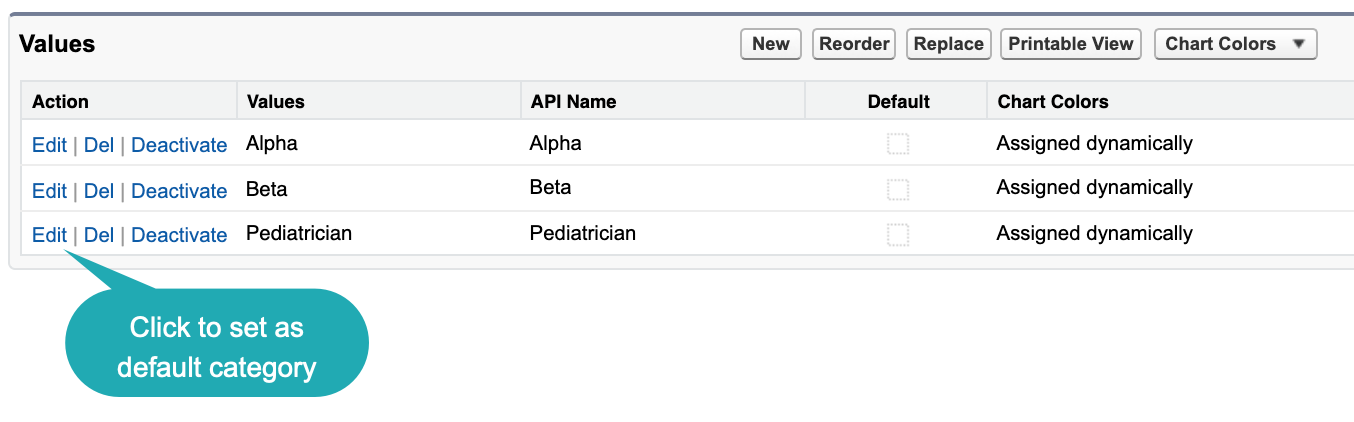
In the Values section, click New.
-
Add the new category name, for example, Pediatrician.
-
Click Save.
Click Edit next to category name and select Make this value the default for the master picklist if you want to use this category by default.
-
Click Object Manager → Marketing Cycle → click User Division.
-
Repeat steps 2–4.
The division is added.
Specify Division on the User Record
To have the ability to target Accounts and Contacts of the specific division, the required User record should be assigned to the division.
By default, the standard Division field is on the user page layout. It is necessary to add and fill the custom User Division field on the User page layout.
To assign the User record to the specific division:
-
Go to the Setup → Object Manager → User → User Page Layouts → User Layout.
-
Drag-n-drop the User Division field to the page layout.
-
Click Save.
-
Go to Home → Users → Users → click Edit next to the required user’s Full Name field.
-
In the User Division field, select the required division, for example, Pediatrician.
-
Click Save.
The division is assigned.
Add Division to the Account and Contact Objects
There should be a picklist to contain division categories and a checkbox that represents belonging to the new division on both Account and Contact objects.
To add a new division:
-
Go to Setup → Object Manager → Account → Fields & Relationships → click New.
-
Create a field with the Picklist type and set the values up.
-
Select Picklist and click Next.
-
Enter Division Pediatrician Category in Field Label, select a global picklist value set (that should be created), or manually enter values (division categories) and click Next.
-
Select the profiles to which you want to grant edit access to this field and click Next.
-
Select the page layouts that should include this field and click Save & New.
-
-
Create a field with the Checkbox type.
-
Select Checkbox and click Next.
-
Enter Division Pediatrician Target Check in Field Label, leave the Unchecked field selected and click Next.
-
Select the profiles to which you want to grant edit access to this field and click Next.
-
Select the page layouts that should include this field and click Save.
-
-
Click Object Manager → Contact → Fields & Relationships → click New.
-
Repeat steps 2–3.
The division is added.
Editing the Application Settings record
To finish the setting, update a corresponding record of the Application Settings with new division fields.
To update the record:
-
Go to Setup → Custom Code → Custom Settings → Application Settings → click Manage next to Application Settings.
-
Click Edit next to the required record, for example, the Global or another existed one.
-
Update the following fields:
-
In the Account Category Fields API names field, add the new division field API Name field of the Account record, that responsible for the new division, for example, Division_Pediatrician_Category__c (separated by a comma, without blank spaces);
-
In the Account Target Flags API names field, add the new division field API Name field of the Account record, that responsible for the selection of the new division, for example, Division_Pediatrician_Target_Check__c (separated by a comma, without blank spaces);
-
Specify the same division fields of the Contact record in the Contact Category Fields API names and Contact *Target Flags API names fields (separated by a comma, without blank spaces).
-
-
Click Save.

The setup is complete.
Next, configure a new record of the Division Target Frequency Settings.