Creating an Objective
There are several options to create objectives:
Create Objective for the Account
If you want to have a regular objective for the selected account, add an objective to the account’s related list.
When you create a visit for the selected account and open the Pharma Activity Report, you will see a regular objective value in the Objective field.
To create a regular objective for the account:
-
Go to the Accounts (1) tab.
-
Click the required account.
-
Switch to the Related (2) tab.
-
Click New (3) under Objectives.
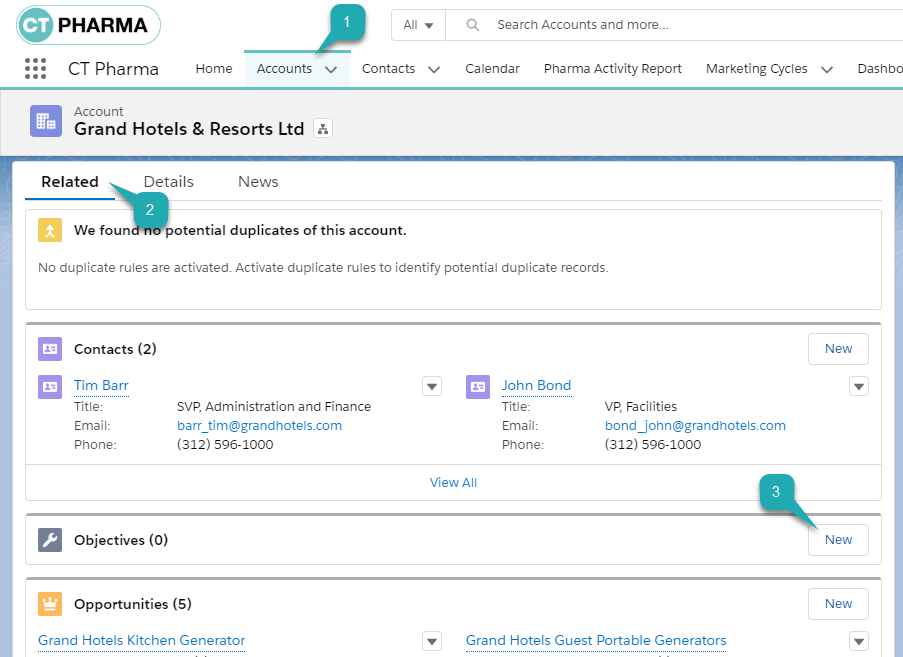
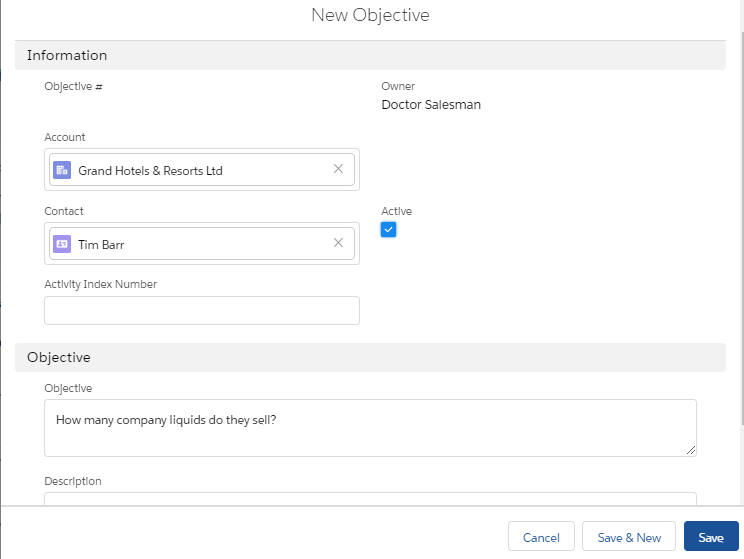
The New Objective pop-up window opens.
-
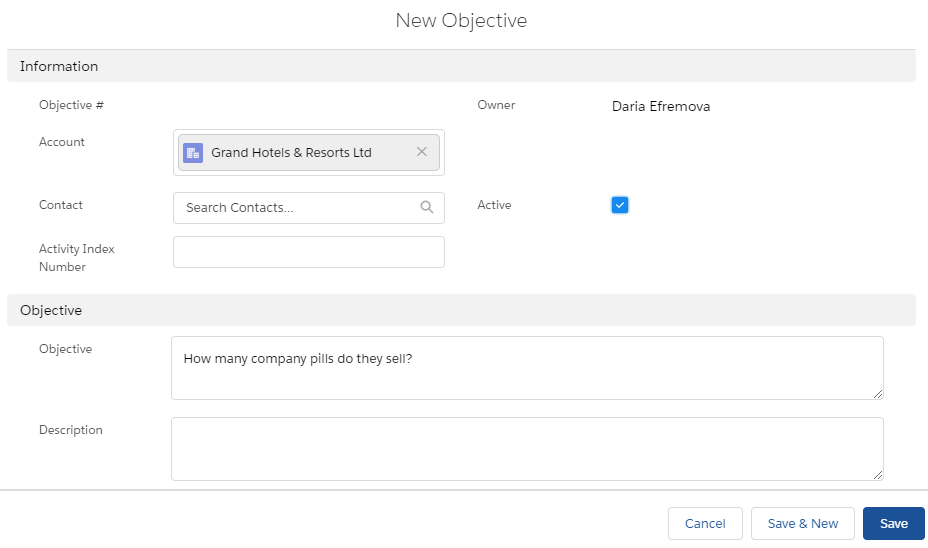
Fill in the required fields.
-
Select Account. The related Account is already in the field.
-
Leave the Contact field blank if you want to have an objective only for the account.
-
Enter Activity Index Number if you want to relate an objective to the existing activity.
-
Set Active.
-
Add Objective.
-
-
Click Save.
The objective is added to the account. On the Related tab of the selected Account, the user can view, edit, or remove all related objectives if he has the required permissions.

When you create a visit related to this account, you can see the Objective field with the added value on the Activity Report.
Contacts related to this account have the account’s objective too if they have not personal objectives.
Create Objective for the Contact
If you want to have a regular objective for the selected contact, add an objective to the contact’s related list.
When you create a visit for the selected contact and open the Pharma Activity Report, you will see a regular objective value In the Objective field.
To create a regular objective for the contact:
-
Go to the Contacts (1) tab.
-
Click the required contact.
-
Switch to the Related (2) tab.
-
Click New (3) under Objectives.
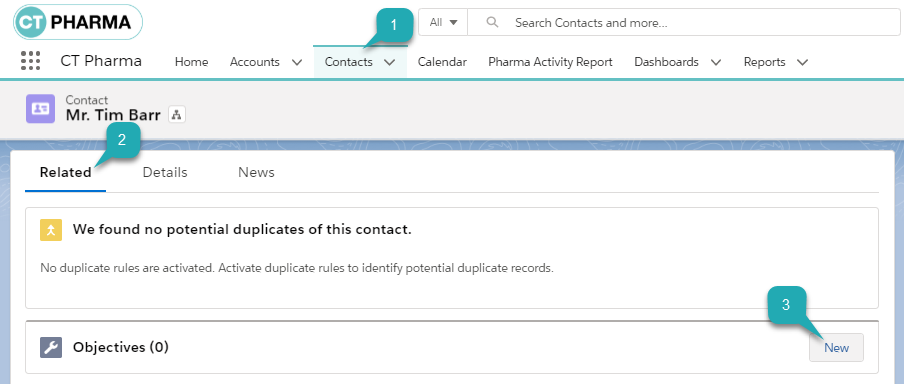
The New Objective pop-up window opens.
-
Fill in the required fields.
-
Select Account or leave this field blank.
-
Select Contact. The related Contact is already in the field.
-
Enter Activity Index Number if you want to relate an objective to the specific activity.
-
Set Active.
-
Add Objective.
-
-
Click Save.
The objective is added to the contact. On the Related tab of the selected Contact, the user can view, edit, or remove all related objectives if he has the required permissions.

When you create a visit related to the contact, you can see the Objective field with the added value on the Activity Report.
|
If the account has its own objective, it will not be applied if the contact of this account has an objective too. |
Create Objective via Activity Report
If you want to create an objective for the particular visit:
-
Create a visit on the CT Pharma Calendar.
-
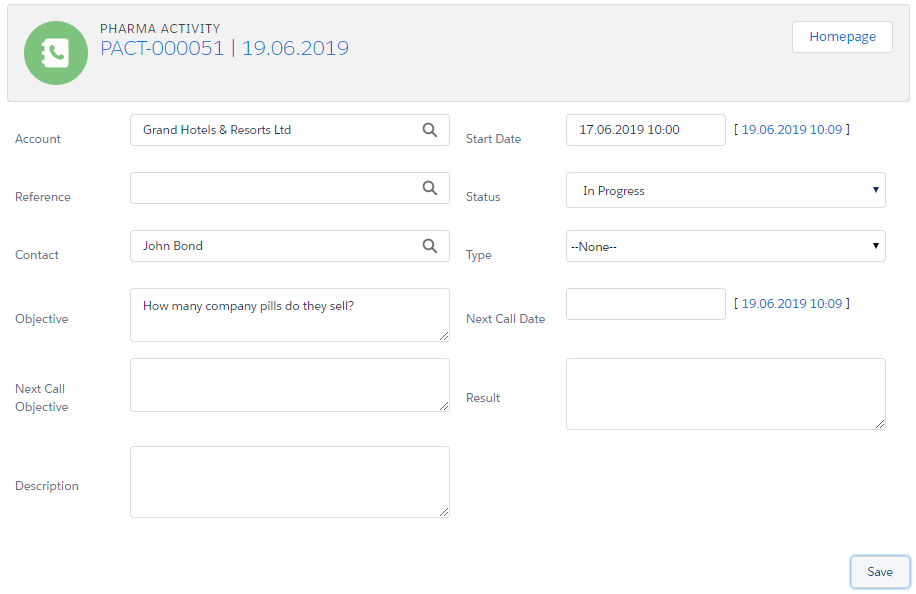
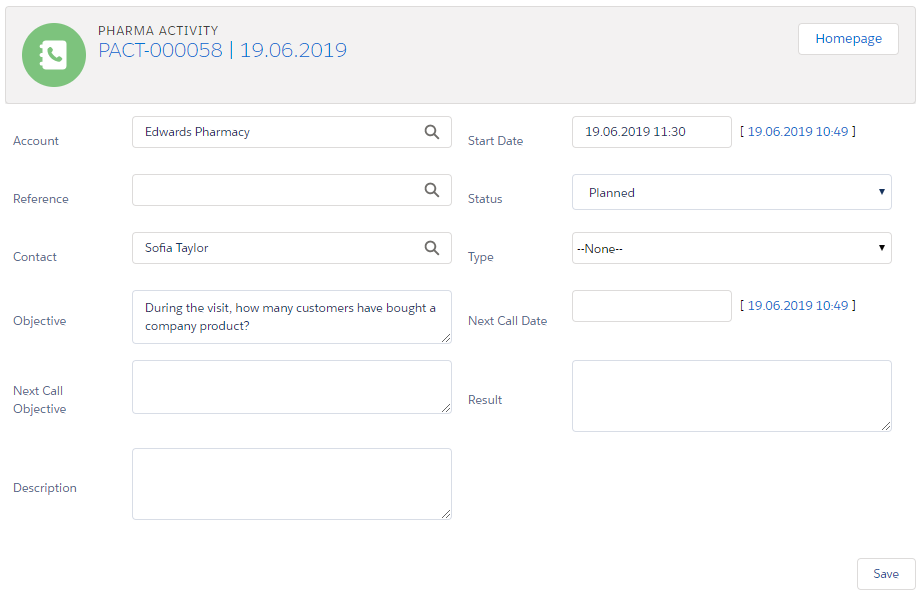
Open the related Activity Report.
-
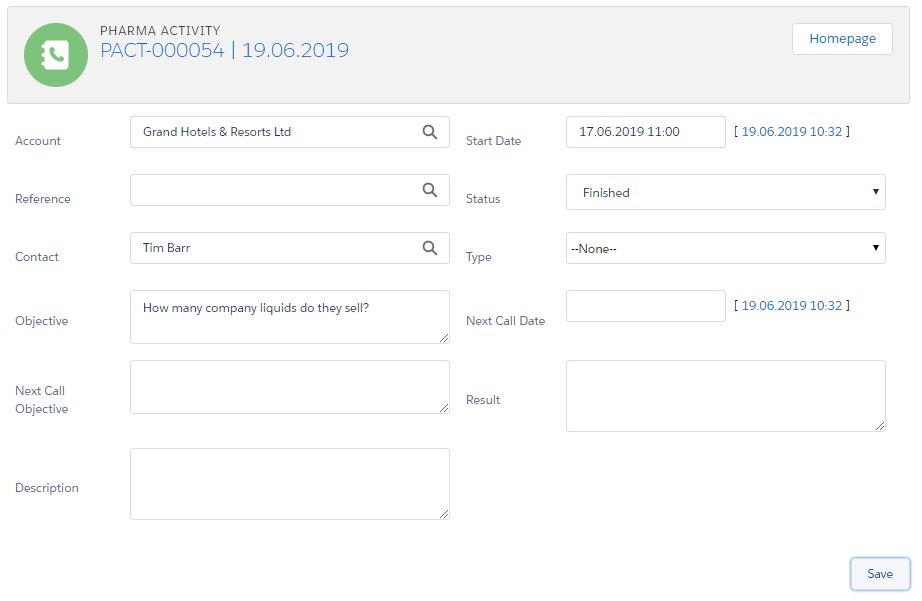
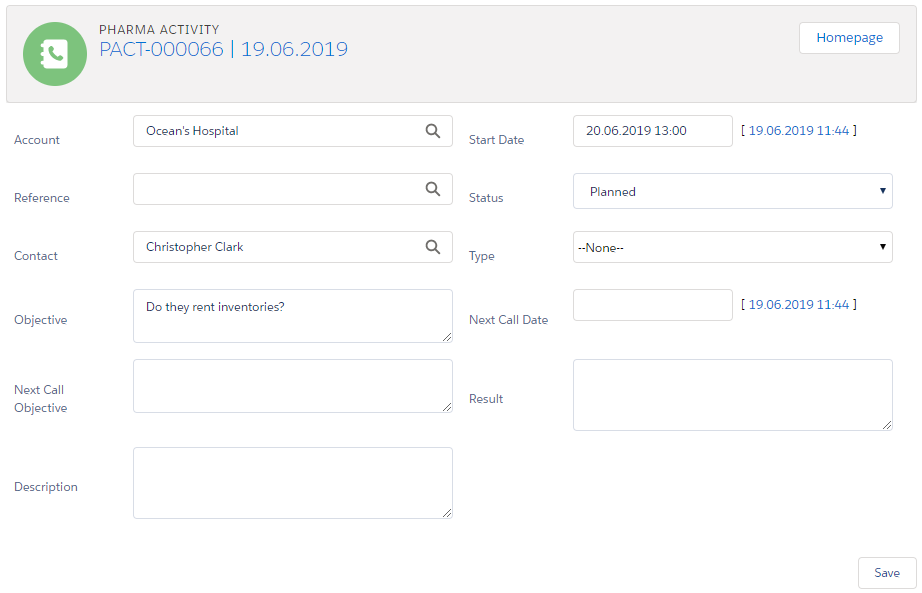
Enter the objective in the Objective field on the related Activity Report.
-
Click Save.
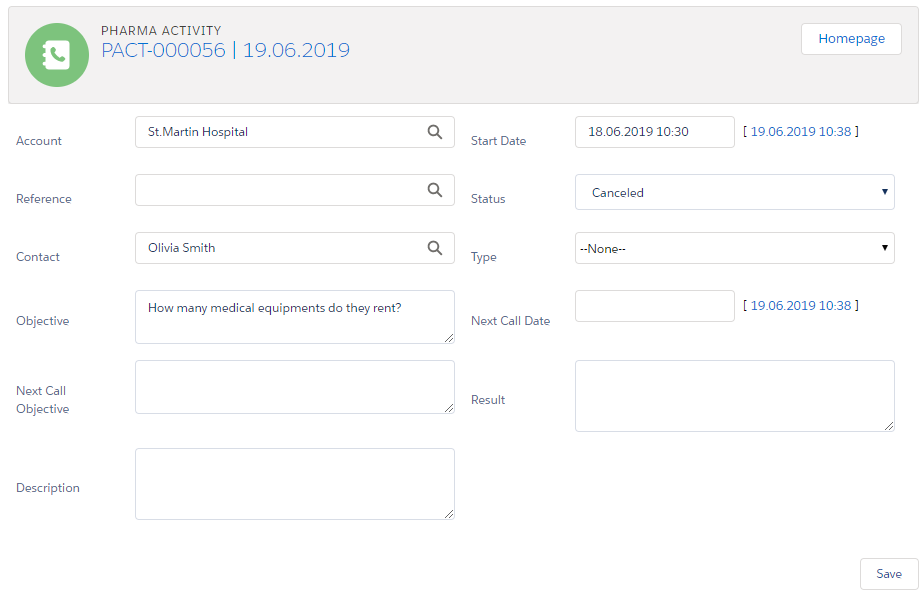
The objective is added to the particular visit.
Create Objective via Next Call Objective
If you want to add an objective to all next visits:
-
Create a visit on the CT Pharma Calendar.
-
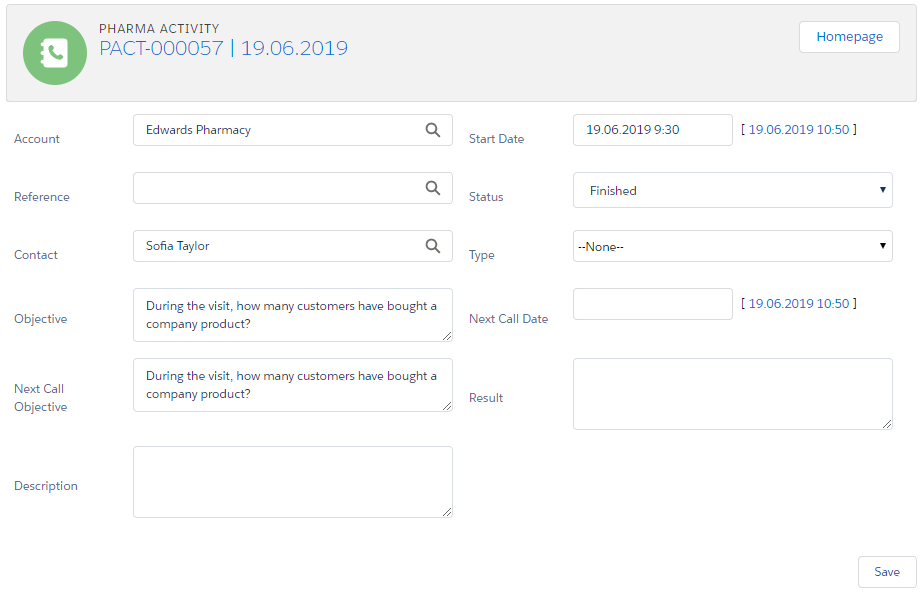
Open the related Activity Report.
-
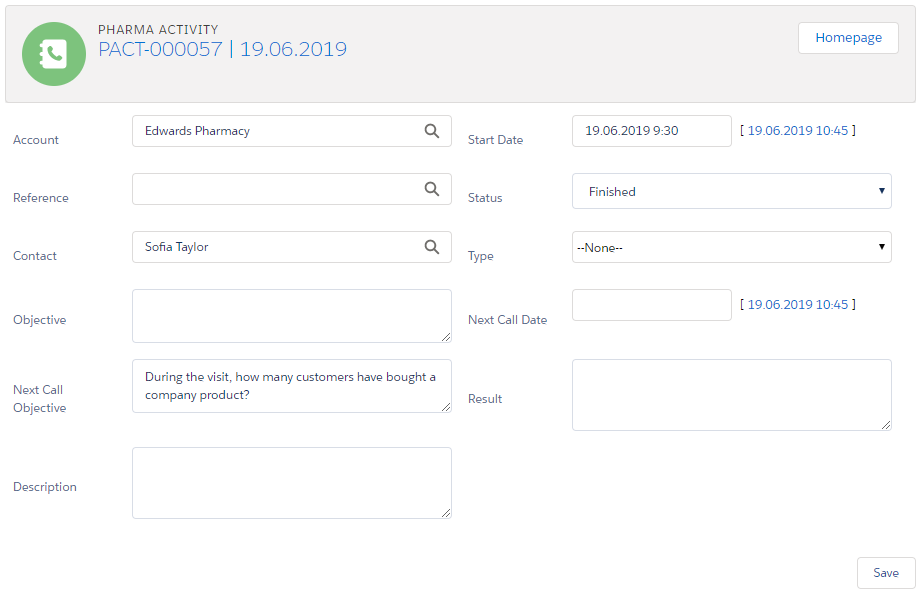
Add the objective to the Next Call Objective field.
-
Change the Status field to Finished.
-
-
Click Save.
-
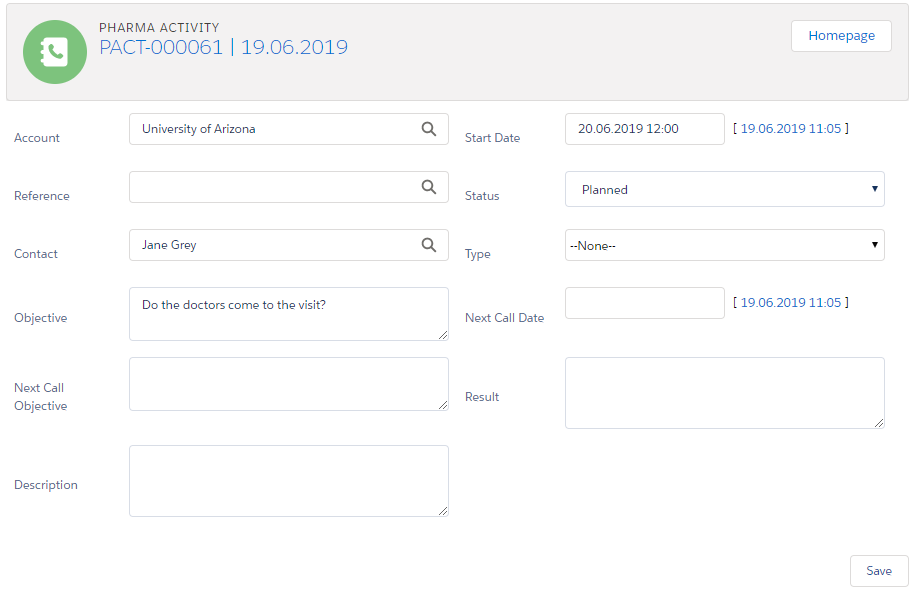
Create a visit with the same account and contact.
On the Activity Report page, the value from the Next Call Objective field of the previous visit is in the Objective field.
If you open the Activity Report of the parent visit, the Objective field is populated too.
Create Objective via Next Call Date
If you want to add an objective for a visit on a specific date:
-
Create a visit on the CT Pharma Calendar.
-
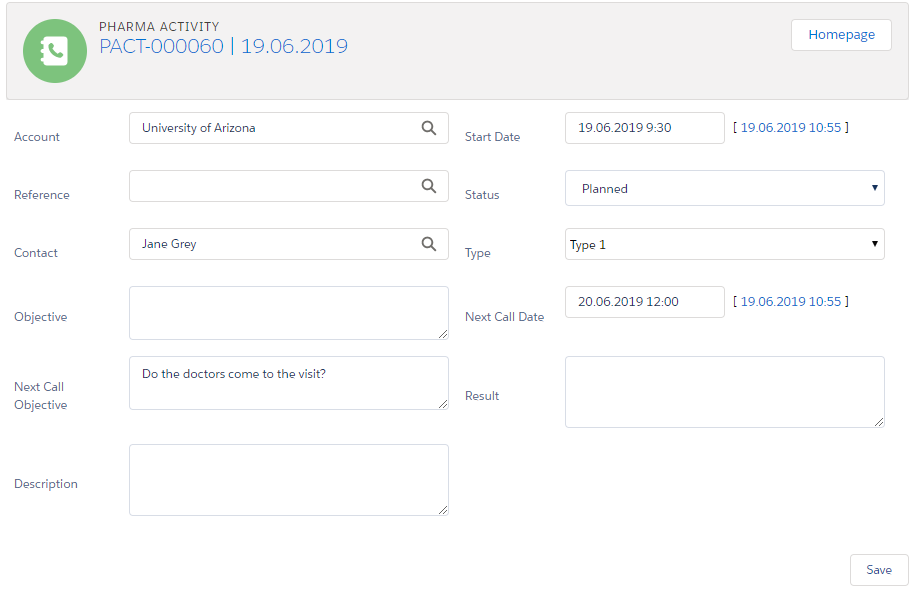
Open the related Activity Report.
-
Add the objective to the Next Call Objective field.
-
Add the required date to the Next Call Date field.
-
Change the Status field to Finished.
 *
*
-
-
Click Save.
The next visit is automatically created on the selected date from the Next Call Date field. On the Activity Report page, the value from the Next Call Objective field of the previous visit is in the Objective field.
|
If you have at least one next call in Next Call Settings, you should manually map fields that must be populated on the activity of the next call date. For further information, please refer to Next Call Settings. |
Create Objective via Next Call Settings
If you want to have a regular objective with the specific values, you should previously create the next call and then create a visit.
To create the next call:
-
Go to Setup (1) → Custom Code → Custom Settings (2) → Next Call Settings.
-
Click Manage (3) next to Next Call Settings.
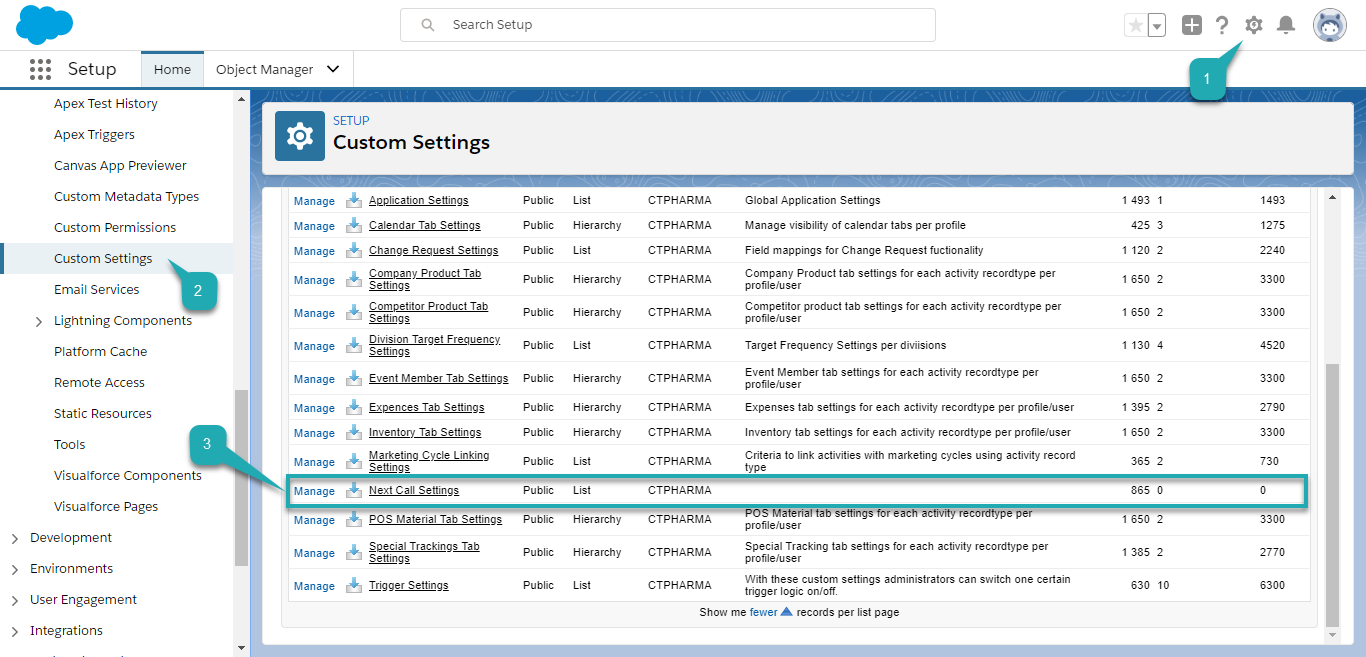
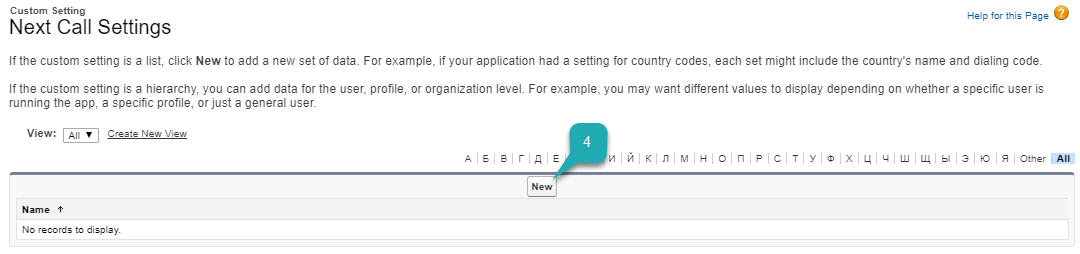
The Next Call Settings page opens.
You can also click Next Call Settings and then click Manage (3) on the opened page.

-
Click New (4) to create the next call.
-
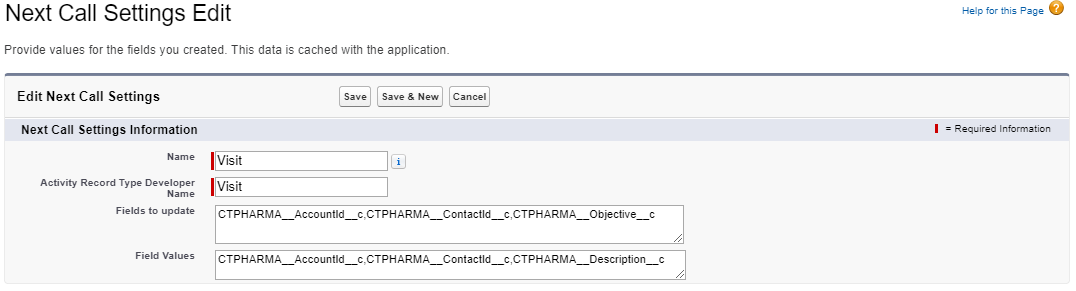
Fill in fields:
-
Name: add the Visit record type.
-
Fields to update: add the Objective, AccountId, and ContactId fields to populate. To multiple fields, use a comma delimiter without spaces.
-
Field Values: add a value that will be populated in the Objective, AccountId, and ContactId fields. To multiple fields, use a comma delimiter without spaces.
-
-
Click Save.
The next call is created.
| Also, you can go to CT Pharma Control Panel: General to customize the Objective Settings and Next Activity Settings sections. |
To create a visit using the Next Call Settings:
-
Create a visit on the CT Pharma Calendar.
-
Open the Activity Report.
-
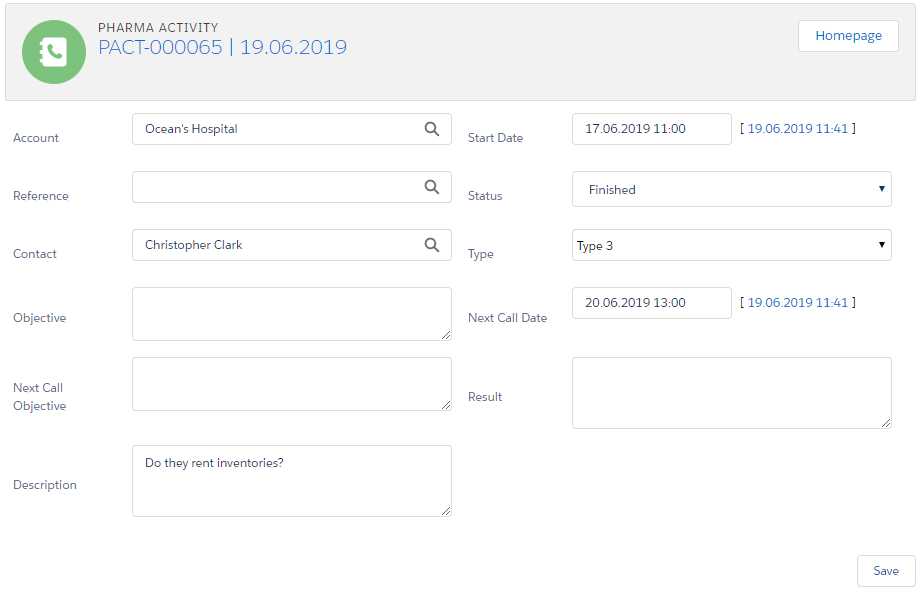
Add the value to the field mentioned in the Field Values field of the created next call.
-
Add the required date to the Next Call Date field.
-
Change the Status field to Finished.
-
-
Click Save.
The next visit is automatically created on the selected date from the Next Call Date field. On the Activity Report page, the value from the Values field of the next call is in the Objective field.
Objectives in the Marketing Cycle
Add objectives to the Marketing Cycle if needed.
|
Previously, you should create a marketing cycle and configure all targeting and marketing settings. For further information, please refer to Targeting & Marketing Cycle. |
-
Use the Special Tracking entity to set and track the tasks and objectives for the active marketing cycle within a visit.
-
Use a related tab of the Activity Report designed to set the objectives for the specific clients within the Marketing Cycle.
For further information, please refer to the Special Tracking settings.