Objective General Settings
To enable full functionality of the Objectives Management, you should previously set up Application Settings and add the Objectives related list to the Account and Contact objects.
| Also, you can go to CT Pharma Control Panel: General to customize the Objective Settings and Next Activity Settings sections. |
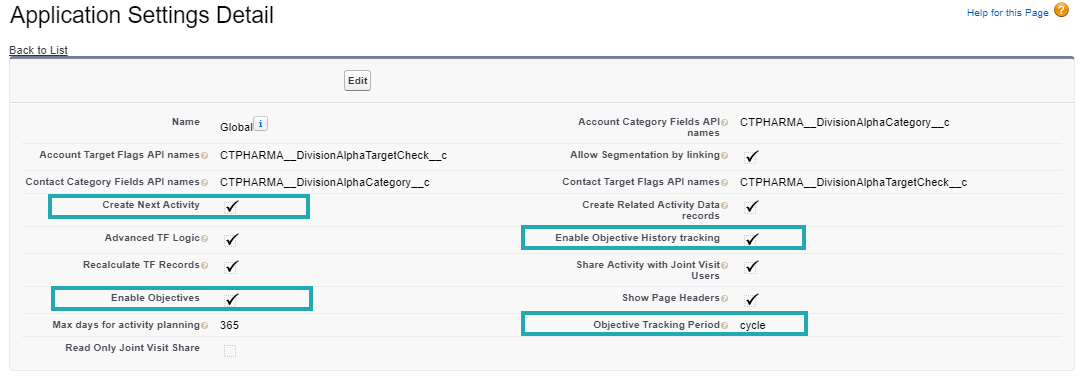
In the Application Settings:
-
Enable Objectives.
-
Enable Objective History tracking.
-
Enter Objective Tracking Period.
You can set a month, quarter, year, or cycle period.
-
Enable Create Next Activity if you want to use the Next Call Date option and Next Call Settings.
You can specify fields to fill in and values with the required information that will be added to these fields while creating the visit on the Next Call Date.
Now, the Application Settings are configured. The next step is to add Objectives related list to the Account and Contact objects.
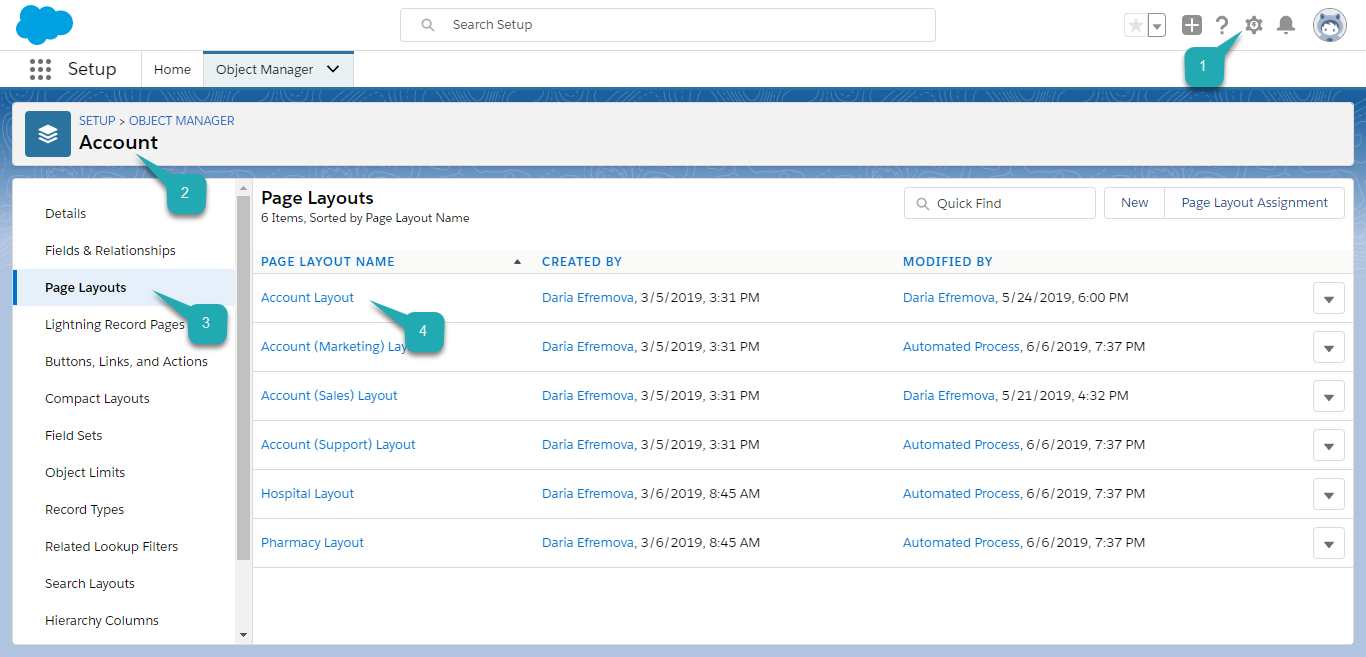
To add a related list to the Account page layout:
-
Go to Setup (1) → Object Manager → Account (2) → Page Layout (3).
-
Click Account Layout (4).
The Account Layout Settings opens.
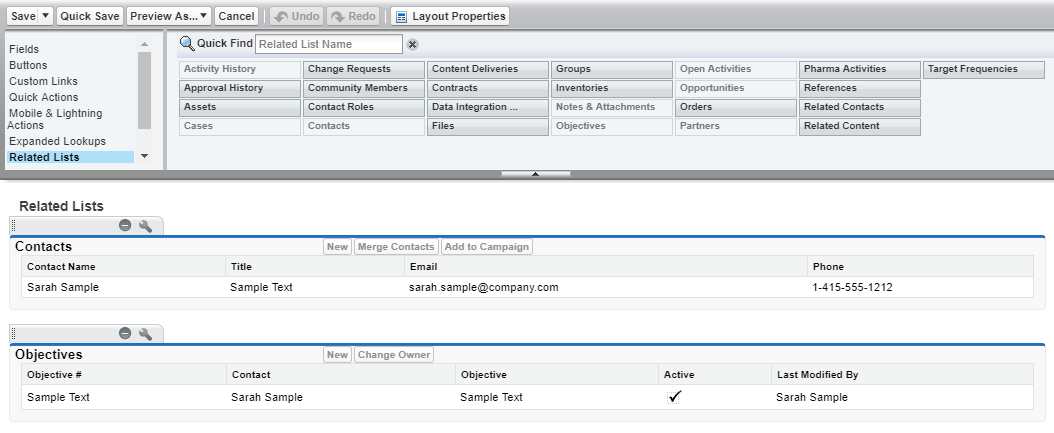
-
Go to the Related lists section and add the Objectives section by dragging it to the layout.
-
Click Save.
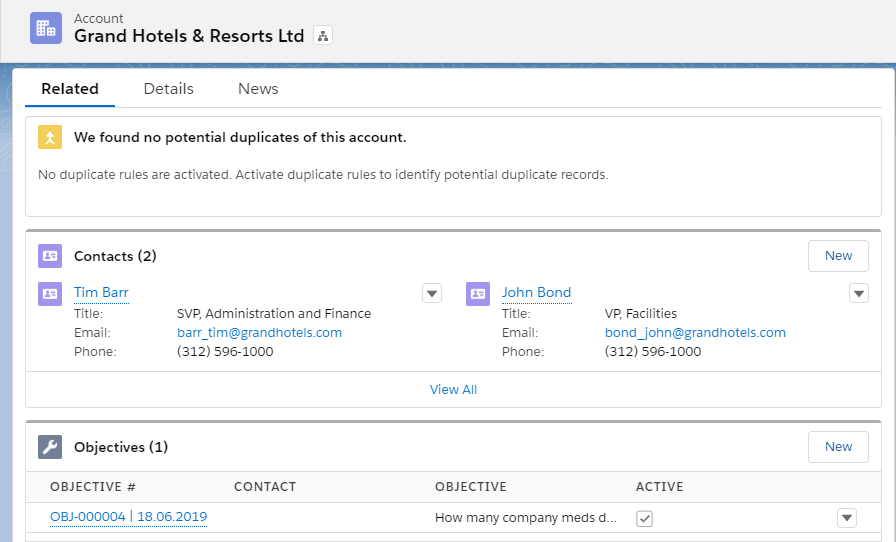
The related list is added. You can find the Objectives section on the Related tab of the selected account.
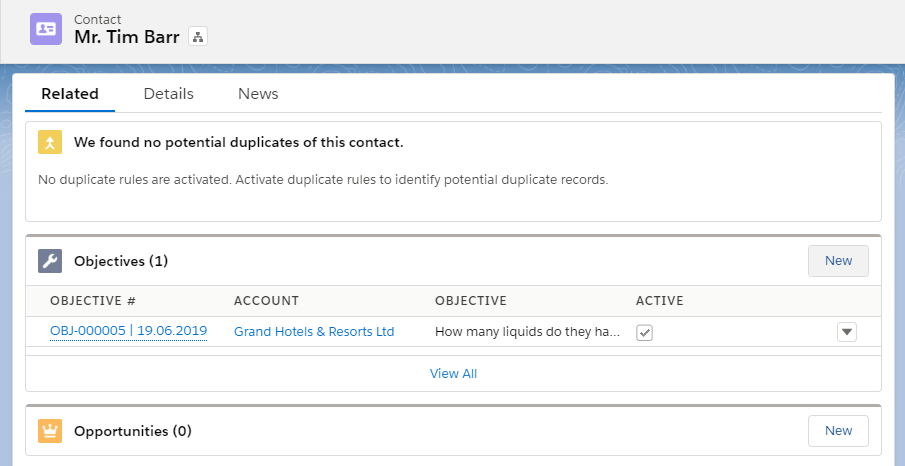
Use the same steps to add the Objectives related list to the Contact object.
The next step is to create an objective.