Routes
The Routes module allows you to build the optimal routes to the activities.
Requirements
Add the Routes module to the app menu.
-
To use maps, specify the Bing Maps API key on the CT Mobile Control Panel: General tab.
-
A field to store an address for the Account object should be specified on the CT Mobile Control Panel: General tab.
-
The Activity object should be specified on CT Mobile Control Panel: Calendar tab. Add a field with the Lookup type from the Activity object to the Account object.
Adding Routes to the Menu
To add the Routes module to the app menu:
-
Go to CT Mobile Control Panel: App Menu tab.
-
Select the required profile in the Location picklist.
General Settings will be applied to all the profiles without individual settings. -
Click the
 button to open the Add menu item tool.
 -
Select the Routes item.
-
Click Add to close the Add menu item tool.
-
Click Save.
The setup is complete.
Working with Routes
Offline Maps
If a mobile user has no access to the Internet, she still can continue to build routes. For this purpose, download offline maps of the desired region using Wi-Fi in advance.
Follow the instructions in Microsoft Support.
-
For the downloaded region, route building and route details are available.
-
For unloaded regions, only main roads are available.
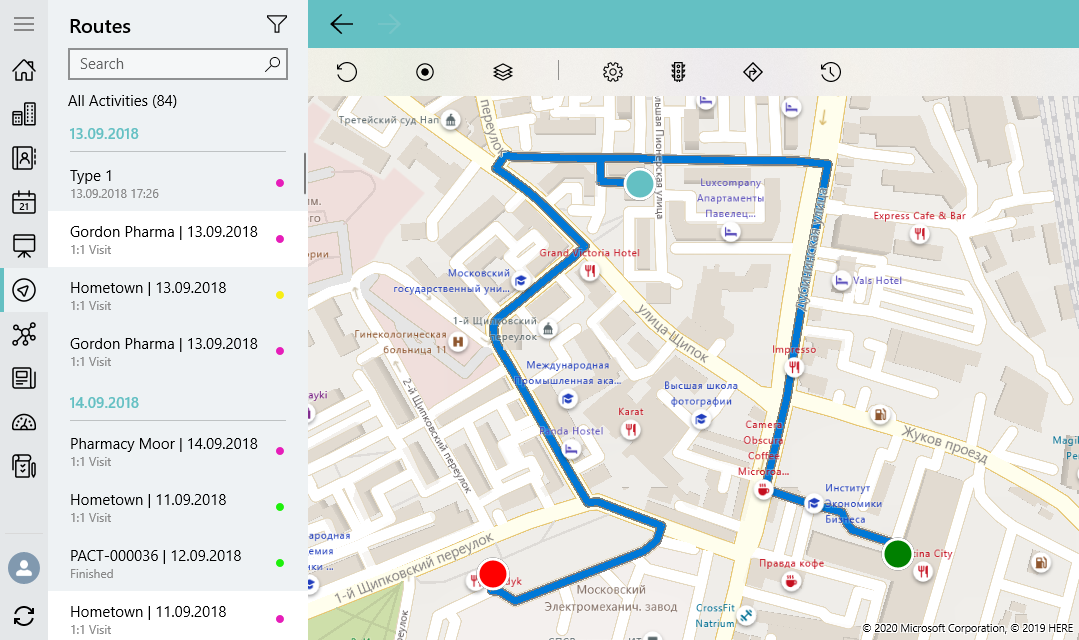
Left Menu
Sections are sorted in ascending or descending order according to the day.
| The mobile user should have access to the start date field. Otherwise, if this field is blank, records will be randomly grouped in the section without a title. |
-
Records in the sections are sorted in ascending or descending order according to the start date—the records with the start date of the Date type are displayed first.
-
Records will be grouped by day according to the Activity object with a title that contains the day, month, and year:
-
Records are displayed by the start date of the Date type.
-
Records are displayed by the start date of the Date/Time type.
-
The available list views:
-
All activities (default list view);
-
List views of each object grouped by the object;
-
All + name of the Activity object for objects without custom list views, e.g., All Events.
The last selected list view will be displayed in the Routes module.
Main Screen
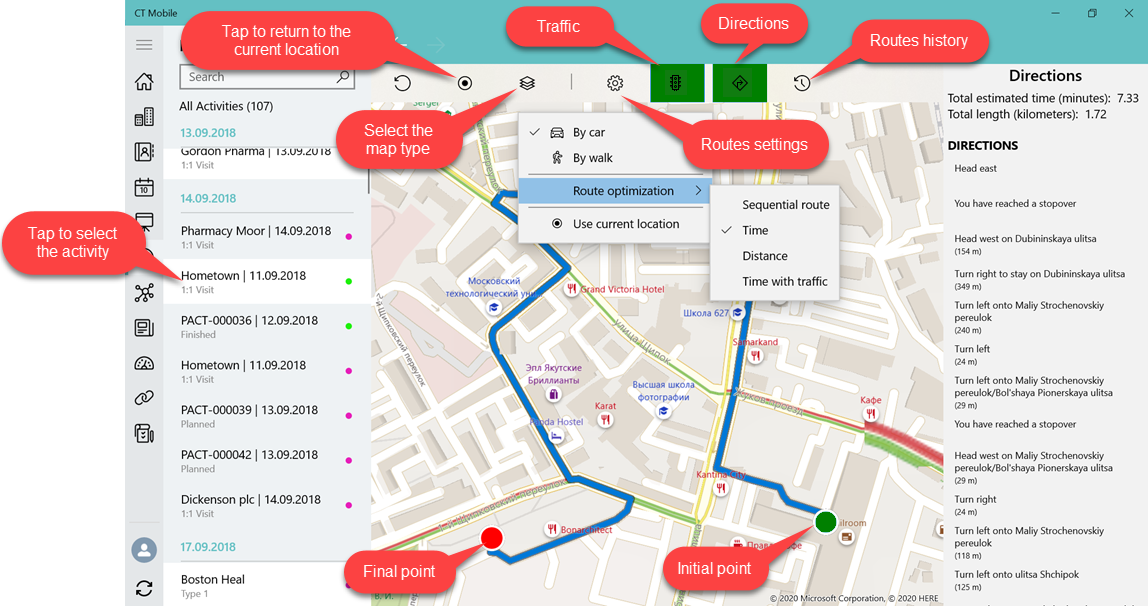
Based or not on the current location, view the location of the selected record on the map.
Available Options
To build a route:
-
Tap Routes in the main menu.
-
Enable Use current location if the current device location will be included in the route.
This option depends on GPS/Wi-Fi. -
Select the activities from the list.
The maximum number of activities for a route is limited. -
For long-distance activities, a route cannot be built.
-
A route cannot be built for the activities in the exact location, and the points will not be displayed.
-
The route is built.
Tap
 to view the navigation screen.