Custom Scenario Editor
Custom Scenario Editor is intended to create and edit the custom scenarios of CLM presentations in Salesforce.
To create a custom scenario:
-
Go to Applications → click the required Application record.
-
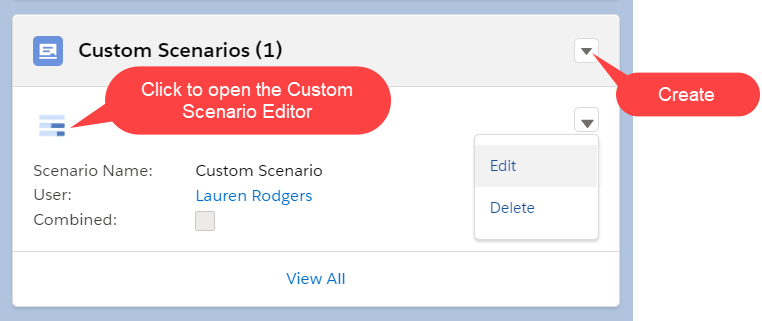
In the Custom Scenario section:
-
Click Create to add a new scenario using the Custom Scenario Editor.
-
Click Edit next to the scenario to edit its details.
-
Click the
 icon to edit the scenario using the Custom Scenario Editor.
 -
Click Delete next to the scenario to delete it.
-
-
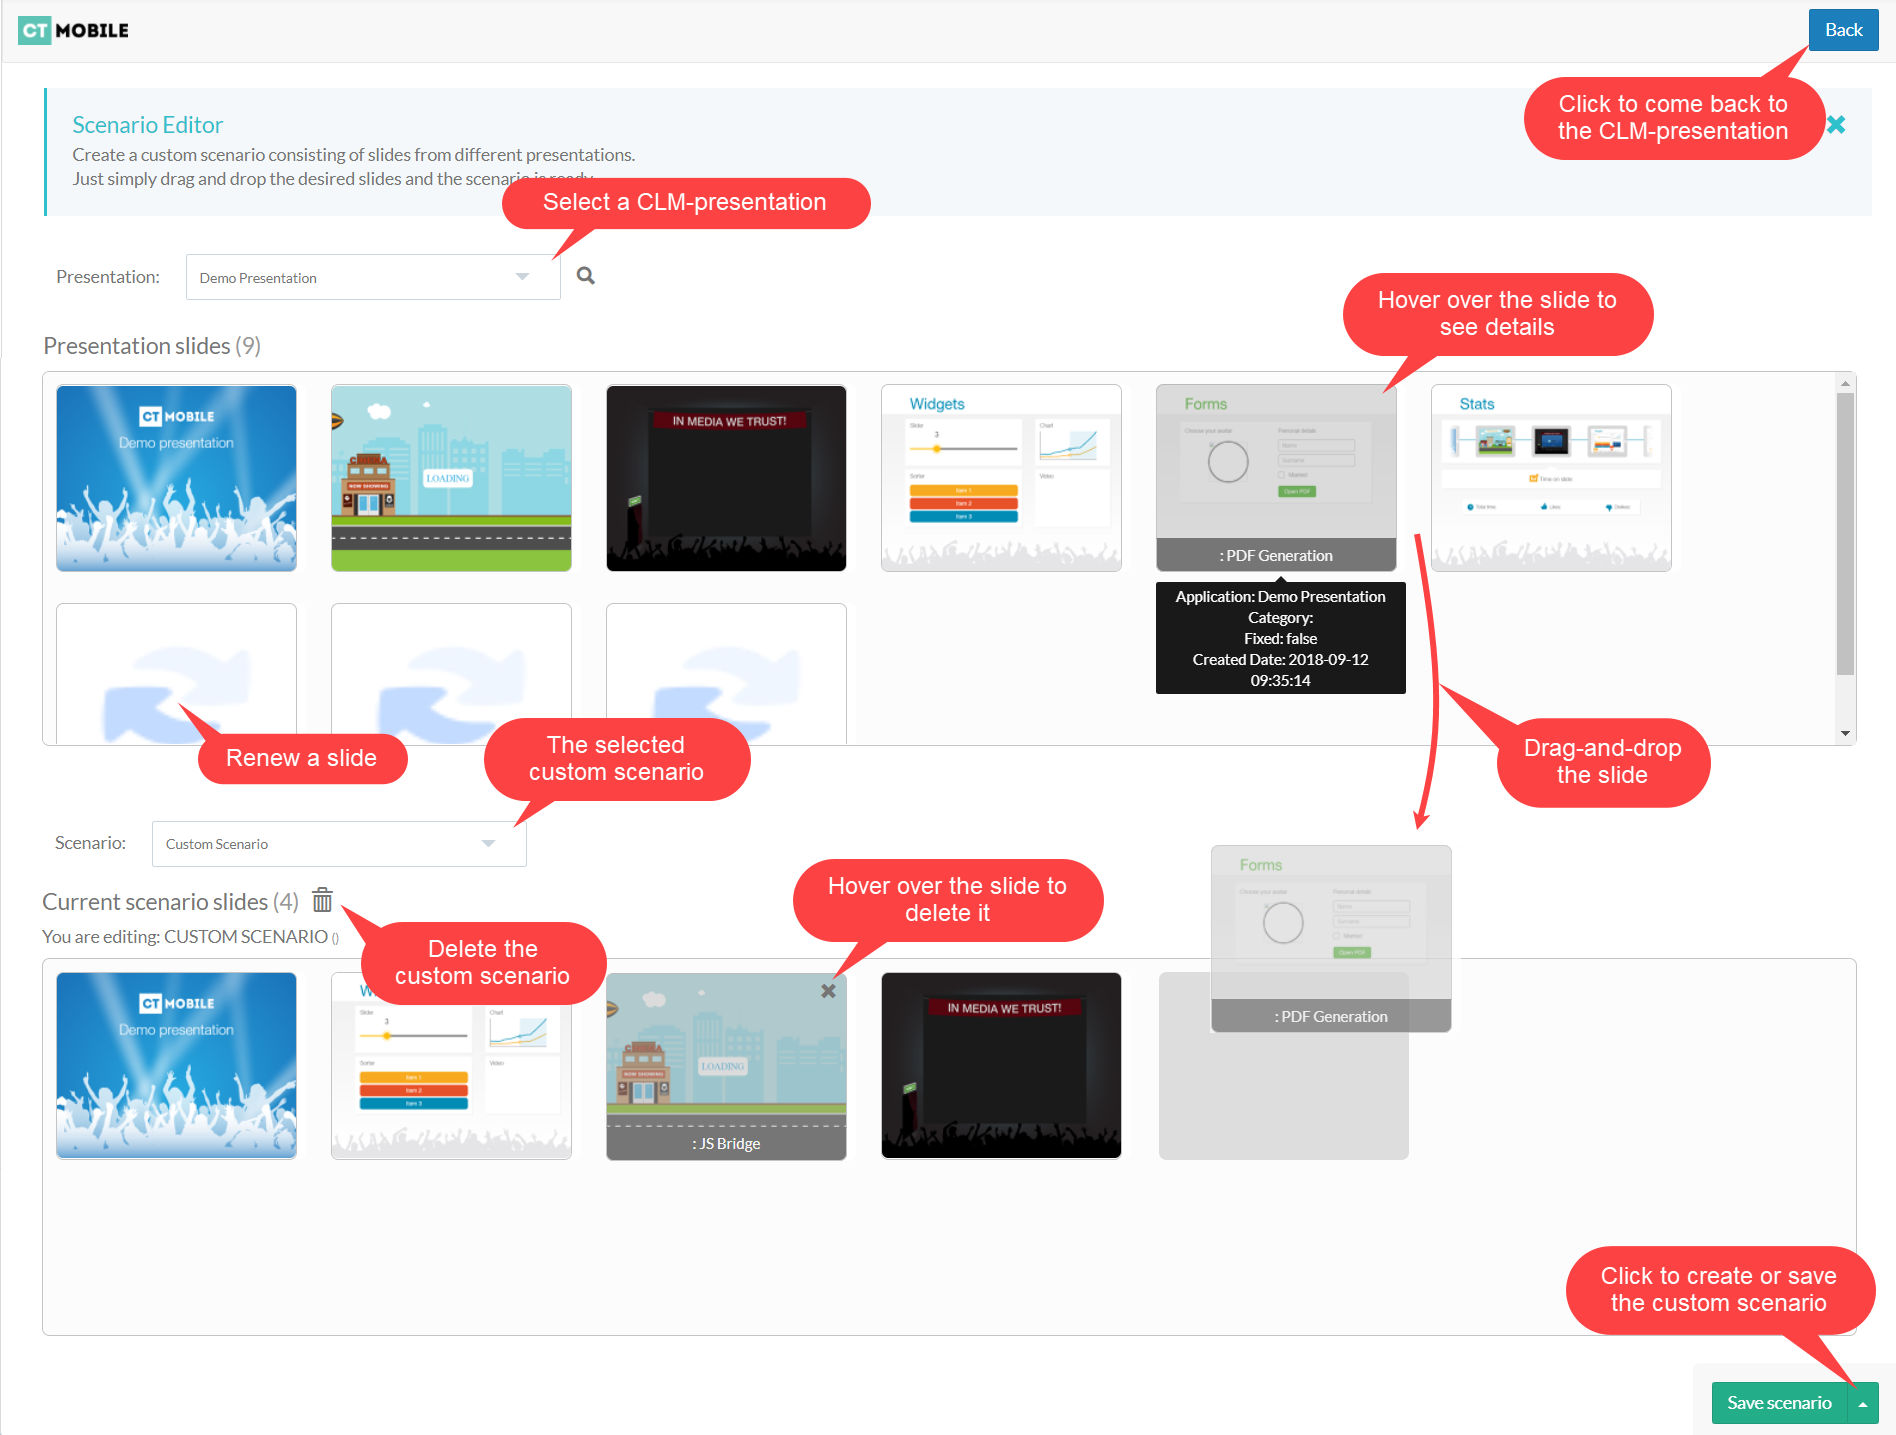
The Custom Scenario Editor opens. Add the required slides.
-
If some slides are not properly shown, renew them.
-
-
Click the arrow next to the Save scenario button.
-
Click Create if you add the new scenario;
-
Click Save if you edit the existing scenario.
-
-
In the new window:
-
In the Create field, select a new scenario or a new CLM presentation.
-
In the Presentation field, select the presentation to save the scenario. The field is not in use if you create a new CLM presentation.
-
In the Scenario name field, specify the custom scenario name;
-
Enable the Favorite checkbox to add the scenario to favorites.

-
-
Click Create.
The custom scenario is added.