Attach Files to CLM Presentation
The Attachment section on the Application record is used to store:
-
.jpeg, .pdf, .html, etc., which can be used from within CLM presentation and should be specified in the Slide markup.
-
project files in the ZIP archive(s).
Attachment requirements for ZIP archives:
-
The file size should be no more than 25 MB. If the attachment is larger than 25 MB, it should be split into several ZIP archives.
-
The file extension for ZIP archives should be .zip with the source’s name. The available formats:
-
the sources[n].zip format, where [n] is the number of the archive part, starting from 1.
-
for convenience of use, it is possible to use the 7-Zip utility program to create and automatically divide archives into parts of less than 25 MB in the sources.zip.00[n] format, where [n] is the number of the archive part, starting from 1.
Even if the attachment limit is extended by Salesforce support, there is no way to overcome the file size limit of 25 MB.
-
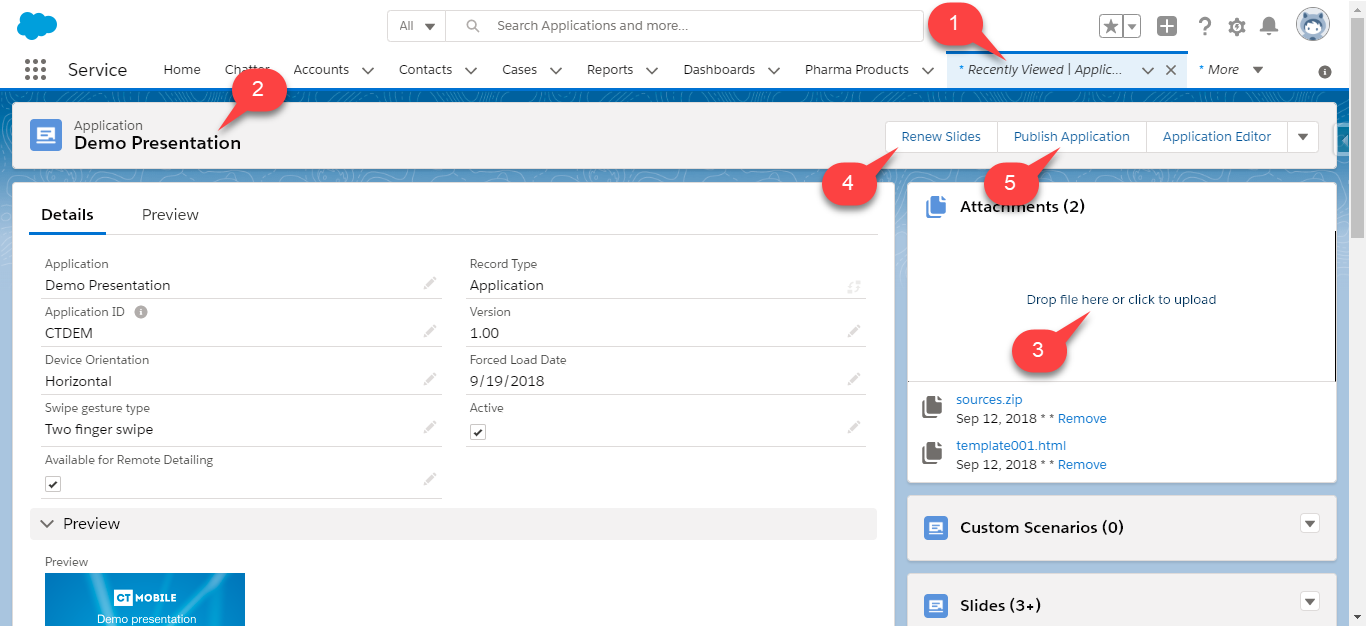
To attach a file to the CLM presentation:
-
Go to the Applications tab.
-
Click the required CLM presentation.
-
Drop the file in the Attachments section.
-
For ZIP archives, click Renew Slides to recalculate all the slides and make them consistent with templates and widgets.
For .jpeg,.pdf, .html, etc., specify the code in the Slide markup.
-
Click Publish Application to upload an updated CLM presentation during fast or mixed synchronization.
The file is added.