Working with CT Vision IR in Salesforce
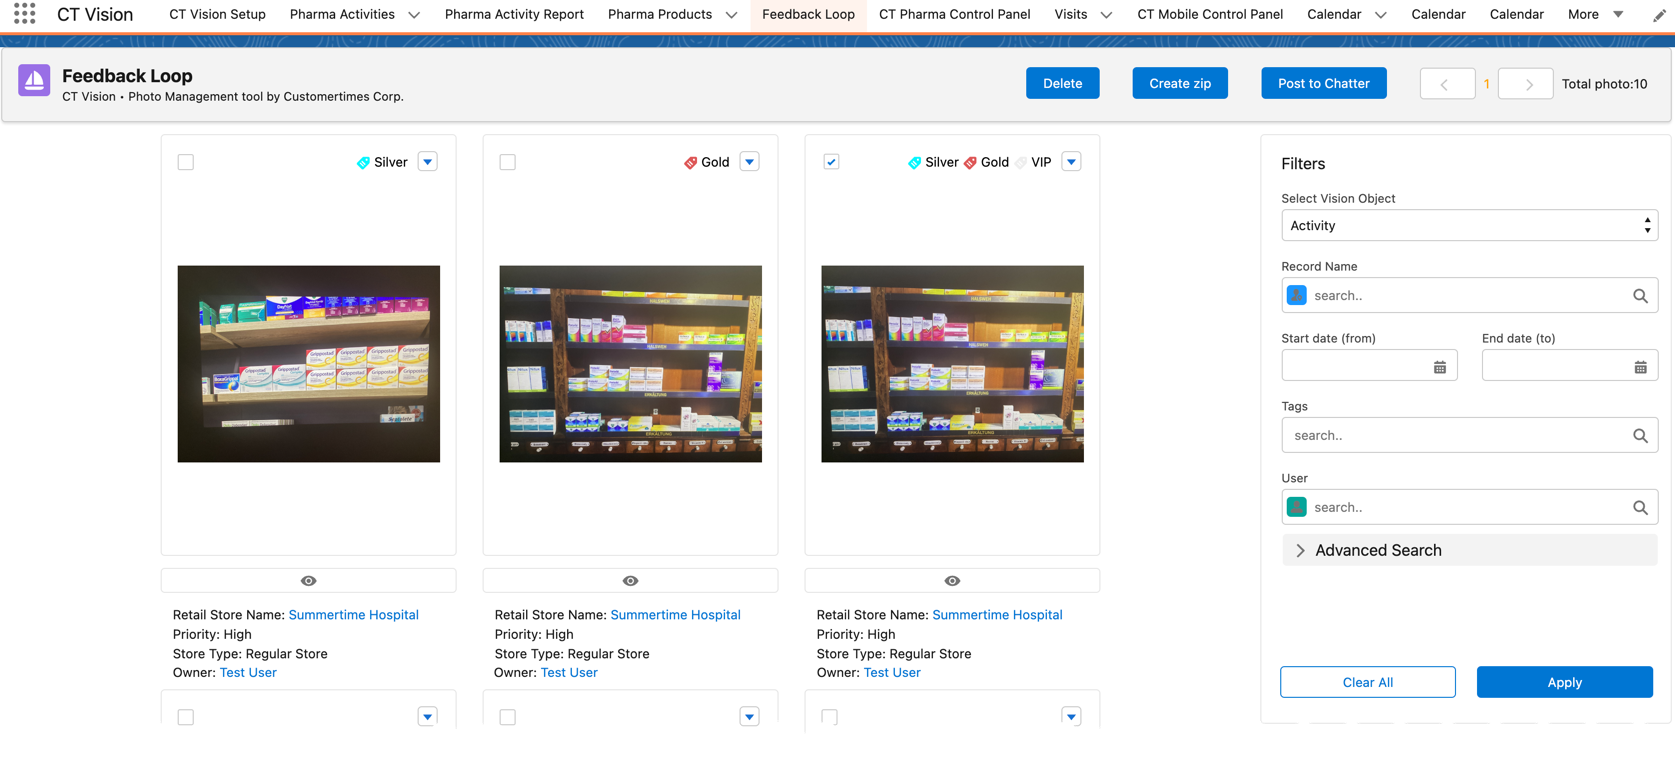
A manager or supervisor reviews the taken photos by the mobile user in Salesforce. Go to the CT Vision app and open the Feedback Loop tab.
Feedback Loop Overview
The taken photos received from the CT Vision server will be displayed on the main screen, and the filters to apply on the right side of the page.
-
One page displays 20 photos. Use page navigation buttons in case of several pages and view the number of the received photos next to Total Records.
Maximum 500 photos can be loaded at a time. More photos (another 500) will be loaded after clicking on the last page in the navigation panel.
-
Under the photo, the information specified for the Vision object in the Photo Description tab is displayed.
-
Click the
 icon to open a photo for verifying its realogram and recognized products.
 -
Click the checkbox above the desired photos and then click the Create zip button to build an archive with the desired photos.
-
The archive will be saved on the user’s device.
-
Images are saved in the
.pngformat.
-
-
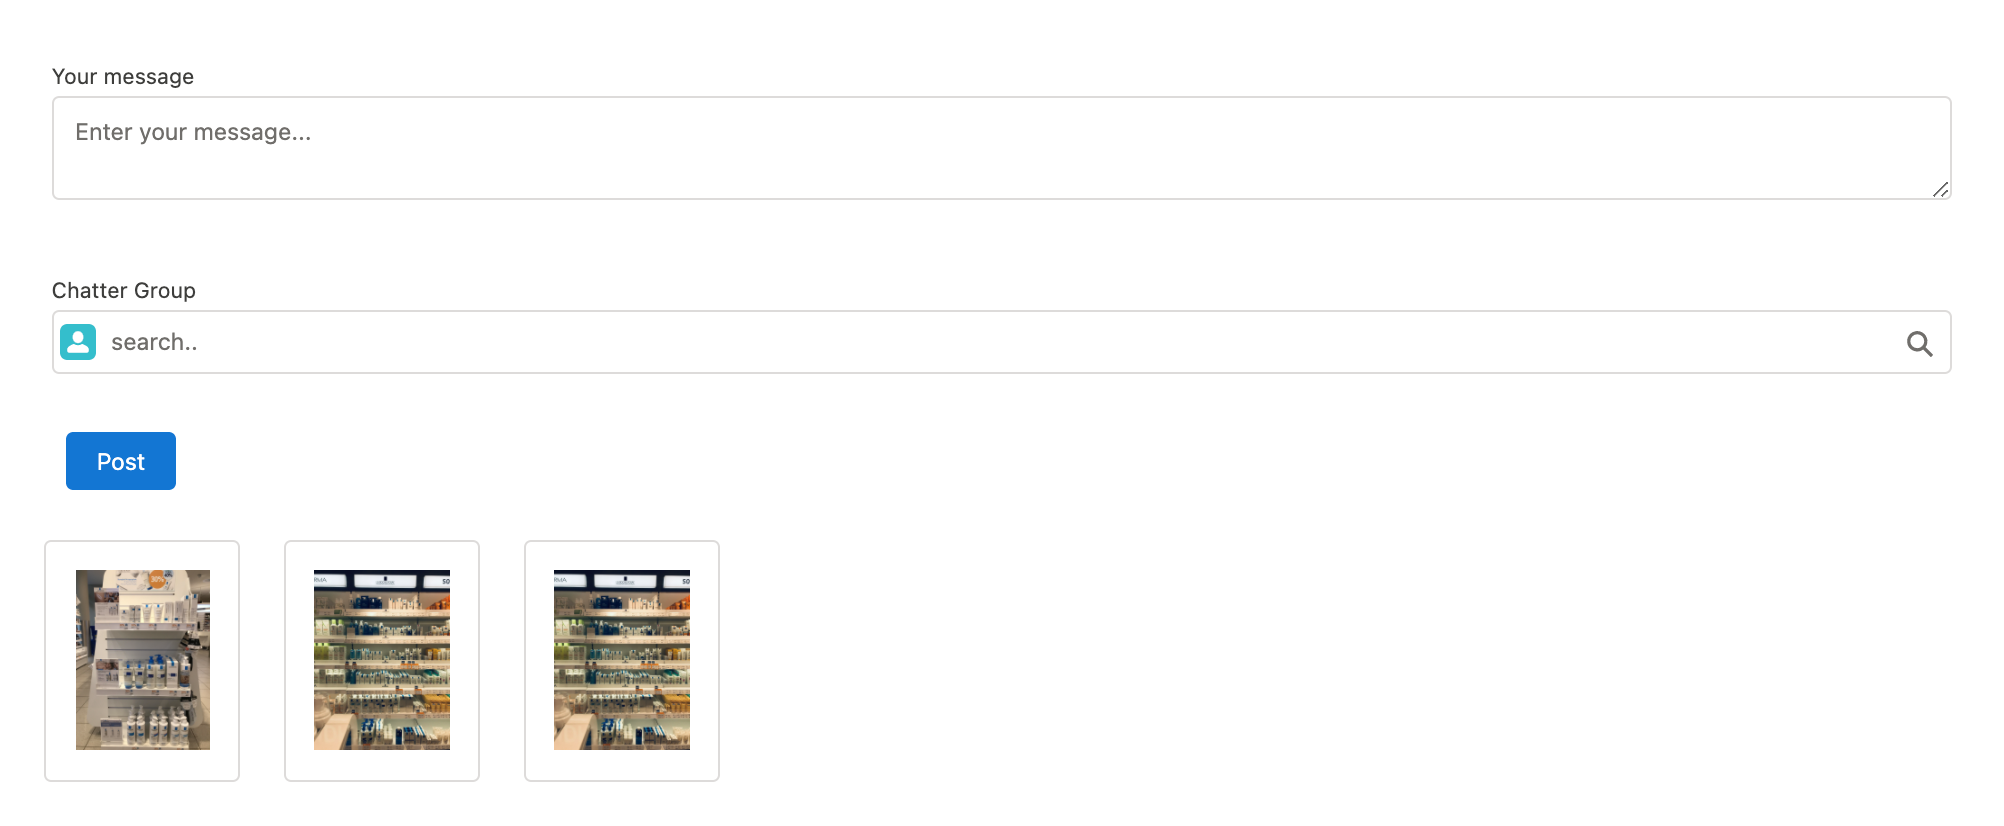
Click the checkbox above the desired photos and then click the Post to Chatter button to send a new message with attached photos to the Chatter. You must select Chatter Group(s) to send the message.
-
Click the checkbox above the desired photos and then click the Delete button to delete the photo. You can also delete a photo by clicking the
 icon in the photo gallery.
 -
Click the
 button to view the desired photo. In the opened viewer, click
  and
and  buttons to list other photos of the gallery.
 -
Click the
 button and select the desired photo tag.
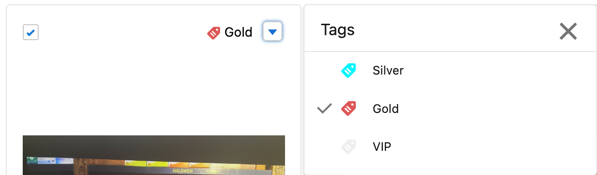
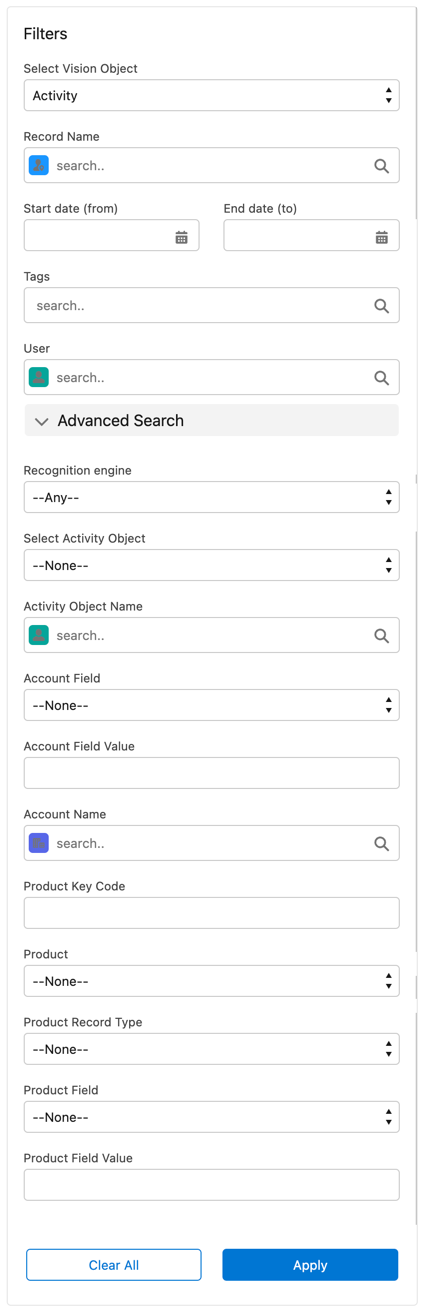
Feedback Loop Filters
Use filters on the right side of the Feedback Loop page to search the taken photos based on criteria. To apply a filter, specify the required criteria and click the Apply button.
Base Filters
Advanced Filters Click Advanced Search to expand additional filter criteria. Use the following criteria:
|
|
Working with Taken Photos
|
To make changes to recognized products, refer to Corrections in Shelf Product List. |
Photos that met the filter criteria are displayed with the description. To customize the description, refer to Feedback Loop tab in the CT Vision Setup. The following buttons are available under a photo:
|
|


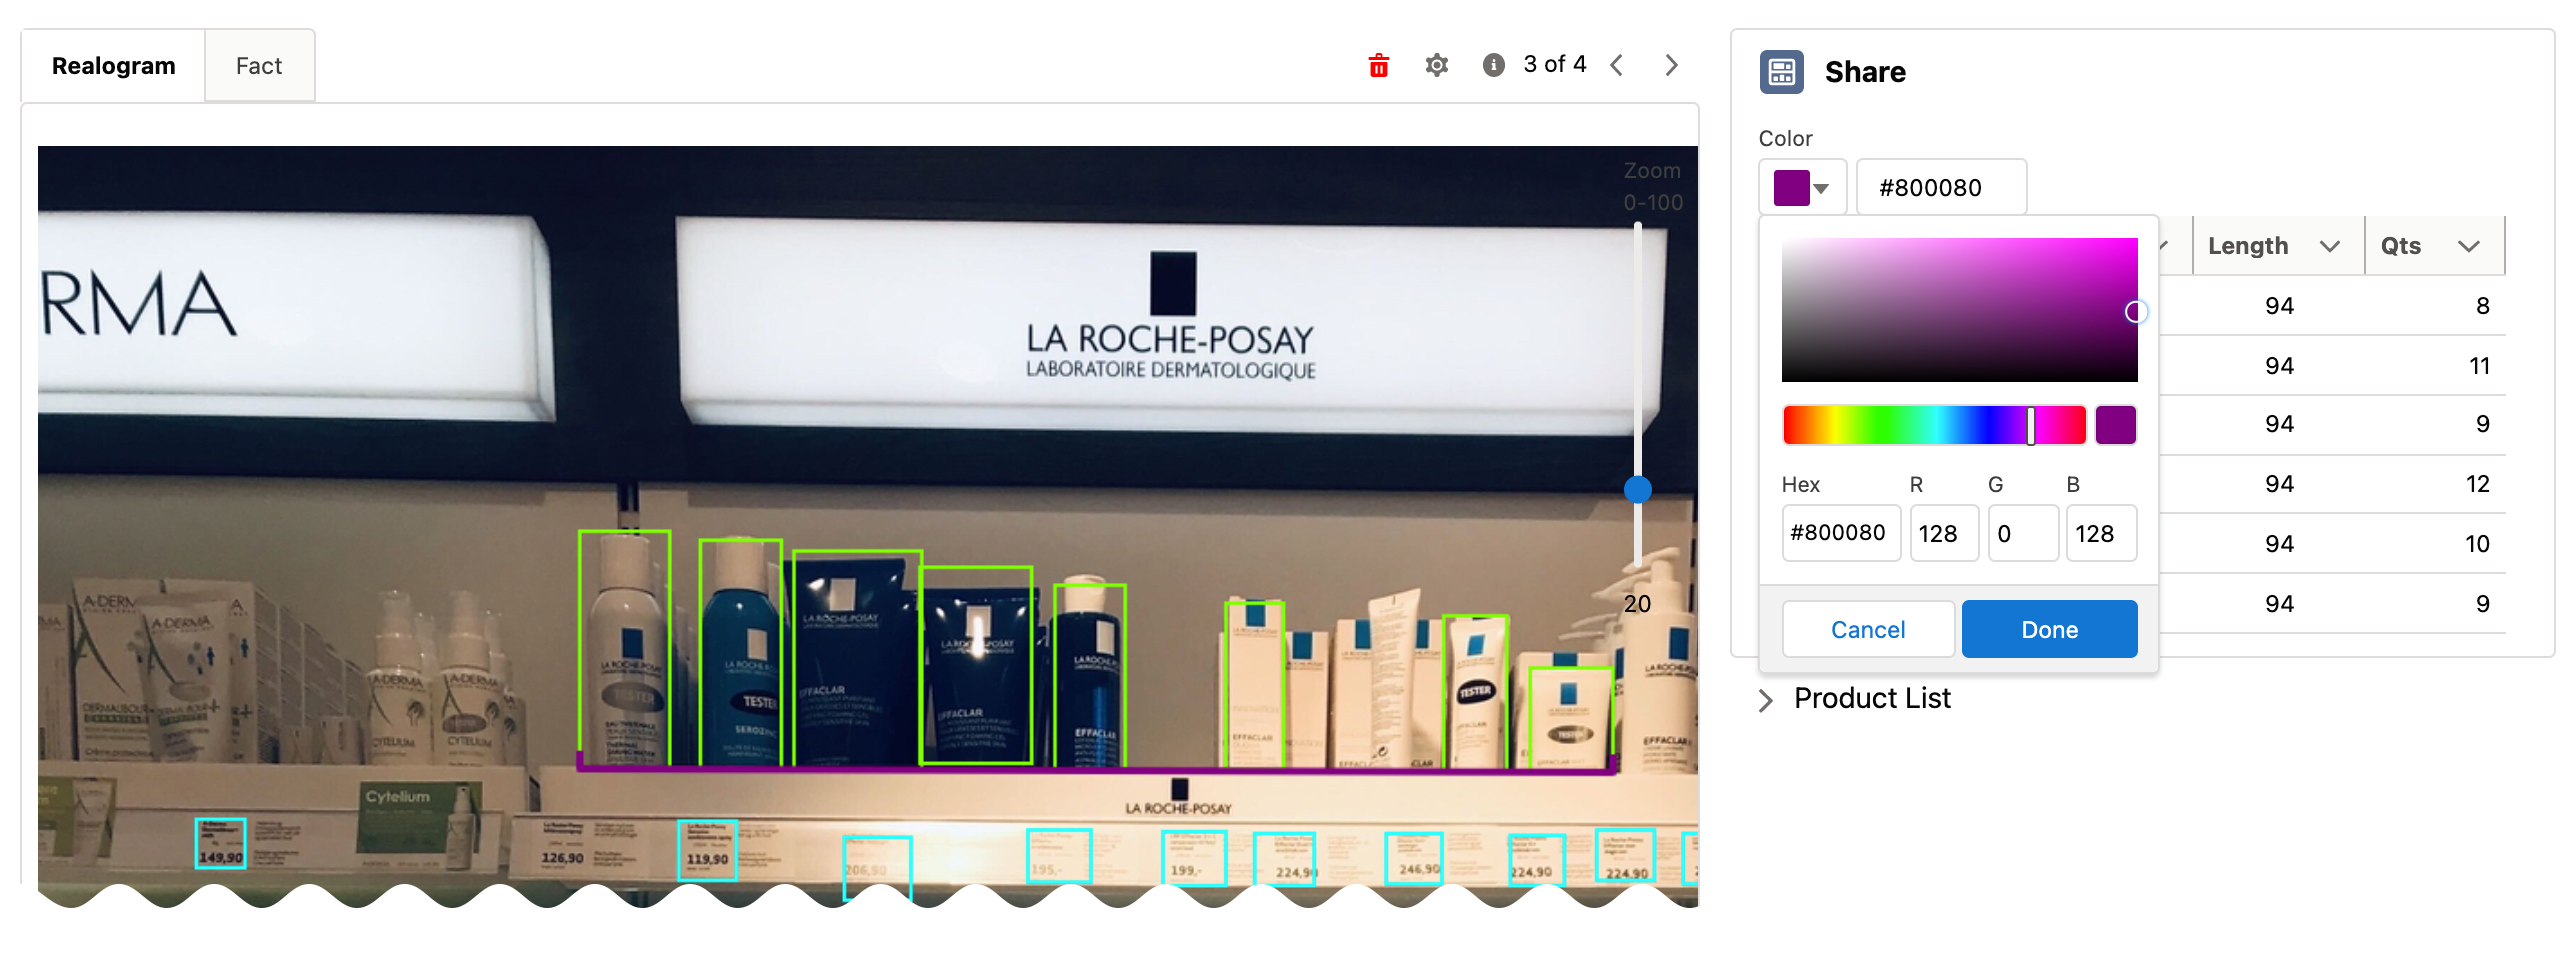
Verify Recognized Products on Realogram
|
Available only for providers with recognition. If the vision_light provider is selected, the realogram is not available. |
Click the  button to open a Preview window.
Use the navigation arrows to scroll photos of the current Activity record.
-
View the recognized products and price tags on the Realogram tab.
-
The originally taken photo without any recognition information is located on the Fact tab.
-
Zoom a photo if needed.
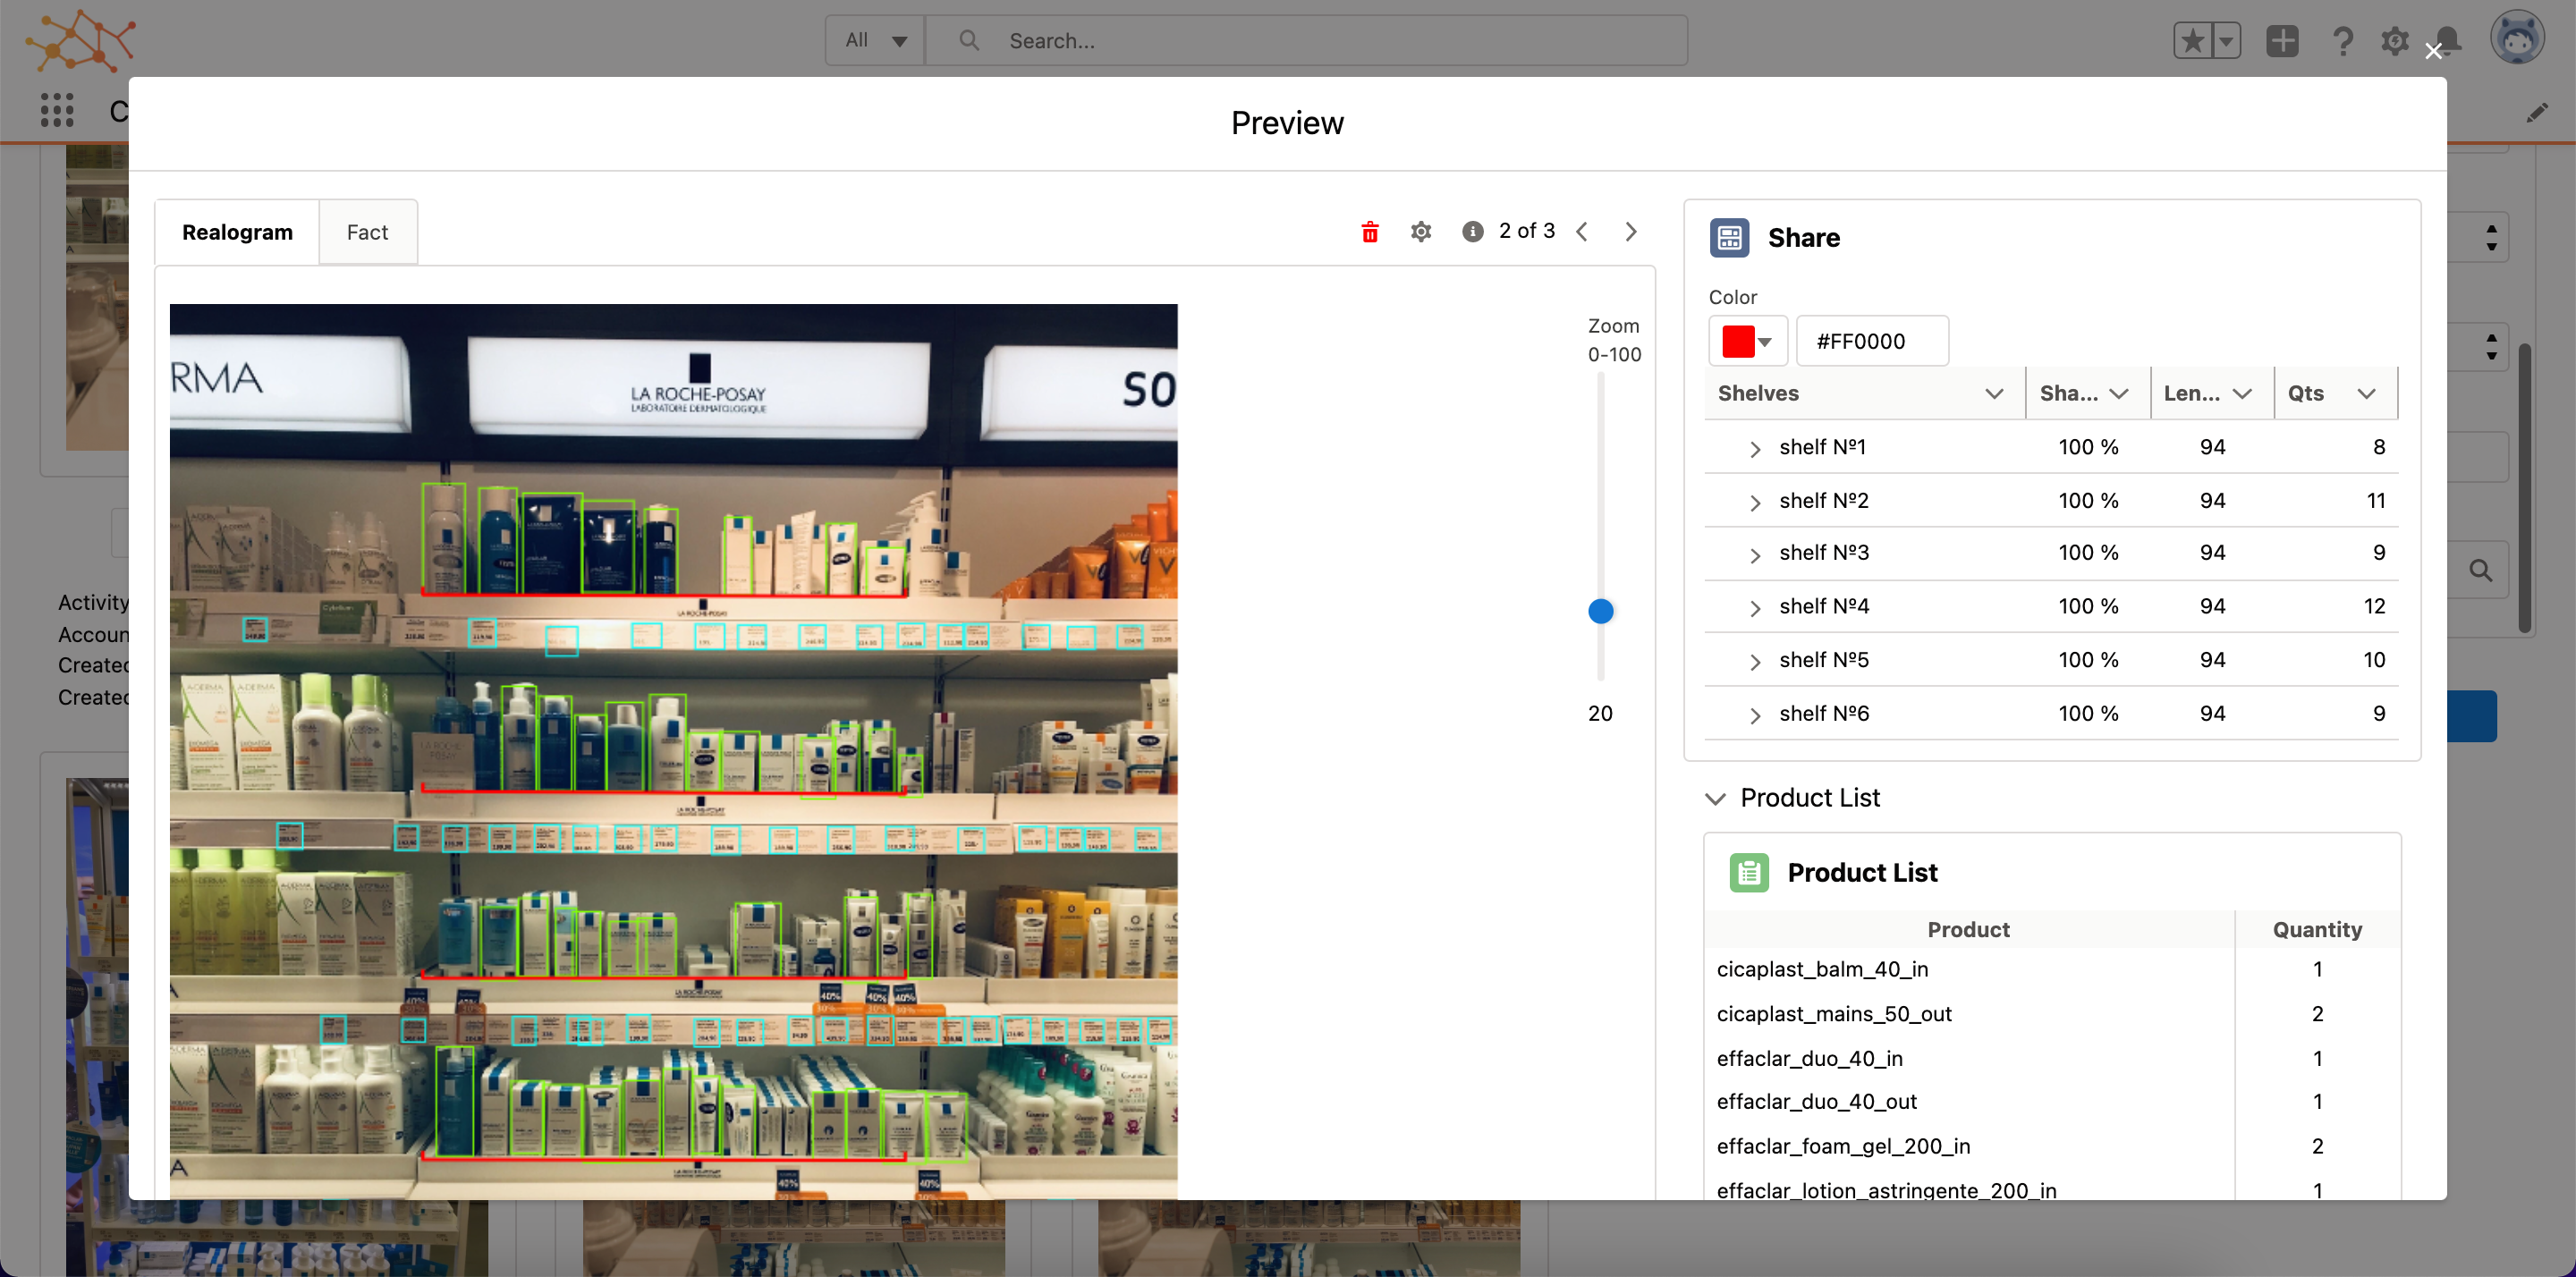
The following tools are available:
| Tool | Example | Description |
|---|---|---|
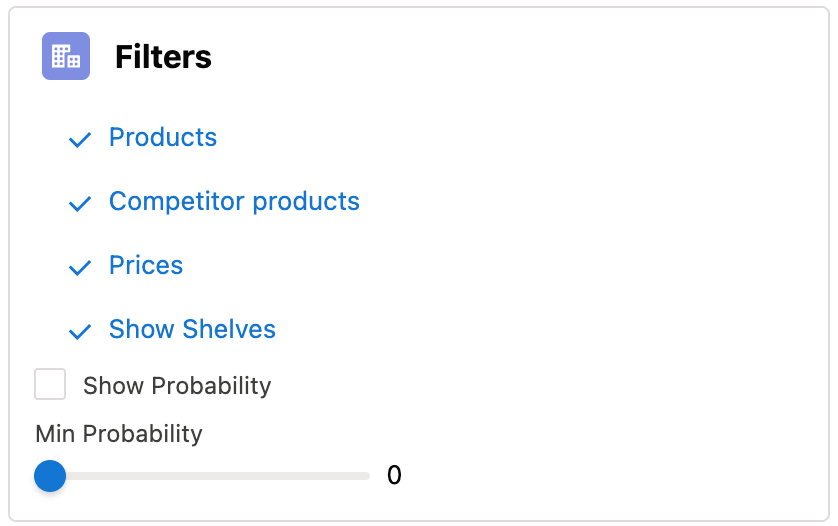
Filters |
|
Click
the
Select the Show Probability button to display the percentage of probability that the product was recognized correctly.
|
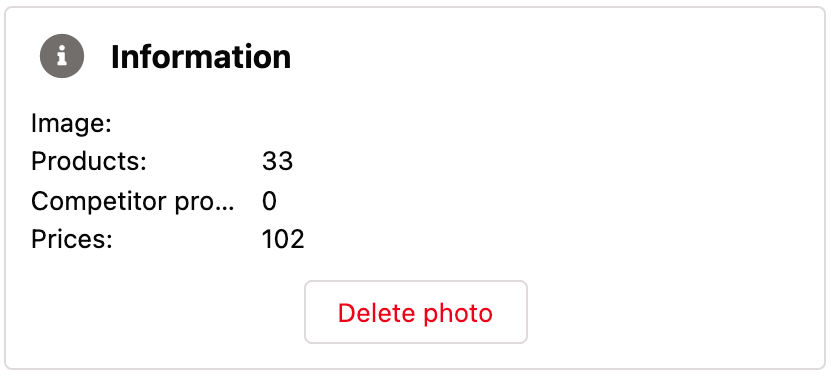
Information |
|
Click the |
Delete a photo |
— |
Click the |
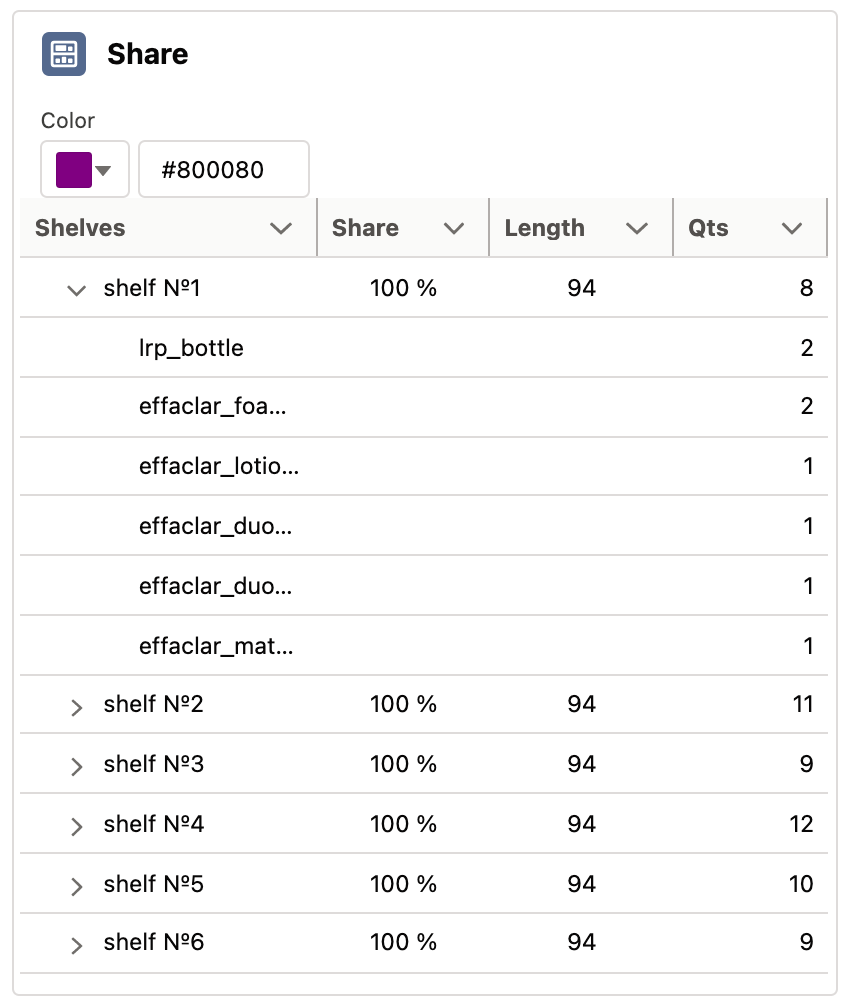
Share |
|
Verify the shelf share.
|
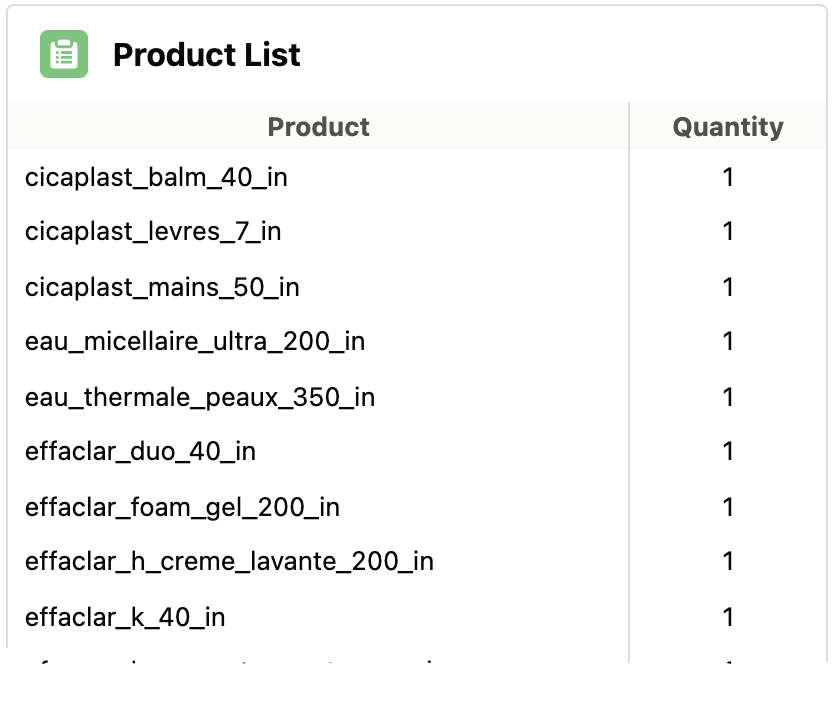
Product List |
|
Review the list of recognized products and their number on shelves. |