6. Adding Information for Products to be Recognized
To recognize products in photos taken, train the provider’s neural networks by uploading marketing photos of the product to the CT Vision server. You also can use these photos in custom related lists in the CT Mobile app or add them to catalogs and orders for the CT Orders solution.
Adding and Viewing Product Photos in Salesforce
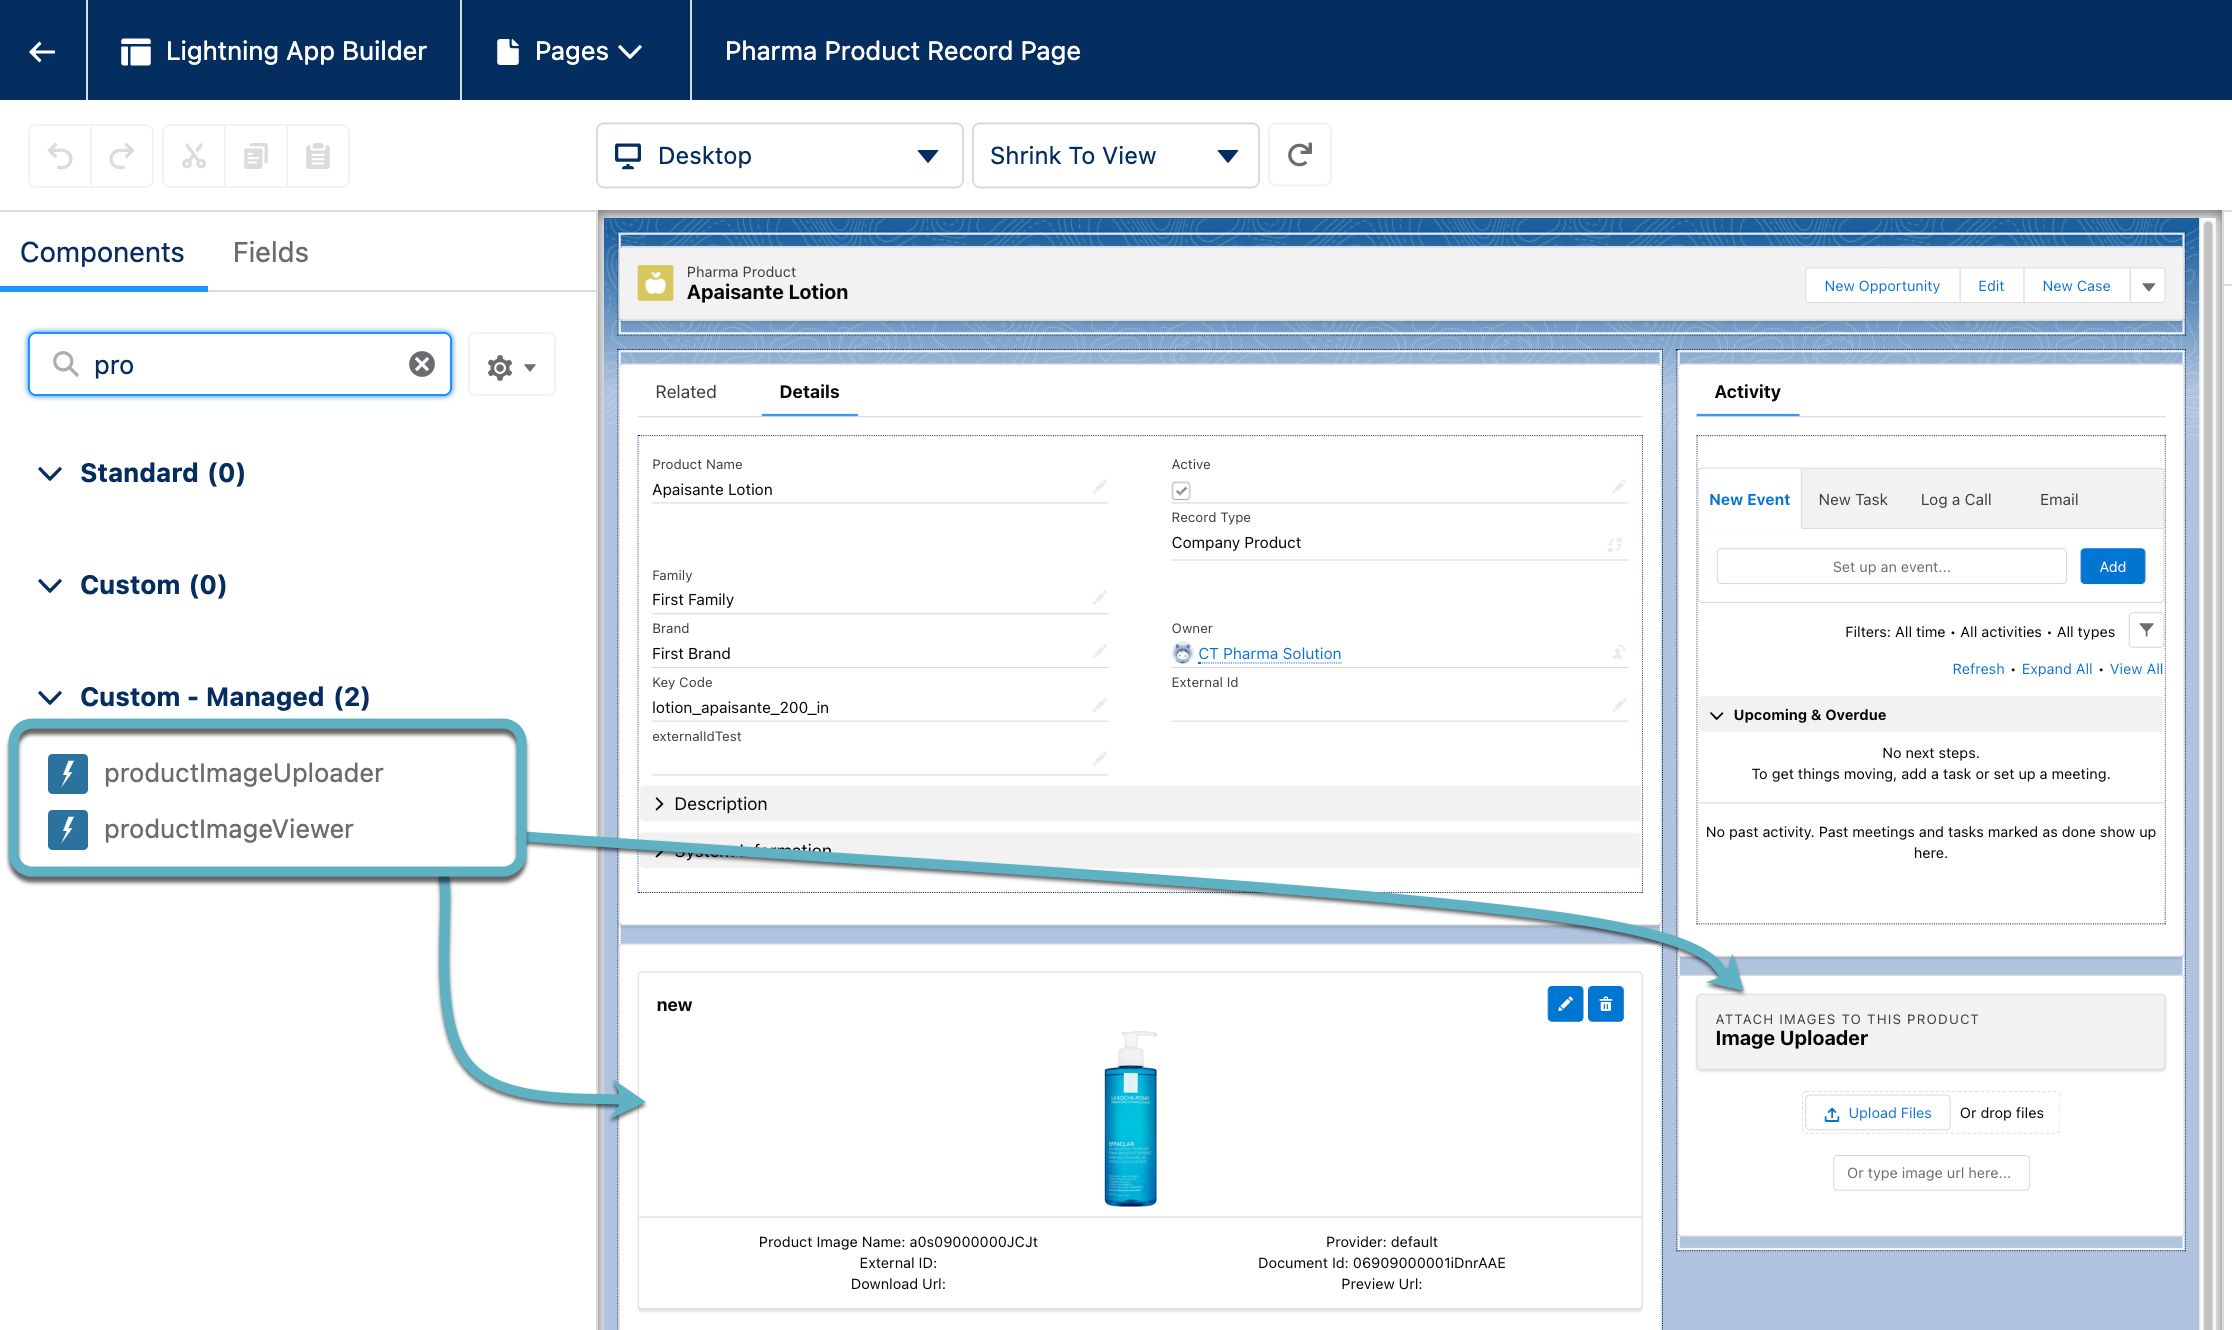
When you added all required products to your Salesforce org, upload marketing photos and additional information about the product to the CT Vision server. The Product Image object is intended to store all required information for recognition of photos by the selected provider in one place. For more information, refer to Product Image Field Reference. To upload and view marketing photos of products, add the following sections on the desired Product Lightning page layout:
-
Add Product Image Uploader for uploading a product image or providing a URL-address to it.
-
Add Product Image Viewer for viewing marketing photos with additional product information specified in the Product fields and statuses of recognition of training provider or Einstein model.
To edit the Product Lightning page layout:
-
Go to Setup → Object Manager → the desired Product object → Lightning Record Pages.
-
Click on the desired record layout name.
-
Click Edit on the record details page.
-
In the Lightning App Builder, drag the Product Image Uploader and Product Image Viewer sections from the components tab on the left to the record page layout.
-
Click Save.
The setup is complete. On the corresponding Product record, you can upload new photos or change them.
For example, if a product has a packaging change, the administrator manually replaces a photo with a new one. Next, if customized, a process sends updated records from Salesforce to the provider. The provider will process product images on a separate endpoint for training, and then a new version of the product design can be used to recognize the product on the shelves.

Setting up Product Image Uploads
To use product images to recognize products in the taken photos, set up uploading them to the CT Vision server:
-
On the Product Image object, create a field with the Lookup type to link it with the corresponding Product object.
-
Go to Setup → Custom Code → Apex Triggers → check that the ProductImageProcess and Product2VisionProcess triggers are active.
-
Go to Setup → Custom Code → Custom Settings → click Manage next to Trigger Settings of the CT Mobile package (Namespase Prefix is clm).
-
Click New:
-
In the Name field, specify Product2VisionProcess.
-
Select Active.
-
-
Click Save.
The setup is complete. Marketing photos will be stored on a server side and, if customized, displayed for the Product record tab.
Filtering Products to Upload Their Images
Specify the criteria to send product images only of the required products. To set the criteria:
-
Make sure, that the Product Synchronization Criteria field is added on the Vision Setup page layout for the Vision Setup custom metadata type.
-
Go to Setup → Custom Code → Custom Metadata Types → click Manage Records next to Vision Setup.
-
Click New.
-
Specify the criteria.
-
Enter Label.
-
Specify Vision Setup Name.
-
In the Product Synchronization Criteria, add the SOQL filter. As the criteria, use the Product fields.
-
-
Click Save.
The setup is complete.
Testing Image Recognition
Optionally, you can test the loading and recognition of photos before setting up the integration with the CT Mobile app. Add the following sections on the desired Activity Lightning page layout:
-
CT Vision: Photo Uploader is designed for uploading images of shelves with the desired products to the CT Vision server.
-
CT Vision: Photo Carousel is designed to recognize products in uploaded images.