4. Create a New Template
After creating libraries, assigning members to them, and creating record types, create templates and specify their availability.
Prerequisites
User Permissions:
-
The Salesforce CRM Content User checkbox should be selected on the required User record. You can check it by going to Setup → User → Users → Your User Account.
-
The user should have access to at least one of the workspaces listed in the Sign Settings record with the Library Setting record type.
-
The user should have access to the following Apex classes:
-
TemplateEditorCommonController
-
TemplateEditorController
-
TemplateObjectsSetting
-
TemplateSelectionAuraController
-
-
To use the No Auth option for a template, the user should have the following custom permission:
-
Label: CTSign Allow Disability 2FA In Templates
-
Name: CTSign_Allow_Disability_2FA_In_Templates
-
Create a Template
|
Get familiar with the Template Editor features. |
-
Go to the Template Editor tab.
-
Click the New Document button. Also, you can select an existing template and click Next to edit it.
-
On the Create new document page, specify the following:
-
Folder: select Library for document templates you have previously created.
-
Select Sign for SObjects: select Simple or DocuSign sign type.
CT Mobile Windows supports only the Simple sign type.
-
Select Object for template: select according to the Sign Settings record with the Object Setting record type. If enabled and needed, select the available record types. For our example, choose Account as the only available option.
-
Title.
-
Select Record Types.
-
Optionally, specify the description.

-
-
Click Next.
-
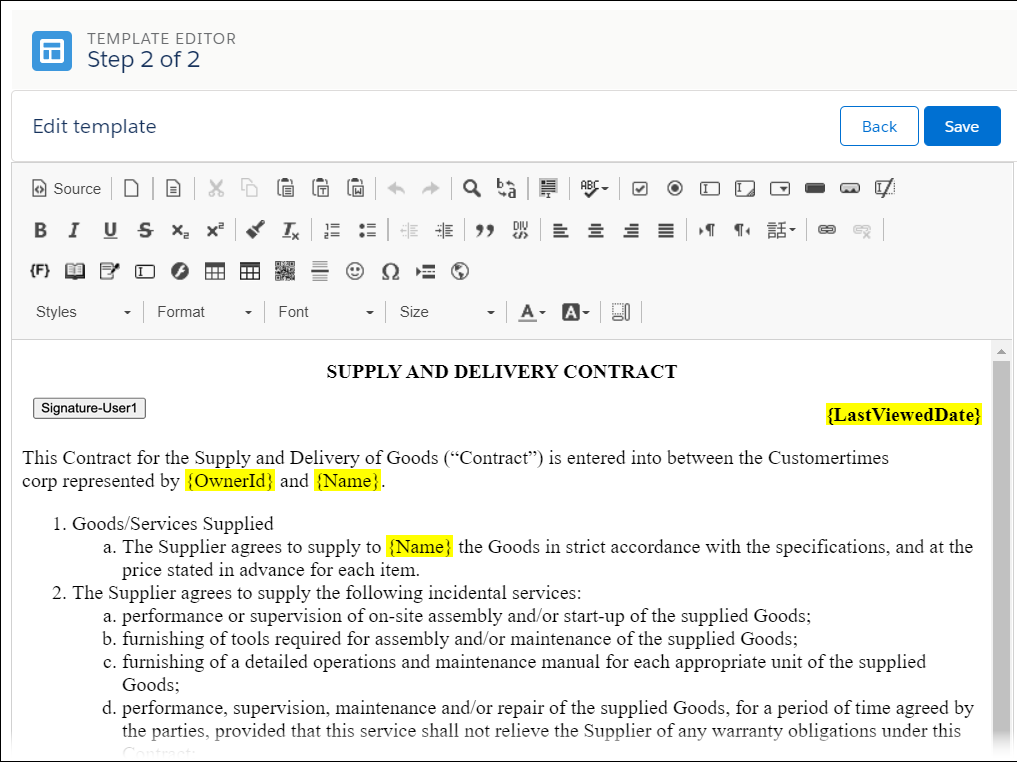
Fill out the template.
-
The maximum size of the template is 10 MB. We recommend using small images (logos, product photos, or graphic elements in the header and footer) so that the size of the template does not exceed 1-2 MB.
-
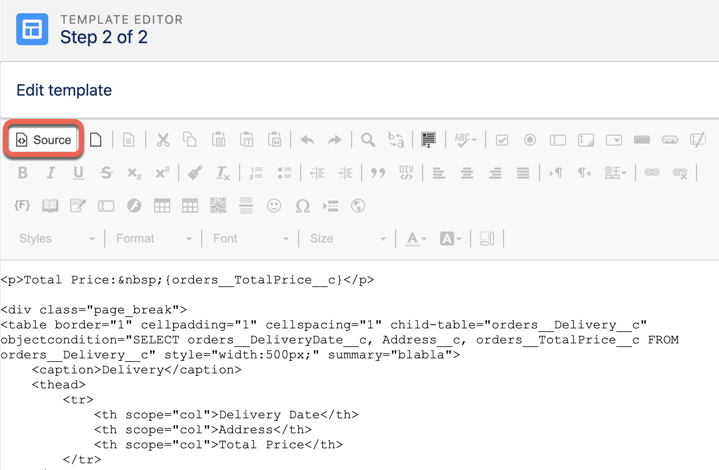
If needed, you can edit the source of the template by clicking the Source button. For example, when you need to edit a child table (add fields, rename columns etc.):
-
-
Add the Signature button for each signer:
-
Simple sign type
-
DocuSign sign type
-
Click
 button.
 -
Fill out the form:
-
Title (example: Signature-User1).
-
Signatory type: User or Contact. If you selected Contact type, fill in the following fields:
-
Signatory source type: List.
-
Signatory Source Reference: Reference.
-
Select Signatory: Parent Account ID Contacts.
-
-
Signature type: Handwritten Signature.
-
X-Offset, Y-Offset: set the button position in pixels relative to the left top corner.
-
Signature Require Notification, Document Signed Notification: Email Templates.
-
-
Click OK.
-
Click Save.
-
Click
 button.
 -
Fill out the form:
-
Title (example: Signature-User1).
-
Signatory type: User or Contact. If you selected Contact type, fill in the following fields:
-
Signatory source type: List.
-
Signatory Source Reference: Reference.
-
Select Signatory: Parent Account ID Contacts.
-
-
Signature type: Electronic.
-
Signature Place: select Email to sign documents in Salesforce and Device to sign documents on a mobile device.
-
Authorization Type:
-
SMS, Phone to ask confirmation during the sign process.
-
No Auth if no confirmation is required.
-
-
X-Offset, Y-Offset: set the button position in pixels relative to the left top corner.
-
Signature Require Notification, Document Signed Notification: Email Templates.
-
-
Click OK.
-
Click Save.
-
The template is created.