3. Configure the CT Sign Package
To use the CT Sign functionality, consequently perform actions listed below:
|
In this article, Account object is used as an example of the object to sign documents. You can use any object for signing documents, including custom objects. In this case, add the Form Document button for the custom object. |
1. Add Objects
-
Assign permissions for the current user to the following record types of the Sign Settings object:
-
Layout Setting
-
Library Setting
-
Object Setting
-
-
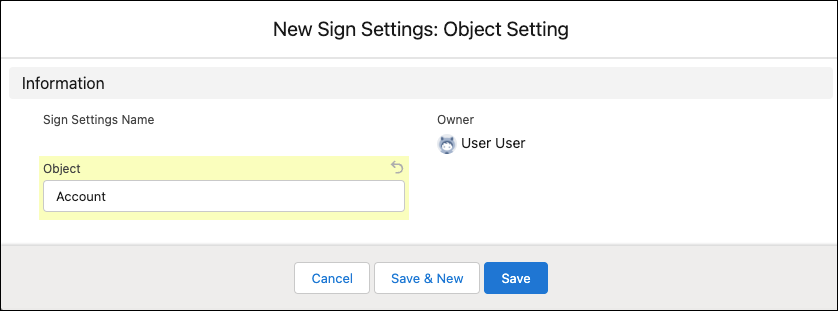
Create a separate record for each required object. To specify an object for which users can create templates and sign documents:
-
Go to Sign Settings and click New.
-
Select the Object Setting record type and click Next.
-
Specify the API name of the object to sign.
-
Click Save.
-
-
On the Sign Document object, create a field with the Lookup type to the object from step 3 to link the signed document with the specific object:
If you use the Account object for signing, you can skip this step, as the required lookup connection for this object is already created in the CT Sign package.
-
Go to Setup → Object Manager → the Sign Document object → Fields and Relationships.
-
Click New.
-
Select Lookup Relationship data type and click Next.
-
In the Related To picklist, select your specific object and click Next.
-
In the Field Label and Field Name fields, type in Account and click Next.
-
Select the Visible checkbox to enable checkboxes for the required profiles and click Next.
-
On the next step, click Next, Next, and Save.
-
2. Add Accounts and Contacts
-
Add at least one Account with associated Record type to sign documents.
-
Go to Accounts tab.
-
Click New.
-
Fill out the form (at least required fields).
-
Click Save.
-
The page with just created account will be opened. In the Contacts section, click New.
-
Fill out the form (at least Salutation, First Name and Last Name).
-
Click Save.
-
-
Add a record type to the Account object:
-
Go to Setup → Object Manager.
-
Open the Account object.
-
Click Record Types.
-
Click New.
-
Fill in Record Type Label and Record Type Name fields, for example, Pharmacy.
-
Click Next.
-
From the Select Page Layout picklist, choose Account Layout.
-
Click Save.
-
3. Specify Libraries
To use CT Sign templates, it is necessary to specify desired libraries as workspaces for storing document and email templates. To have access to libraries and the ability to share them using sharing rules, create and assign the CT Sign role to administrators and users. To specify libraries as workspaces for CT Sign templates:
-
Create libraries and specify library members:
-
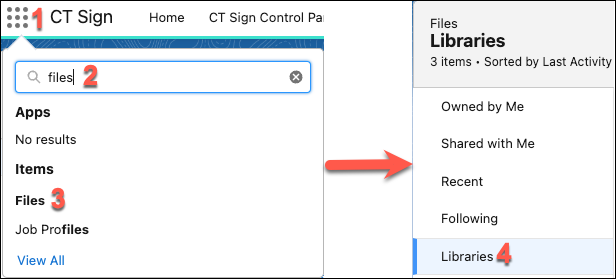
Go to Files → Libraries.
-
Click New Library.
-
In the Name field, type the library name (for example, Document Templates).
-
Click Save.
-
Find the created library in the Libraries list, click
 and select Manage Members.
 -
In the dialog window, Add Members who must have access to templates in this library and assign them the Viewer permission. Click
 and
and  to switch between adding public groups or certain users.
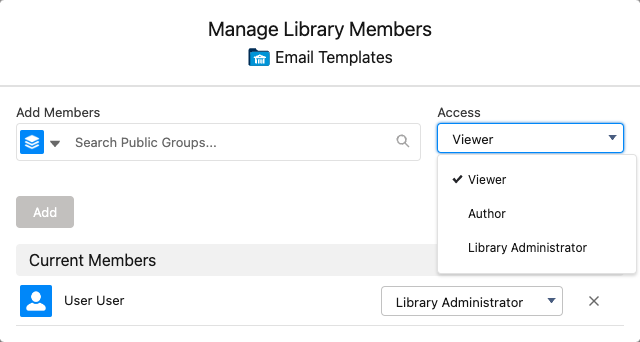
-
Click Add.
-
In the same way, create a new library for signing documents by email (for example, with the name Email Templates) and specify its members.
-
-
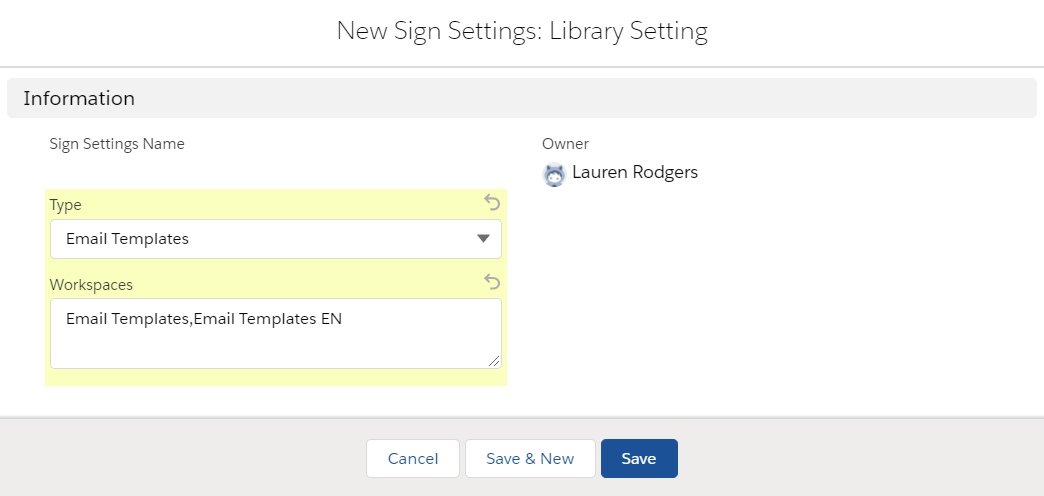
Go to Sign Settings and click New.
-
Select the Library Setting record type and click Next.
-
In the Type field, select Document Templates.
-
In the Workspaces field, specify desired libraries to store templates of the selected type (separated by a comma, without a blank space).
-
Click Save.
-
Repeat steps 2–6 to create Library Setting record type with Type = Email Templates.
4. Create the Layout settings
Layouts are used to display data about the object to sign and data about signatories. Create layouts for each object that is used for signing. Below is an example for creating layouts for Account, Contact, and User objects.
To set up a layout:
-
Go to Sign Settings and click New.
-
Select the Layout Setting record type and click Next.
-
Specify options:
Parameters listed below are just a working example. You can specify your own parameters for Account, User, Contact and other objects, which are used for signing.
-
For Account object
-
For User object
-
For Contact object
-
Type: Header
-
Object: Account
-
Fields To Display: Name,Industry
-
Required Attributes: true,false
-
Read Only Attributes: true,true
-
Type: List
-
Object: User
-
Fields To Display: FirstName,LastName,Email,Phone
-
Required Attributes: true,true,false,false
-
Read Only Attributes: true,true,false,false.
-
Type: List
-
Object: Contact
-
Fields To Display: FirstName,LastName,Email,Phone
-
Required Attributes: true,true,false,false
-
Read Only Attributes: true,true,false,false
-
-
Click Save.
The setup is complete.